• Screw both accesses in place using the lag screws provided and place
the insulating panels and covers on both accesses. Close the cover of
the main access using the four (4) lag screws and close the cover of the
secondary access using the two (2) quarter turns. The secondary
access’s cover and insulating panel are in the component box (placed
in the main access at the time of delivery of the shell).
6.4.2 Models 2.8, 3.4 and 4.1 (stand alone and PACK option)
Primary tank for the PACK option
Assembling the riser on the primary tank:
• Clean the rim of the primary tank’s access (where 4 holes have been
punched to allow for the installation of the lag screws).
• Install the watertight gasket on this rim.
• Place the extension on the access by aligning the holes on the base
of the extension with the holes on the primary tank.
• Insert the plastic washers in the four (4) lag screws provided with the
extension and screw the lag screws into the holes to secure the
extension in place.
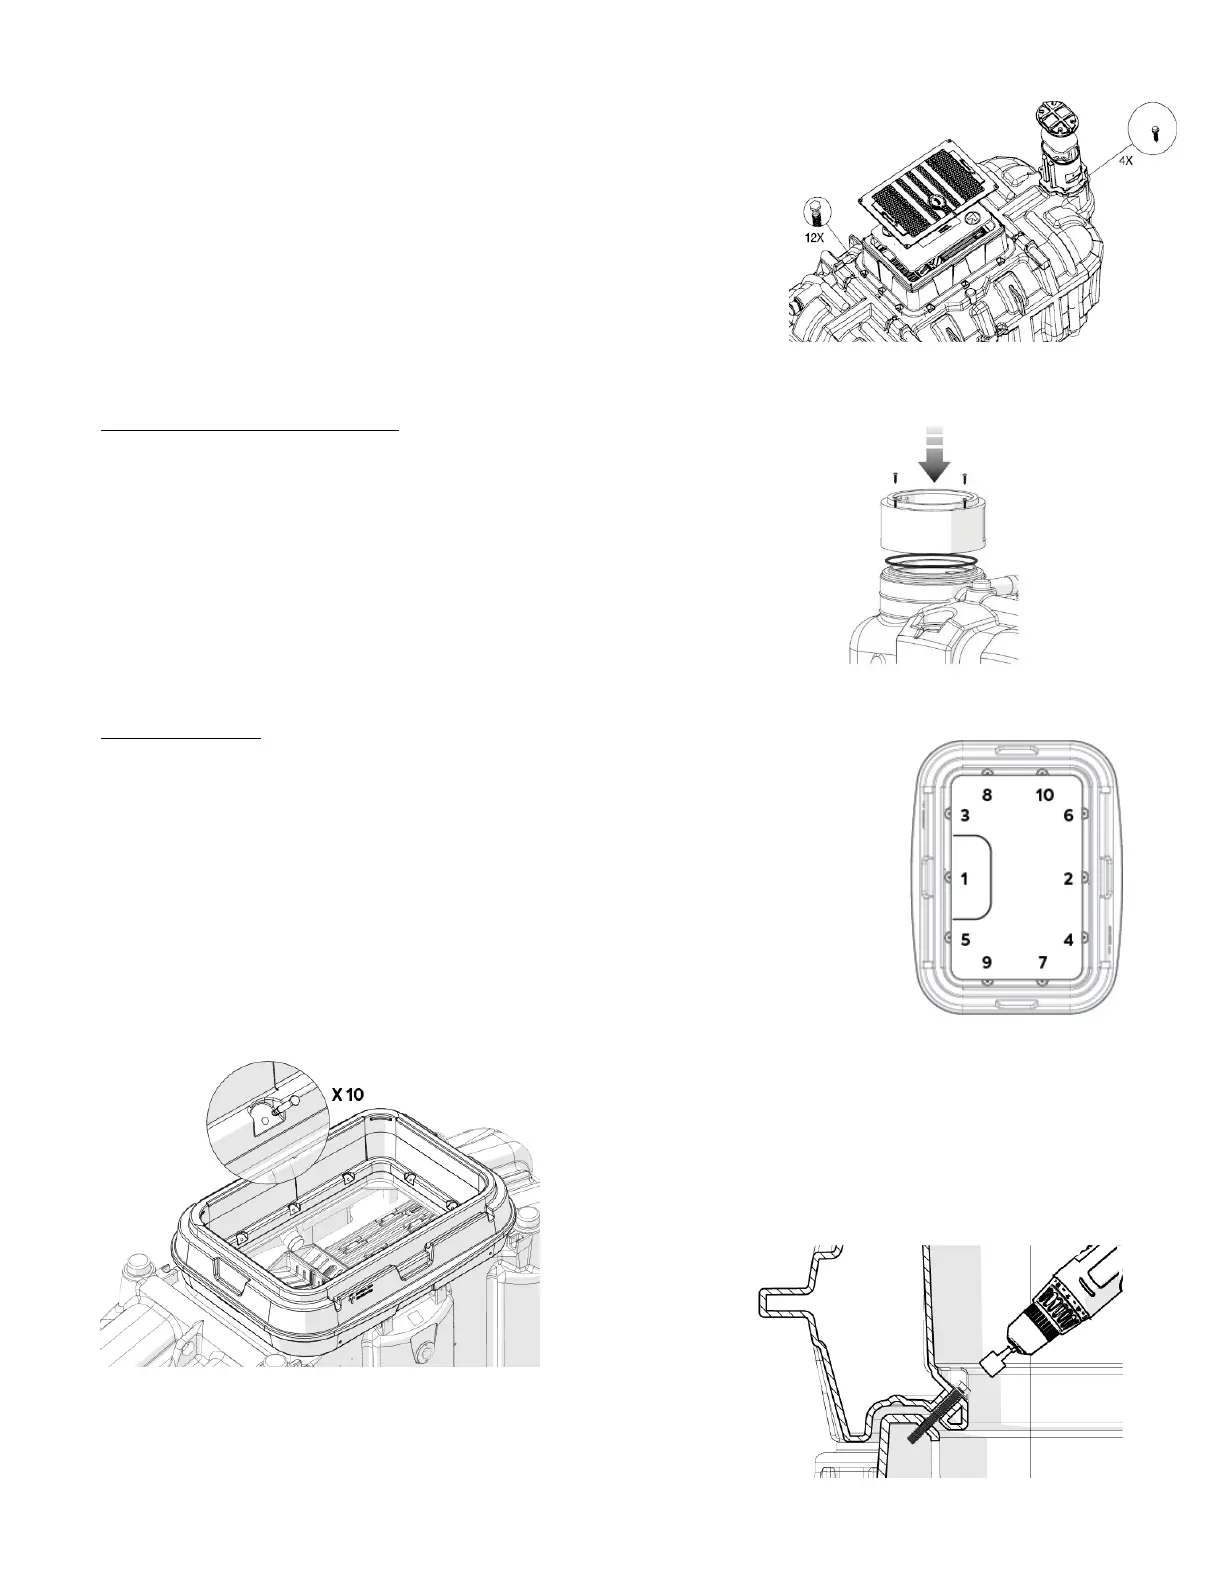
Ecoflo Coco Filter
Remove the access lid by turning the two ¼ turn locks. Remove the insulating panel.
Using the 3/8” screws provided and a 9/16” socket driver (not provided), loosely fasten
the riser through the hole above the pumping vault (1). Center the riser on the Ecoflo by
running your hand alongside the riser’s outer rim and repositioning it if necessary.
Using the drill bit provided, pre-drill a hole on the opposite side and loosely fasten the
riser to the Ecoflo biofilter (2). Drill a new hole only when the previous screw is
positioned. Do not drill all holes at once. Alternating sides and following the order
shown, loosely fasten all 10 bolts. Evenly secure and compress the gasket by
progressively tightening each bolt at least twice.
Drill a new hole only after the previous screw has been inserted
into place. Once all screws are in their respective positions,
tighten them further, but not completely. This will ensure that
the gasket is evenly compressed into place. At this stage, the
D-shaped gasket is about 30% compressed. The best practice
is to alternate screws and sides instead of going from one
screw to the next.
Completely tighten
each screw by
going over it one
last time.
By securing the riser in multiple tightening sequences, you evenly
compress the gasket and ensure maximum watertightness.
 Loading...