EasyManua.ls Logo

Ecolab Ecodos-L - User Manual

Ecolab Ecodos-L
13 pages
Print Icon
To Next Page IconTo Next Page
Loading...
Ecodos-L, Ecorinse-L, Ecoset-L Rev 3.12-07
Short Instruction Manual
Ecodos-L
(1.237.21, 1.237.22)
Ecorinse-L
(1.237.23, 1.237.24)
Ecoset-L
(1.235.40)
(with PCB 2.237.82)

Questions and Answers

  • A
    Andrew SkinnerAug 12, 2025
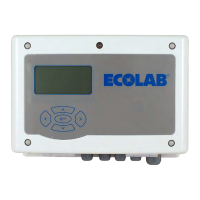
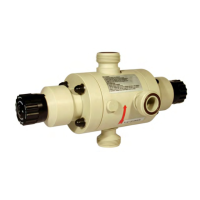
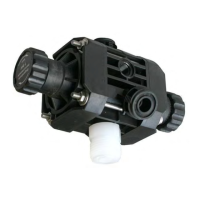
    What to do if Ecolab Control Unit pump does not draw/meter product?
    • B
      bwilsonAug 12, 2025
      If the Ecolab Control Unit pump isn't drawing or metering product, several issues could be the cause. First, ensure that the product container isn't empty and replace it if necessary. Check the peristaltic tube and replace it if it's defective. Inspect the product feed hose for any squeezing or damage, replacing it if needed. Also, verify the foot valve isn't blocked; clean it or replace it if required. Check if the pick-up tube is defective and replace it if needed. Replace the metering line if it's defective. Finally, replace the check valve if it's blocked.
  • S
    Samuel GoodmanAug 16, 2025
    Why is the red LED flashing on my Ecolab Control Unit?
    • N
      Nathan EllisAug 16, 2025
      If the red LED is flashing on your Ecolab Control Unit, it could indicate several issues. It might mean the product level is low, so replace the container. It could also mean that no capsule is inserted; in this case, insert a capsule. Another reason could be that the maximum dosage time has been exceeded, so replace the container or capsule, check the pump functionality, and check the solenoid valve/water supply.
  • C
    Cheryl EnglishAug 19, 2025
    How to fix Ecolab Ecodos-L Control Unit pump that doesn't work when power is applied?
    • M
      micheleschaeferAug 20, 2025
      If the Ecolab Control Unit pump isn't working when power is applied, the pump motor or solenoid valve may be defective, requiring replacement. Alternatively, the tube rollers might be blocked, in which case you should replace the tube roller assembly.
  • S
    Steven VasquezAug 23, 2025
    What to do if Ecolab Control Unit has product leakage from pump head?
    • L
      larasarahAug 25, 2025
      If there's product leakage from the Ecolab Control Unit pump head, the peristaltic tube might be defective, so replace it. The tube nuts could also be defective, requiring replacement. Alternatively, the inlet or outlet fittings may be defective, and you should replace them.
  • S
    Susan HolmesAug 27, 2025
    Why is the red LED permanently on on my Ecolab Control Unit?
    • D
      Donna GarciaAug 27, 2025
      If the red LED is permanently on (only in inductive mode) on your Ecolab Control Unit, the measuring probe might not be connected; in this case, connect the inductive probe. Alternatively, the measuring probe could be defective, requiring replacement with a new inductive probe.
  • S
    Samantha JohnsonAug 31, 2025
    What to do if Ecolab Control Unit pump doesn't work at conductivity mode?
    • L
      lewistimothyAug 31, 2025
      If the Ecolab Control Unit pump isn't working in conductivity mode, first ensure the measuring probe is connected to “1 ...6” or “7 8” on the PCB. Also, if in 2-wire mode and the DW is filled with DEMI-water (conductivity < 100µS/cm), connect a wire link between “3” and “4”. Be aware that metering starts the moment Ecodos-L is live and conductivity is below the setpoint.
  • D
    derrickcharlesSep 3, 2025
    Why LED does not illuminate when power is applied from the dishwasher in Ecolab Control Unit?
    • B
      Brianna WhiteSep 3, 2025
      If the LED on your Ecolab Control Unit doesn't illuminate when power is applied from the dishwasher, the transformer or wiring might be defective; check and replace them if required. Alternatively, the PCB could be defective, and you should replace it.
  • N
    Nicole LeonardSep 7, 2025
    How to stop green LED from flashing on Ecolab Control Unit?
    • K
      Kayla SmithSep 8, 2025
      If the green LED is flashing on the Ecolab Control Unit, the system is likely in standby mode. To return to operation mode, press the QUIT button for 2 seconds.

Summary

General Information

Scope of Warranty

Details the conditions under which operational safety, functionality, and performance are guaranteed.

Applicable Regulations

Lists the regulations the unit complies with, such as electromagnetic compatibility.

Transport Damage

Instructions for handling units found to be damaged upon unpacking or during transit.

Contact Address and Manufacturer

Provides the manufacturer's contact information, including address, phone, and email.

Safety Precautions

Safety Information

General safety precautions for authorized personnel performing connection and repair work.

Emphasised Points

Explains the meaning of emphasized points like CAUTION, WARNING, IMPORTANT, and NOTE.

Special Safety for Maintenance and Repair

Specific safety guidelines for maintenance and repair, including protective clothing and power disconnection.

Assembly Overview

Functional Description, Operation and Settings

Settings

Refers to a separate manual for detailed descriptions of function, operation, and settings.

Buzzer Volume Adjustment

Instructions on how to adjust the volume of the acoustical alarm buzzer.

Mounting and Installation

Pre-installation Requirements

Specifies dimensions and general requirements to ensure correct unit operation before installation.

Wall Mounting

Step-by-step guide for mounting the unit housing onto a wall using drilling holes.

Product Feed Line and Metering Hose Installation

Procedures for installing the product feed line and metering hose into the tank.

Conductivity Sensor Installation

Guidelines for installing the conductivity sensor, including placement and connection.

Electrical Connection

Directs users to a separate manual for detailed instructions on electrical connections.

Maintenance and Repair Instructions

Peristaltic Tube Replacement

Detailed steps for removing the old peristaltic tube and inserting a new one.

Roller Assy Replacement

Instructions for replacing the roller assembly of the pump head.

PCB Replacement

Steps for removing the old PCB and installing a new one.

Buzzer Replacement

Procedure for replacing the unit's buzzer.

Troubleshooting Guide

Spare Parts List

Technical Data

Ecolab Ecodos-L Specifications

General IconGeneral
BrandEcolab
ModelEcodos-L
CategoryControl Unit
LanguageEnglish

Related product manuals