3
+ Plus sign indicates output is occurring.
POOL FUNCTION
The next step is to setup the parameters for your pool pump. The
"POOL" Key allows you to set the pool Start and Stop times. If you received
and ECOsmarte Controller with the Pool Pump Relay Option* your pool pump
will be turned ON and OFF at the Start and Stop times set with this function.
Press the "POOL" Key to display the following screen:
The cursor automatically starts below the hour hand of the start time.
Use the "UP" and "DOWN" arrow keys to set the appropriate hour. Then press
the "RIGHT" arrow key to move to the minute hand. At any time, use either the
"LEFT" or "RIGHT" arrow keys to move within the LCD. Use "UP" and
"DOWN" to change any values. When all values are correct, press the "NEXT
WEEK" key to return to the "Home Screen."
SPECIAL NOTES: "OXY" and "ION" start and end times
MUST be
set within the "POOL" start and end times or no power will be delivered, al-
though the LCD will display your selected values, (this is a safety feature). In
addition, even if you do not own a pump timer, you must set the "POOL" start
and end times according to when you manually turn your pump on and off,
therefore we assure that we are never Ionizing or Oxidizing when the water is
not flowing. Those without a firemans switch on thier timer must turn the pool
heater off 15 minutes before pool is turned off.
Upon completing the setup for the "POOL" time, the "Home Screen"
will display the new settings:
HOME SCREEN
10:42:09A 5/22/2006
Pool 8:00A- 5:00P+
Oxy 10:00A- 4:00P+
Ion None
2:22:20P 1/04/2006
Pool 10:00A- 4:00P+
Oxy 10:00A- 4:00P+
Ion None
Use
^
>< Keys to set
Start Stop
Pool 8:00A- 4:00P-
Press NEXT when done
^
14
COCO
COCO
CO
22
22
2
Swimming Pool Installation Guide Swimming Pool Installation Guide
Swimming Pool Installation Guide Swimming Pool Installation Guide
Swimming Pool Installation Guide
SWIMMING POOLSWIMMING POOL
SWIMMING POOLSWIMMING POOL
SWIMMING POOL
INST INST
INST INST
INST
ALLAALLA
ALLAALLA
ALLA
TIONTION
TIONTION
TION
1) Confirm 110V outlet cord and CO
2
tubing will reach target install area,
which is as close as possible to swimming pool on the return lines.
2) Plug in electrical timer or Ecosmarte Programmable Controller
3) Select area and measure 7", mark pipe
4) Cut PVC, and clean pool pipe ends & Chamber fittings.
5) Using PVC Glue, install chamber fittings to the pool pipe ends. Let dry,
then screw the chamber onto the fittings.
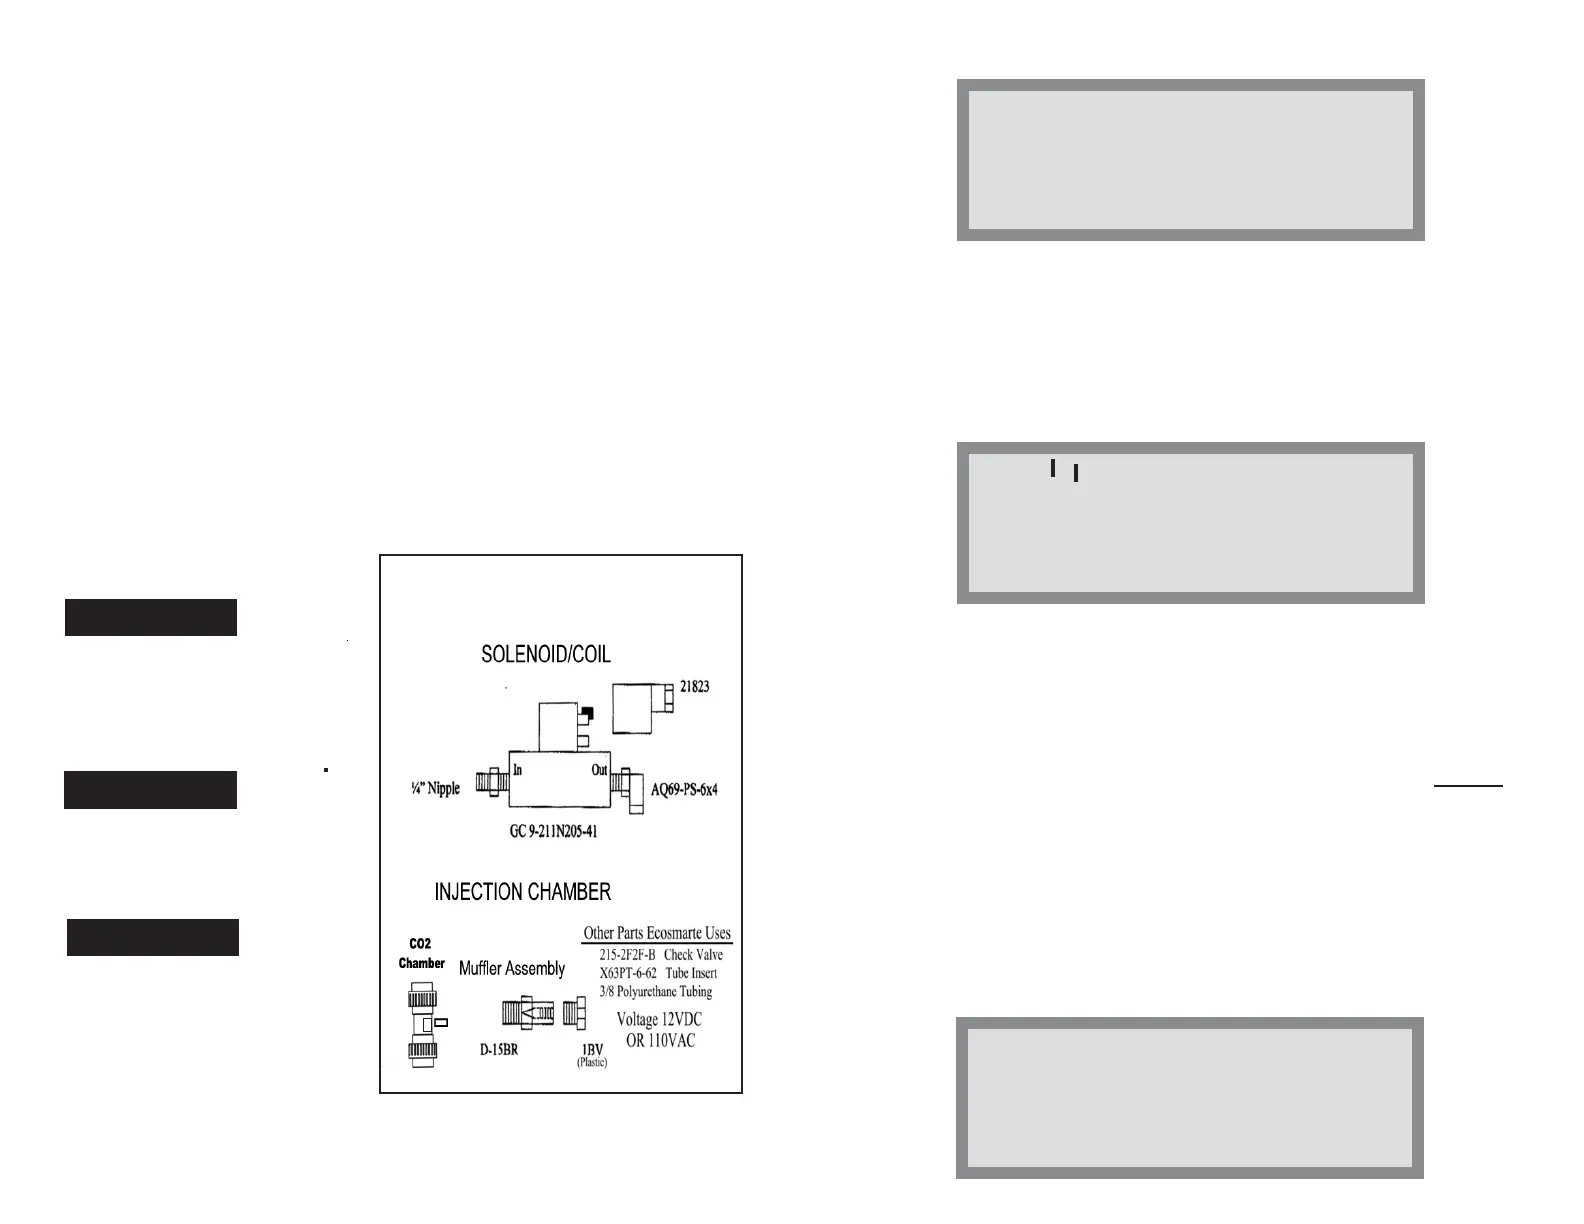
6) Screw Flow Regulator into CO2 Cylinder, and connect 1/4" pressure
hose from Regulator to the Solenoid.
NOTE: C02 Cylinder must be standing up.
7) With Solenoid "OFF," open valve on CO2 tank SLOWLY until open all the
way. Then turn 1/4 turn back. Test all fittings between tank and solenoid
for leaks using "Soapy" water. Tighten any loose fittings.
8) Start using 30 minutes per day on pools, 3 minutes on spas. Modify as test
results dictate with twice weekly testing
CO 2
• Indoor installations require
vented rooms
• Northern units should avoid
freezing; 5lb cylinders fit
inside cabinet
• Direct sunlight above 120
o
F on
Southern Units should be avoided
SpecificationsSpecifications
SpecificationsSpecifications
Specifications
CO2 Assembly Components
ELECTRICAL
• Manual: 110V, 60 Hz
• Programmable: 12V
• CE, UL Listed Solenoid,
• Power Cord
• Maximum Tank PSI: 3000
• Maximum Operating PSI: 60
• CGA 320 Valves, Tanks, Fittings
PLUMBING