The WH0310 Wireless Weather Station with Multi-channel Temperature Sensor is a device designed to monitor indoor temperature, humidity, and barometric pressure. It also supports up to three temperature sensors (additional two sensors sold separately) for monitoring multiple locations.
Function Description:
The weather station consists of a display console and a multi-channel thermometer sensor. The display console shows indoor temperature, humidity, and barometric pressure. It also displays weather forecasts, pressure changing trends, 24-hour/7-day history graphs for barometric pressure, and outdoor/multi-channel temperature readings along with their 24-hour high/low records. The remote sensor transmits temperature data wirelessly to the console.
Important Technical Specifications:
Wireless Specifications:
- Line of Sight Wireless Transmission (in open areas): 300 feet (100 feet under most conditions).
- Frequency: 433 MHz.
- Sensor Update Rate: 60 seconds.
- Weather Forecast Update Rate: 10 minutes (based on barometric pressure changes).
- Barometric Pressure Trend Arrow Update Rate: 60 seconds (compared with last 3-hour value).
Measurement Specifications:
- Indoor Temperature:
- Range: 32 to 122 °F (0 to 50 °C)
- Accuracy: ±1 °F/°C
- Resolution: 0.1 °F/°C
- Indoor Humidity:
- Range: 10-99%
- Accuracy: ±5%
- Resolution: 1%
- Outdoor Temperature:
- Range: -40 to 140 °F (-40 to 60 °C)
- Accuracy: ±1 °F/°C
- Resolution: 0.1 °F/°C
- Barometric Pressure:
- Range: 300.0 hPa to 1200.0 hPa
- Accuracy: +/-3 hPa
- Resolution: 0.1 hPa
Power Consumption:
- Base Station (Display Console): 1 x AA Alkaline or Lithium batteries (not included).
- Remote Sensor: 1 x AA 1.5V Alkaline or Lithium batteries (not included).
- Battery Life: Approximately 2 years for the base station with one sensor and excellent reception. Minimum 12 months for the thermometer sensor (using lithium batteries in cold weather climates less than -4 °F). Intermittent reception and multiple sensors may reduce battery life.
Usage Features:
Getting Started:
The power-up sequence requires inserting batteries into the remote transmitter(s) first, then the display console.
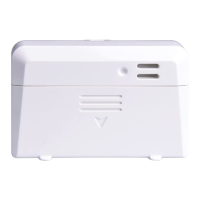
- Thermometer Sensor Setup:
- Remove the battery door by sliding it down.
- Set the RF sensor channel (1, 2, or 3).
- Insert one AA battery.
- The remote sensor LED indicator will light for 4 seconds, then flash once every 60 seconds when transmitting data.
- Close the battery door.
- For additional remote transmitters, repeat the process, ensuring each is on a different channel.
- Display Console Setup:
- Place the remote thermometer(s) 5 to 10 feet away from the display console for optimal reception.
- Remove the battery door on the back of the display.
- Insert one AA (alkaline, lithium, or rechargeable) battery.
- All LCD segments will light up briefly to verify proper operation.
- Replace the battery door and fold out the desk stand to place the console upright.
- The console will instantly display indoor temperature and humidity. Remote temperature will update within a few minutes. The reception search icon will flash during search mode.
Console Operation:
The console features five buttons: '+' and 'CH' (left), '-' and 'MODE' (right), and 'LIGHT' (top). Any program mode can be exited by pressing the 'LIGHT' button or by waiting for the 30-second time-out.
- ABS/REL Barometer Display: In normal mode, press the 'MODE' button once to switch between absolute (ABS) and relative (REL) barometer display.
- Setting Mode: Hold the 'MODE' button for 2 seconds to enter setting mode.
- Temperature Display Unit: Set to C/F.
- Barometer Display Unit: Set to hPa/mmHg/inHg.
- REL Barometric Pressure Calibration: Range 300.0-1200.0 hPa / 8.86-35.44 inHg / 225.0-900.1 mmHg. Calibration instructions are available at http://www.ecowitt.com/news/102.html.
- Use the 'MODE' button to navigate settings, and '+' or '-' buttons to change values. Press 'LIGHT' to return to normal mode.
- Pressure Tendency Indicator: Updates every 60 seconds. An upward direction indicates improving weather.
- 24H/7days History Graph: Switch between 24-hour and 7-day pressure history graphs using the '+' button.
- Weather Forecast Algorithm: Compares the past 24-hour average pressure against the past 30-day average pressure.
>=4hpa: Sunny-0.5hpa to 3.5hpa: Partly cloudy-3.5hpa to -1hpa: Cloudy <=-4hpa: Rainy- A sudden pressure decrease will trigger a flashing "Rainy" display, indicating an approaching storm.
- RF Channels Setting and Sensor Resynchronization:
- The default display mode for outdoor/multi-channel sensor data is Cycle Mode, indicated by an arrow icon with the channel number. Different channel sensor data will toggle on the LCD.
- Press 'CH' once to exit cycle mode and display the current channel sensor data continuously.
- The cycle sequence is CH1 – CH2 – CH3 – Cycle Mode.
- If the remote sensor signal is lost, dashes '--' will display.
- In cycle mode, hold the 'CH' button for 2 seconds to re-register all channel sensors.
- In non-cycle mode, hold the 'CH' button for 2 seconds to re-register the current channel sensor.
- If only one multi-channel temperature sensor is purchased, the other two channels will display '--'.
- Cycle mode can be canceled to display only the current channel data.
- High Low Record:
- Check latest 24 hours High/Low record: In normal mode, the console displays the latest 24-hour high/low record for outdoor/multi-channel temperature.
- Check history High/Low record: In normal mode, press the '-' button (the 24HR icon will disappear) to check the history high/low records for outdoor/multi-channel temperature since power-on or last clear.
- In cycle mode, hold the '-' button for 2 seconds to clear the high/low record for all channels.
- In non-cycle mode, hold the '-' button for 2 seconds to clear the high/low record for the current channel.
Maintenance Features:
Wireless Communication Best Practices:
To ensure proper communication and minimize interference, distance, walls, and metal barriers:
- Electro-Magnetic Interference (EMI): Keep the console several feet away from computer monitors and TVs.
- Radio Frequency Interference (RFI): If communication is intermittent with other 433 MHz devices, try turning them off for troubleshooting. Relocate transmitters or receivers if necessary.
- Line of Sight Rating: The device is rated for 300 feet line of sight (no interference, barriers, or walls). Typically, 100 feet maximum is achieved in most real-world installations with barriers or walls.
- Metal Barriers: Radio frequency will not pass through metal barriers like aluminum siding. If metal siding is present, align the remote and console through a window for a clear line of sight.
- Sensor Mounting: Mount the remote sensor on a vertical surface, such as a wall, in a shaded area. Do not lay the sensor flat. Direct sunlight and radiant heat sources can cause inaccurate temperature readings. Although weather-resistant, mounting in a well-protected area (e.g., under an eve) is recommended.
The product comes with a 1-year limited warranty against manufacturing defects in materials and workmanship. This warranty begins on the original purchase date and is valid only for the original purchaser. It covers actual defects within the product itself and does not cover installation/removal costs, normal setup/adjustments, or claims based on misrepresentation or performance variations due to installation. For warranty service, contact the provider for problem determination and service procedures. The manufacturer disclaims responsibility for technical or printing errors.