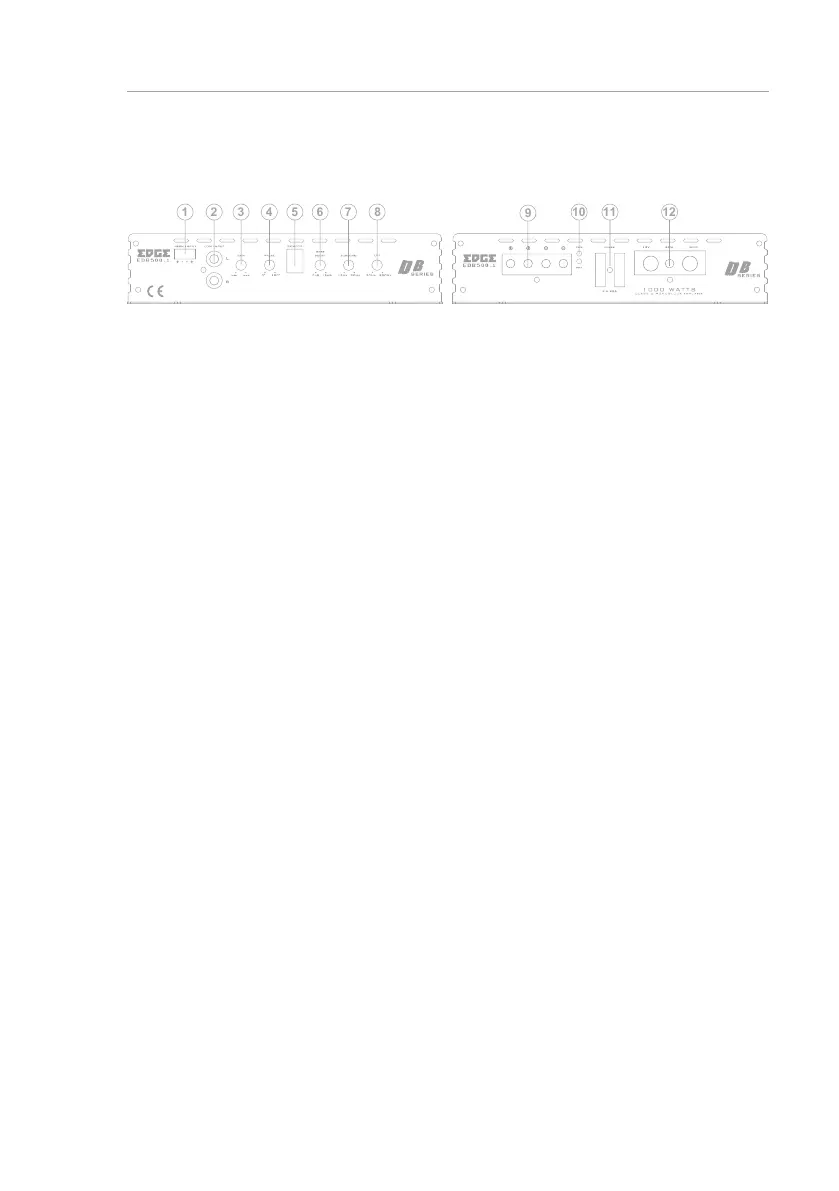
1. High level input
For connection to the speaker output of your source (head unit). This is to be used if the source
(headunit) does not have a low level output.
2. Low level input
For connection to any source (head unit) with a low level output. This is your RCA output from the
source (headunit)
3. Gain control
This control is used to match the input signal of the source to the amplier. See the setup section
for more details.
4. Phase adjust
This control is used to set the speaker output phase for the amplier and is adjustable between
0° and 180°
5. Remote input socket
Used to connect the remote level control to the amplier.
6. Bass boost Control
This control is used to add bass boost to the amplier centered at 45Hz and is adjustable between
0dB and +12dB.
7. Subsonic lter
This control is used to set the subsonic lter which is used to limit the very low frequency
information passed to the subwoofer. The frequency is adjustable between 15Hz and 50Hz.
8. Low Pass Filter (LPF)
This control is used to set the crossover frequency for the amplier when LPF is
selected. The frequency is adjustable between 50Hz and 250Hz.
9. Speaker terminals
Used to connect speaker cables to the amplier. See the wiring conguration section for more details
10. Power / protect LED
If the amplier is operating normally, the GREEN LED will illuminate.
If the amplier is in protection mode the RED LED will illuminate.
11. ATC fuses
Replace only with fuses of the same value.
EDB500.1 : 2 x 25 amp ATC fuses.
EDB1000.1 : 3 x 35 amp ATC fuses.
12. Power terminals
Used to connect DC power to the amplier. See the power connections section for more details
NOTE:
When using high level input, the REM terminal will now output a +12v feed that can be used to turn
other devices in the system that do not have auto turn on.
6
Terminals And Connections