Warning:
CO
2
can be dangerous! CO
2
cylinders contain high-pressured gas, which can be hazardous if handled improperly. Please handle with care.
1
2
3
4
5 6
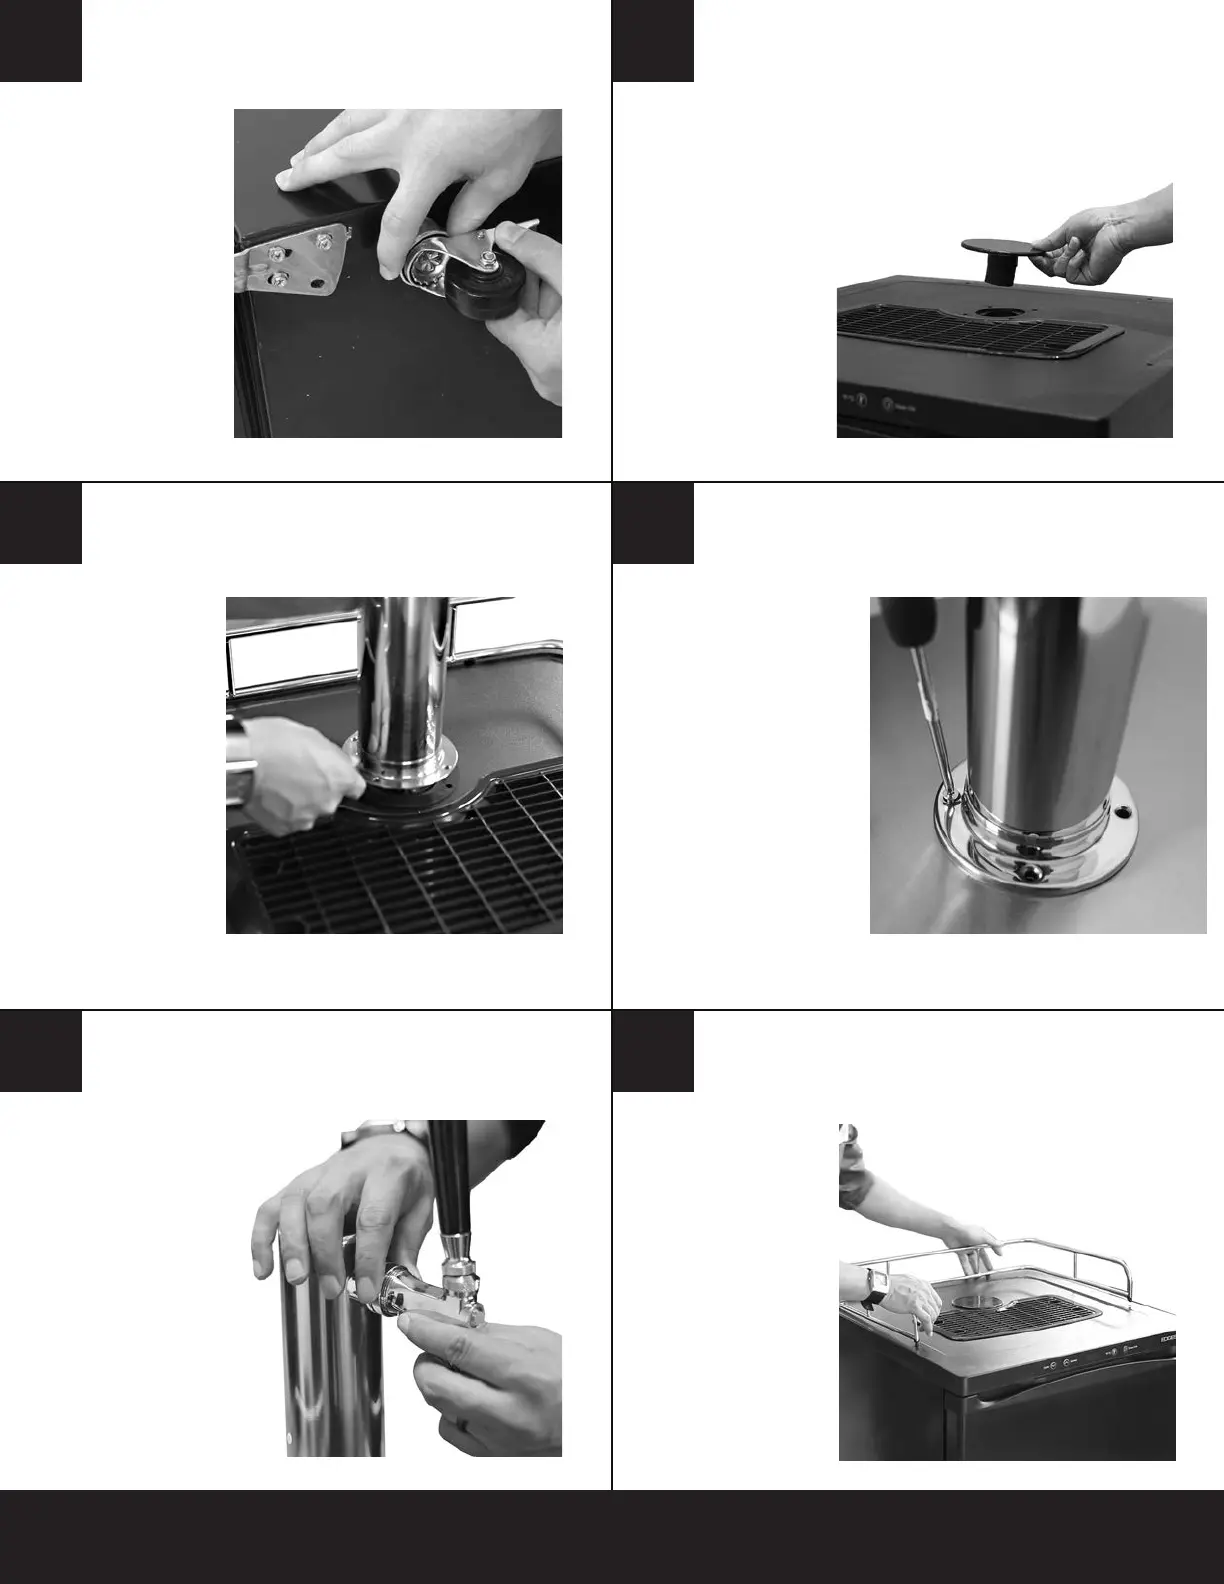
Before assembly, make
sure to empty the inside
of the unit including all
shelves and metal keg
floor (# 11). Carefully
lay the unit on its back.
Attach the casters (#12)
into the existing holes at
the bottom of the unit.
The front two casters
require a flat washer
(part# 12) prior to
installation. Next, set
the unit upright and
reinstall the keg floor
(# 11).
Note: Allow the dispenser
to stand in an upright
position for 24 hours
before plugging in the
unit.
Install Caster Wheels Remove Plug
Install Tower Secure Tower
Install Railing
Carefully remove the
tower plug (#17)
located on the top of
the unit by opening the
cabinet, and with your
hand, push plug
through the top of the
cabinet from the inside.
Use flat head screw-
driver as a prying tool if
necessary.
Mount the tower gasket
(#19) by lining it up with
the preexisting holes at
the top of the unit.
Install the tower (#3) by
first unraveling the beer
line from the bottom of
the tower. Feed the beer
line (#13) through the
top opening that was
under the cabinet plug.
Once the beer line is fed into the
unit line up the holes at the
bottom of the tower and install
the four screws (#20).
Take the railing (#4) and
slide its “feet” into the
pilot holes in the top of
the cabinet.
Install Handle & Faucet
Screw the faucet
handle (#1) to the beer
faucet (#2). Line up
the beer faucet to the
tower shank at the
front of the tower (#3)
and tighten the collar.