en
27
from the opposite side (Fig.20.2).
2. Divide the line into two equal parts (Fig.
20.3) and then load the trimmer head by
turning the knob (Fig. 20.4).
Carburetor Adjustment
Before adjusting the carburetor, clean
the cover vents and air fi lter as shown in
Illustration Fig. 23, refer to Operation-Starting
Unit and Maintenance-Air Filter Sections for
details. Allow the engine to warm up prior to
carburetor adjustment.
This engine is designed and manufactured
in order to comply with EPA (Environmental
Protection Agency) Phase 3 regulations.
The carburetor (Fig. 21) is designed to
permit only the adjustement of L and H
screws in a range of 1/4 round; the ± 1/8
round the hall range admissible for L and H
screws is determined by the manufacturer
and you can not modify it.
WARNING: Don’t try to force the
screws outside the range!
WARNING: Don’t modify the
carburetor in any way in such
case the engine will not run
in compliance with emissions
regulations.
Idle Speed Adjustment
• If the engine starts, runs, and accelerates
but will not idle; turn the idle speed screw
“T” clockwise to increase idle speed (Fig.
21).
• If the cutting attachment turns at idle, turn
the idle speed screw “T” counter-clockwise
to reduce the idle RPM and stop the
cutting attachment movement. If the cutting
attachment still moves at idle speed, contact
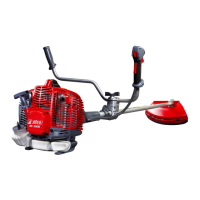
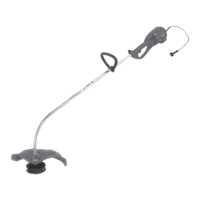
• Smaller machines generally require small
trimmer heads and vice versa. This is
because when clearing using a cord the
engine must throw out the cord radially
from the trimmer head and overcome the
resistance of the grass being cleared.
• The length of the cord is also important.
A longer cord requires greater engine
power than a shorter cord of the same
diameter.
• Make sure that the cutter on the trimmer
guard is intact. This is used to cut the cord
to the correct length.
• To increase the life of the cord it can be
soaked in water for a couple of days. This
will make the line tougher so that it lasts
longer.
• Only use line of the same diameter as the
original to avoid overloading the engine
(Fig.18).
• In order to get more line out of the cutting
head, tap it lightly on the ground while
working. NOTE: never hit the nylon head
against hard spots such as concrete or
stones, it could be dangerous.
Replacing the nylon line on the
UNIVERSAL trimmer head (Fig.27)
DS 2200 TR: cut two pieces long 8 in (200
mm) of nylon line Ø 0.08 in (2.0 mm).
1. Inserting a line into the hole indicated with
LINE (1) until it is released about 0.4 in (10
mm) from the opposite side (2).
2. Repeat operation with the other line (3).
Replacing the nylon line on the LOAD&GO
trimmer head (Fig.20)
DS 2200 S - DS 2200 T (Ø 4.3 in / 110 mm):
cut 13 ft (4 m) of nylon line Ø 0.09 in (2.4
mm).
DS 2400 S - DS 2400 T (Ø 5.1 in / 130 mm):
cut 28 ft (8.5 m) of nylon line Ø 0.09 in (2.4
mm).
1. Align the arrows and insert the line into the
trimmer head (Fig. 20.1) until it is released
MAINTENANCE