6
Fi
ure 6
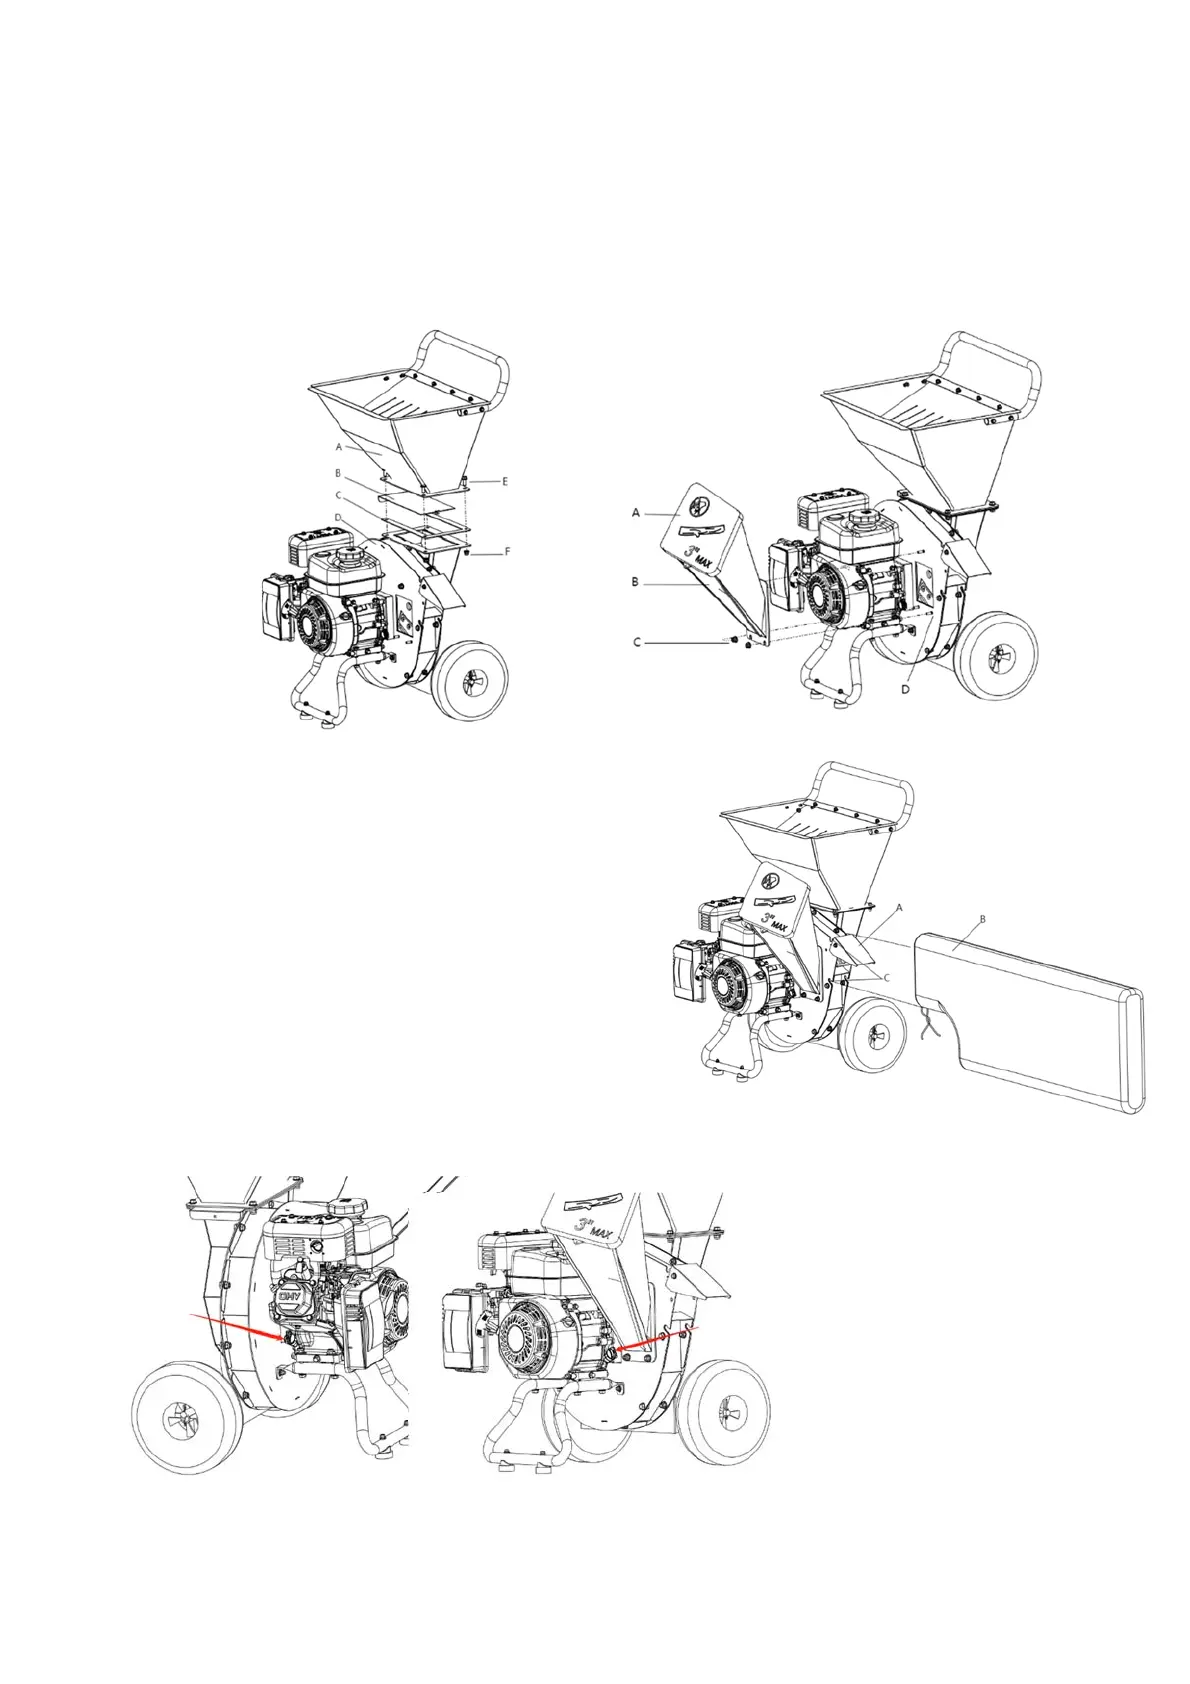
Install the Hopper (See Figure 5)
1.
Set damper plate (B) and U shape plate (C) onto
housing (D) by aligning through the aligned holes
2.
Assembly the U shape plate (C), put hopper (A)
onto U shape plate (C)
3.
Position the hopper (A)
by aligning the
assembly holes and fix
by bolts (E)
4.
Tight nuts (F) to secure
the guard assembly
to the hopper
Install the Chipper Cone (See Figure 6)
1.
Set chipper cone (B) to the three outstanding bolts
(D) on housing
2.
Tight three flange nuts (C) to secure shipper cone
(B)
NOTE: must put cone cap (A) on before use
vacuum kit to collect leaves.
Figure 5
BAG ASSEMBLY
(See Figure 7)
1. Open adjustable discharge guard (A) and lock open with locking nut.
2. Place opening of the bag (B) around discharge chute (C)
and fasten to housing using draw string on the bag.
Adding Oil
(See Figure 8)
You must add oil to the machine
before starting, oil can be added in
either of the two spots located at the
bottom rear of the machine, there is one each
side. (See page 1 for oil type)
Figure 8
Figure 7