Flow Sensor
4-6 Rev 2/01
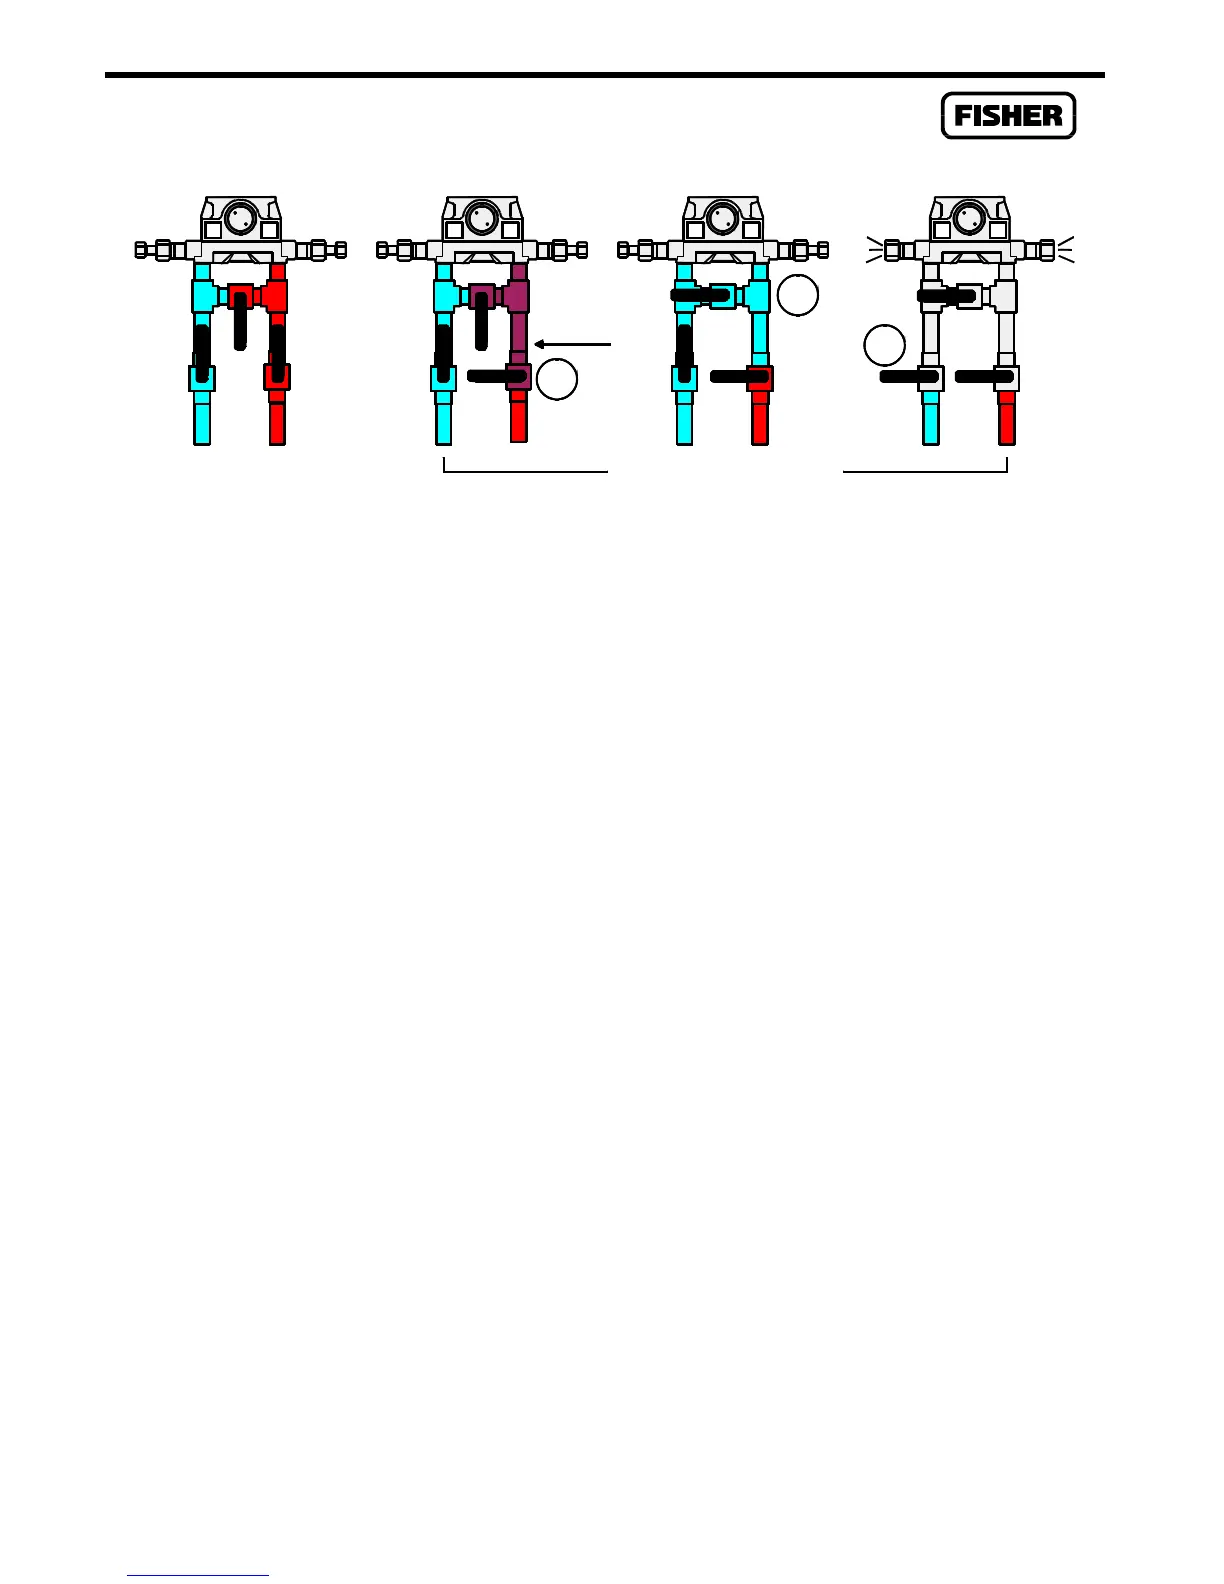
1
Close
Shutdn2
LH
2
Open
LH
3
Close
LH
High
Pressure
Remains
Bleed
Blee
LH
Operating Shutdown Sequence
Figure 4-1. Removing the Sensor from Service
9.
When the displayed Live Reading is stable, select the Set Zero pushbutton to calibrate the zero
reading. The Set Span dialog box then appears.
10.
Apply the desired lower-end value to the input (the top end of the expected operating range).
To maintain rated accuracy, be sure to observe the turndown limits listed in the Specifications
Table on page 4-8. [If you are calibrating the Diff Press input, and the Sensor is configured for
Downstream operation, be sure to apply the calibrator pressure to the low (labeled “L”) side of
the Sensor; the Live Reading will appear as a negative value. Static pressure for Downstream
is calibrated the same as for Upstream.]
11.
Enter the applied value in the Dead Weight / Tester field of the Set Span dialog. For static
pressure on an absolute-pressure device, remember to add in the actual atmospheric pressure,
such as 300 + 14.73. [If you are calibrating the Diff Press input, and the Sensor is configured
for Downstream operation, enter the value as positive, even though the Live Reading is a
negative value. The software will automatically compensate.]
12.
When the Live Reading is stable, select the Set Span pushbutton to calibrate the high reading.
The calibration sequence advances to the Set Midpoint 1 dialog box.
13.
If a midpoint (up to three midpoints are possible) is to be calibrated, apply the desired pressure
or temperature and enter the applied value in the Dead Weight / Tester field. Note that the
midpoints can be calibrated in any order. If you are done calibrating, select the Done
pushbutton
14.
When the Live Reading is stable, select the Set Mid pushbutton to calibrate this reading. The
display advances to the next midpoint dialog box.
15.
If additional midpoints are to be calibrated, repeat the above two steps.
16.
When the calibration for a selected point is complete, you have the choice to calibrate another
input or to complete the calibration. If calibration is complete, and you calibrated pressure
inputs, read the following Caution and then return the Sensor to service.