EasyManua.ls Logo

EINHELL 235 E

EINHELL 235 E
72 pages
To Next Page IconTo Next Page
Loading...
Art.-Nr.: 45.000.80 I.-Nr.: 11021
k
Originalbetriebsanleitung
Kettenschärfer
t
Original operating instructions
Chain Sharpener
p
Mode d’emploi d’origine
de lʼappareil à aiguiser les chaînes
C
Istruzioni per l’uso originali
Affilatore per catene
m
Manual de instrucciones original
Afilador de cadenas
U
Original-bruksanvisning
Kedjeslipmaskin
q
Alkuperäiskäyttöohje
Ketjunteroitin
Bf
Originalne upute za uporabu
naprave za oštrenje lanca
4
Originalna uputstva za upotrebu
Sprava za oštrenje lanca
Z
Orijinal Kullanma Talimatı
Zincir Bileme Aleti
BG-CS 235 E
Anleitung_BG_CS_235_E_SPK7__ 04.12.13 15:02 Seite 1
Question and Answer IconNeed help?

Do you have a question about the EINHELL 235 E and is the answer not in the manual?

EINHELL 235 E Specifications

General IconGeneral
BrandEINHELL
Model235 E
CategoryPower Tool
LanguageEnglish

Summary

Original operating instructions Chain Sharpener

Safety regulations

Layout (Fig. 12)

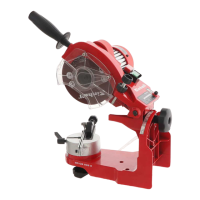
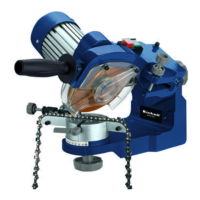
Identification of device components with numerical labels.

Items supplied

Instructions for unpacking and checking the delivered items.

Intended use

Technical data

Sound and vibration

Details on noise and vibration measurements according to EN 61029.

Grinding

Specific vibration emission values for the grinding operation.

Before starting the equipment

Fitting the grinding head (Fig. 3 a3 b)

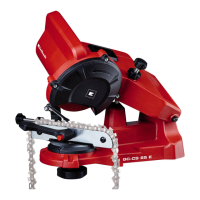
Instructions for assembling the grinding head and base frame.

Fitting the handle (Fig. 4)

Steps for attaching the handle to the grinding head.

Mounting on a table or wall (Fig. 56)

Guidance for mounting the device on a table or wall.

Operation

Insert the chain to be sharpened into the chain bar (Fig. 7)

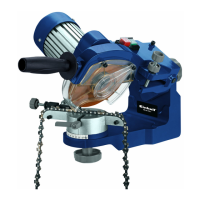
Steps for placing the chain into the guide bar.

Set the grinding angle according to the specifications for your chain (Fig. 8)

Adjusting the grinding angle using the scale and locking screw.

Set the roof angle according to the specifications for your chain (Fig. 11)

Adjusting the roof angle using the scale and locking screw.

Set the chain stopper (Fig. 910)

Adjusting the chain stopper to secure the chain link.

Set the depth limit (Fig. 910)

Adjusting the grinding depth using the setting screw for proper sharpening.

Lock the chain (Fig. 7)

Securing the chain with the locking screw.

Grind the link (Fig. 1011)

Instructions for grinding individual chain links.

Set the depth limiter spacing (Fig. 1213)

Adjusting the depth limiter spacing for correct chain sharpening.

Cleaning, maintenance and ordering of spare parts

Disposal and recycling

GUARANTEE CERTIFICATE

Related product manuals