Do you have a question about the EINHELL TC-AG 18/115 Li-Solo and is the answer not in the manual?
Read all safety regulations and instructions to avoid electric shock, fire, or serious injury.
Store safety regulations and instructions in a secure location for future reference and use.
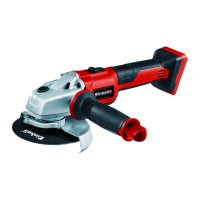
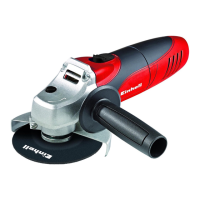
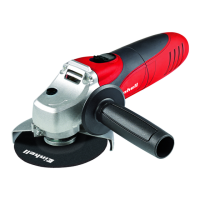
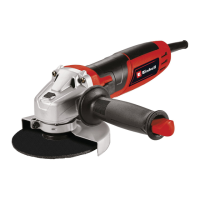
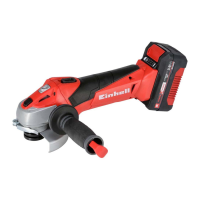
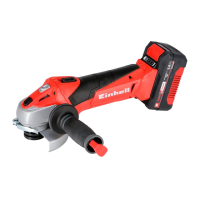
Details the components of the angle grinder and its accessories as shown in Figure 1.
Lists all parts included in the delivery and instructions for checking completeness.
Warning regarding the use of the grinder/sander for cutting metal and stone.
Details sound pressure, sound power levels, and vibration emission values according to EN 60745.
Advises wearing ear protection due to potential hearing damage from noise.
Provides vibration emission values for comparison and initial assessment of harmful effects.
Always remove the battery pack before making any adjustments to the equipment.
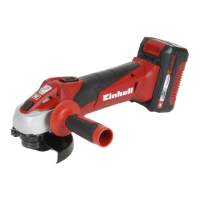
Instructions for fitting the additional handle to the angle grinder for safe operation.
Instructions for removing and replacing the guard on the angle grinder.
Guidance on adjusting the guard for optimal hand protection and workpiece guidance.
Ensures the guard is securely fitted before operating the angle grinder.
Critical safety warning against operating the tool without the guard fitted.
Step-by-step guide for charging the Li-ion battery pack using the provided charger.
Explanation of the angle grinder's safety switch and how to operate the ON/OFF switch.
Indicates the battery is fully charged when all three LEDs are illuminated.
Shows the battery has an adequate remaining charge when one or two LEDs are lit.
Indicates the battery is empty and requires recharging when one LED blinks.
Signifies a defective battery pack that has undergone exhaustive discharge.
Always pull out the battery pack before changing wheels and press spindle lock.
Press the spindle lock only when the motor and spindle are stationary.
Diagrams showing correct flange setup for grinding wheels.
Diagrams illustrating the proper flange configuration for cutting wheels.
Illustrations of the correct flange setup for straight cutting wheels.
Emphasizes the importance of motor ventilation and keeping air vents clean.
Guidelines for selecting and using grinding and cutting wheels safely and effectively.
Technique for rough grinding using the angle of 30-40 degrees to the workpiece.
Guidelines for cutting operations, emphasizing avoiding tilting and using appropriate wheels.
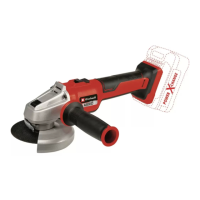
Recommendation to use 4.0 Ah Power-X-Change battery for increased power and runtime.
Pull out the battery pack before starting any cleaning work to prevent electric shock.
Instructions for cleaning the equipment, air vents, and motor housing.
States that there are no parts inside the equipment requiring additional maintenance.
Information on what data to provide when ordering spare parts.
Prohibits disposing of electric power tools in regular household waste for EU countries.
Explains EU regulations for separating and disposing of old electrical equipment.
Offers alternative recycling options for old equipment if not returned to the manufacturer.
Instructions for storing the equipment and accessories in a dark, dry place at suitable temperatures.
Indicates the charger is connected to mains and ready for battery insertion.
Shows the battery is charging in quick charge mode with LED status.
Indicates gentle charging mode, slower charging for reasons like long storage or temperature.
Signifies a defective battery pack or charging issue where charging is no longer possible.
Indicates the battery pack temperature is too high or too low for charging.
Prohibits disposing of electric power tools in regular household waste for EU countries.
Explains EU regulations for separating and disposing of old electrical equipment.
Offers alternative recycling options for old equipment if not returned to the manufacturer.
Alerts that the consignment contains lithium-ion batteries, requiring careful handling.
Information on finding competent service partners for repairs and spare parts.
Notes on parts subject to wear and tear, required as consumables.
Instructions for registering problems online, including questions to answer.
Details guarantee terms applicable only to consumers for personal use.
Defines warranty coverage limited to material or manufacturing faults.
Lists conditions and damages not covered by the product guarantee.
Specifies the 24-month guarantee validity and claim submission procedures.
Instructions on registering defective devices online and required proof of purchase.
| Product color | Black, Red |
|---|---|
| Adjustable speed | Yes |
| Number of handle positions | 3 |
| Idle speed (max) | 8500 RPM |
| Cutting depth (max) | 28 mm |
| Grinding disc diameter | 115 mm |
| Power source | Battery |
| Battery included | No |
| Weight | 1210 g |
|---|---|
| Package depth | 142 mm |
| Package width | 290 mm |
| Package height | 108 mm |
| Package weight | 2180 g |