GB
- 19 -
5.3 Installing the fl exible shaft (Figs. 3/5a)
•
Unscrew the cover (5) from the front of the
equipment.
•
Undo the collet chuck nut (3).
•
Insert the internal schaft (a) of the flexible
shaft into the collet chuck (3).
•
Tighten the collet chuck nut (3).
•
Now tighten the ring (b) on the multi-tool.
5.3.1 Inserting the various tools in the fl exib-
le shaft (Fig. 5b)
1. Press the locking pin (8) into the hole in the
fl exible shaft (13) and turn the shaft until the
pin latches in place.
2. Remove the clamp nut (3), insert the mat-
ching clamping sleeve (11) and refi t the
clamp nut.
3. Insert the required tool into the clamping
sleeve as far as the stop and screw the collet
chuck nut tight.
5.4 Using the stand (Fig. 6)
•
Fit the stand to a workbench
•
The stand is adjustable in height and can be
adjusted as shown in Fig. 6.
•
The multi-tool can now be attached to the
stand.
6. Using the tool for the fi rst time
•
Make sure that the drive unit is switched off.
•
Check that the mains voltage specified on the
rating plate of the power supply unit is the
same as your mains supply. Only then should
you insert the plug of the power supply unit
into a socket-outlet.
6.1. ON/OFF switch (Fig. 3)
Turn on the equipment by setting the On/Off
switch (1) to “I”.
Turn off the equipment by setting the On/Off
switch (1) to “0”.
6.2. Speed selector (Fig. 3)
The required speed can be set with the speed
control (2).
The correct speed depends on the tool used and
the type of material being processed.
6.3 Directions for use
•
With small milling cutters / grinding pins: Use
a high speed.
•
With large milling cutters / grinding pins: Use
a low speed.
6.4 Tips
•
Exert only moderate pressure on the workpi-
ece and allow it to be processed at uniform
speed.
•
You will not finish your work sooner by exer-
ting heavy pressure. On the contrary, heavy
pressure will cause the drive unit to slow
down or stop and will overload the motor.
•
For your own safety, use a vise or screw
clamp to secure small workpieces.
•
Precision work/engraving: Hold the drive unit
like a pen (single-handed).
•
Rough work: Hold the drive unit like the hand-
le of a hammer (two-handed).
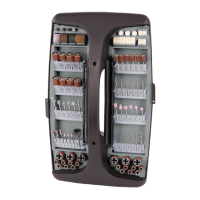
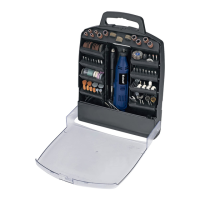
7. Accessories
7.1. Accessories (Fig. 7 / Fig. 1; Item 3/18)
1 Abrasive paper
2 Grinding belt (small)
3 Grinding belt (large)
7.2. Accessories (Fig. 8 / Fig. 1; Item 12)
1 Cutting wheel (fi ne)
2 Cutting wheel (coarse)
7.3. Accessories (Fig. 9 / Fig. 1; Item 5)
1 Cutter (cylindrical, large)
2 Cutter (cylindrical, small)
3 Cutter (pointed)
4 Cutter (ball-shaped)
7.4. Accessories (Fig. 10 / Fig. 1; Item 2/10)
1 Grinding wheel
2 Felt polishing wheel
7.5. Accessories (Fig. 11 / Fig. 1; Item 9)
1-6 Grinding pins
7.6. Accessories (Fig. 12 / Fig. 1; Item 4/12/
16/17)
1 Diamond cutting wheel
2 Clamping spindle for diamond cutting wheel
3 Grinding head for grinding belts (small)
4 Grinding head for grinding belts (large)
5 Pot brushes
Anl_TC_MG_135_E_SPK9.indb 19Anl_TC_MG_135_E_SPK9.indb 19 07.11.2019 09:22:5207.11.2019 09:22:52