GB
- 39 -
•
The vacuum cleaner you use for the vacuum
extraction must be suitable for the material
you are machining. Use a special vacuum
cleaner if you are handling harmful materials.
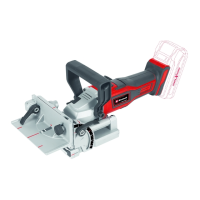
Cordless palm router (Fig. 1.2/Item 11)
•
Secure the extractor adapter (11) to the
palm router insert (19) using the countersunk
screw (12).
•
The extractor adapter can be connected to
extractor units (vacuum cleaners) with a suc-
tion hose.
•
The internal diameter of the extractor adapter
is 36 mm. Now fit a suction hose of matching
size to the extractor adapter.
5.2 Fitting the parallel stop (Fig. 3/ Item 18)
•
Undo the fastening screw for the routing gui-
de (10).
•
Insert the parallel stop (18) in the holder for
the routing guide (10) as shown in Fig. 3 and
retighten the fastening screw for the routing
guide (10).
•
Set the parallel stop (18) to the required di-
mension and secure it in place with the wing
screw (c).
5.3 Fitting the compass point (Fig. 4/Item 17)
•
You can cut circular areas using the compass
point (17).
•
To do so, undo the wing nut (c) and remove
the front section of the parallel stop (18).
•
Screw-fit the compass point (17) on the par-
allel stop (18) as shown in Fig. 5. Now fit the
parallel stop (18) together with the compass
point (17) on the router.
•
The procedure for fitting is the same as de-
scribed in section 5.2 except that the parallel
stop (18) must be turned through 180° so that
the compass point (17) points downwards
(Fig. 4).
•
Set the required radius between the compass
point (17) and the cutter.
•
Position the compass point (17) in the center
of the circle you wish to cut.
5.4 Fitting and using the copy sleeve
(Fig. 5-8/Item 14)
•
Remove the four recessed head screws (d)
from the bottom of the palm router insert and
take off the cover (e) (Fig. 5).
•
Insert the copy sleeve (14) as shown in Fig. 6.
•
Refit the cover (e) using the four recessed
head screws (d).
•
The copy sleeve (14) will be guided along the
template (g) by the guide ring (f).
•
To obtain an exact copy the workpiece (h)
must be larger by the difference between the
“external edge of the guide ring” and the “ex-
ternal edge of the cutter” (i).
5.5 Fitting/removing the cordless routing unit
(Fig. 9)
Warning! Remove the battery.
•
To insert the cordless routing unit (1) in the
palm router insert (19), first undo the faste-
ning screw for the depth adjuster (8) and then
insert the cordless routing unit (1).
•
Then use the height adjuster (9) and the sca-
le (21) to set the required cutting depth.
•
Finally retighten the fastening screw for the
depth adjuster (8).
5.6 Fitting/removing the cutting tool
(Fig. 10- 14)
Warning! Remove the battery.
Caution! When you have fi nished working
with the router, the cutting tool will stay very
hot for a relatively long time!
Caution! Cutters are very sharp. Wear protec-
tive gloves at all times when handling cutting
tools.
•
To make it easier to change the cutter, re-
move the cordless routing unit (1) from the
respective insert as described in section 5.5
•
Cutters with a shaft diameter of ¼ " can be
used in the cordless palm router.
•
You can use cutters made of the following
materials:
- HSS - suitable for cutting softwood
- TCT - suitable for cutting hardwood, particle
board and plastic
•
Select the appropriate cutting tool for the job
in hand.
•
When using the cutters for the first time:
Remove the plastic packaging from the cutter
heads.
•
Clean the nut, clamp and shaft of the cutter
before fitting it.
•
Undo the clamp nut (6) using the two open-
ended wrenches (13).
•
If a cutter is already fitted in the clamp (15),
remove it.
•
Select the appropriate cutting tool for the job
in hand.
•
Now insert the clamp (15) in the cutting
spindle (Fig. 11).
Anl_TP-ET_18_Li_BL_SPK8.indb 39Anl_TP-ET_18_Li_BL_SPK8.indb 39 06.03.2024 08:51:0806.03.2024 08:51:08
 Loading...
