QUICK INSTALL GUIDE EL-DB
10 11
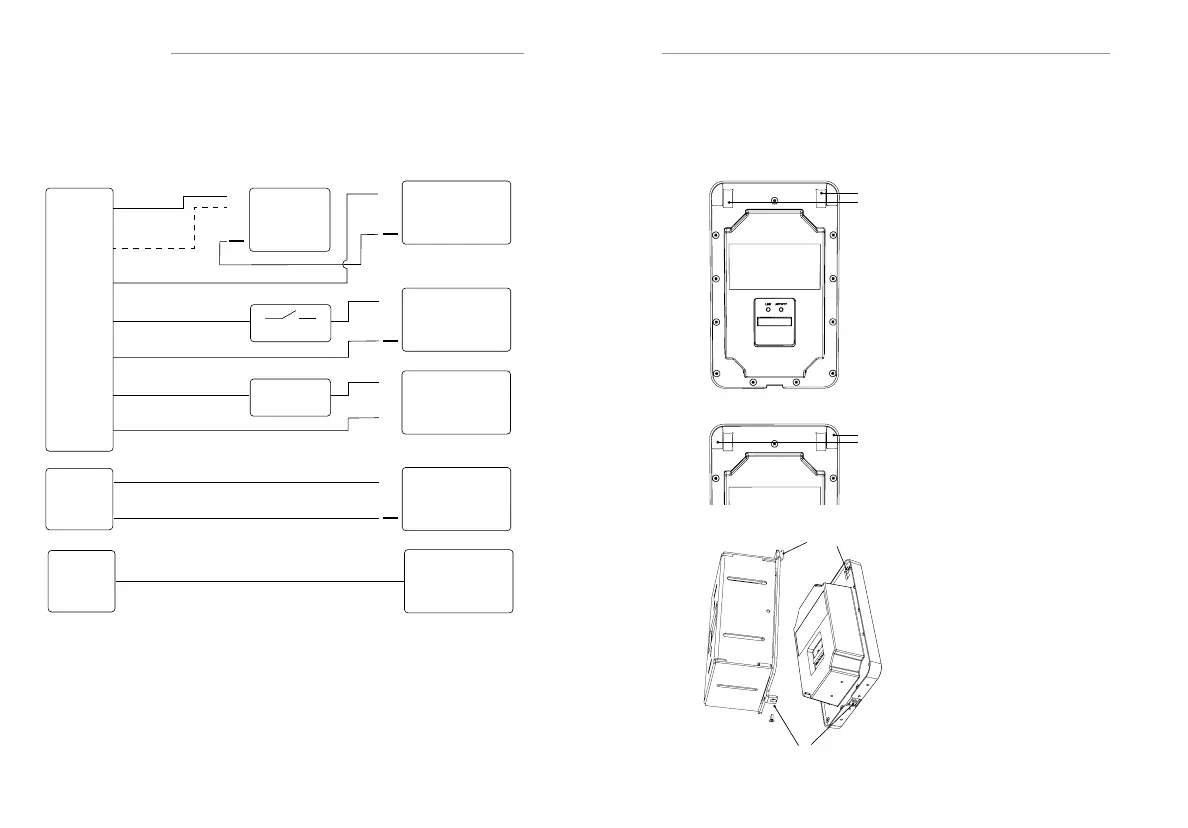
d. Wiring
e. Mounting – Rough-in
Once the the rough-in bracket has been installed and connections are made,
the video doorbell can me mounted.
Mounting hook holes
Connect the pigtail connector
to the network, power, relay,
door sensor, or door chime as
necesary, described in section
c. Route the end of the pigtail
connector through the large hole
in the rough-in box from the rear.
Connect the pigtail terminal
to the video doorbell.
Add the smalll adhesive pieces
to top corners on the back of the
video doorbell.
Place the video doorbell on the
mounting hooks and slide the
video doorbell down.
Using the included screw driver
and M2 screw, attach the video
doorbell to the bottom tab of the
mounting bracket.
261-50110xr_clearlake_Product_AltView_SecScrewHangers_Page8B_01.ai
Security Screw
Mounting hooks
261-50110xr_clearlake_asm_RearCoverandPlateWScrew.ai
261-50110xr_clearlake_asm_RearCoverandPlateWScrew.ai
Top Corners
NO
NC
COM
DI+
DI-
DB+
DB-
+
24V DC
Access
+
Fail-Safe
Fail-Secure
Sensor
+
12V DC
Chime
~
24VAC
XFMR
12V
GND
12V DC
+
RJ45
PoE / LAN
~
 Loading...