QUICK INSTALL GUIDE EL-DB
12 13
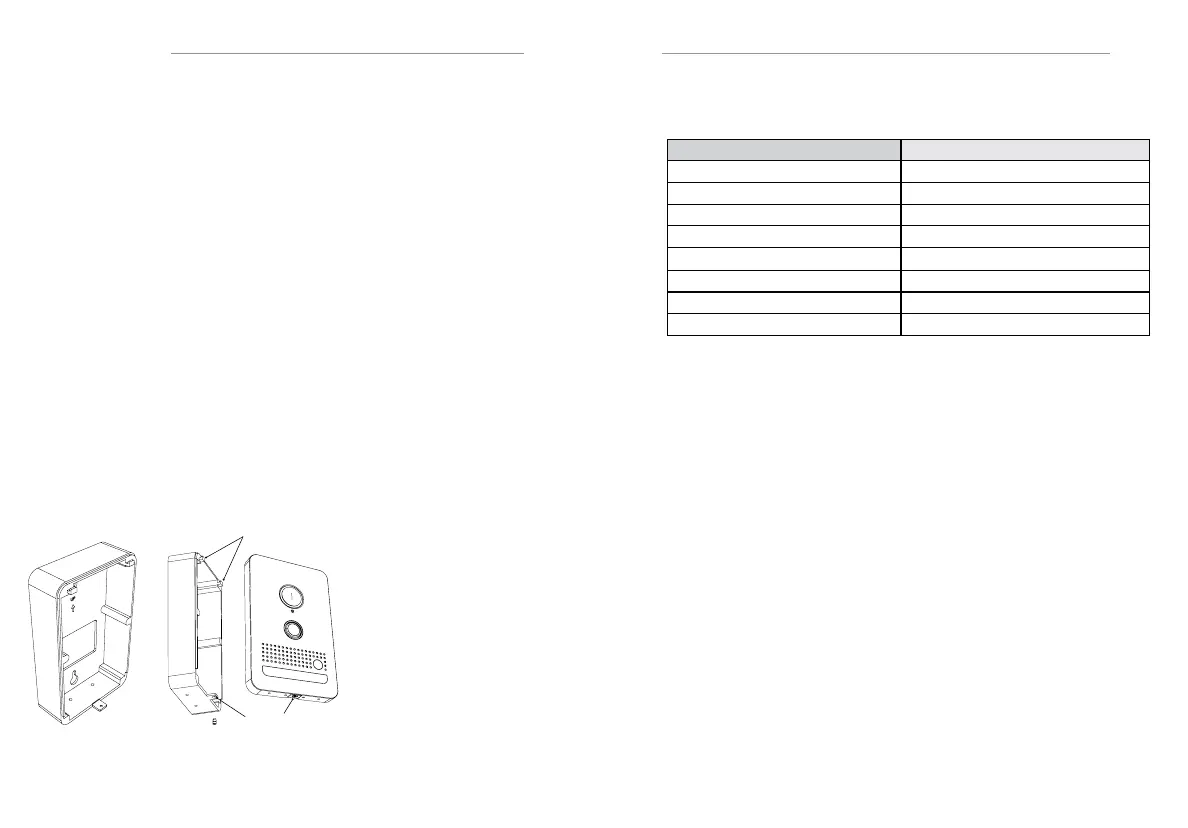
f. Mounting - Surface
The video doorbell can be surface mounted using the optional surface mount
box (sold separately in each color).
TROUBLESHOOTING
a. Factory Reset
Reset a unit to DHCP:
1. Disconnect power from the unit
2. Press and hold the doorbell button and connect power
3. Continue to hold the doorbell button for 20 seconds until the LightRing
flashes red
4. Connect directly to the video doorbell using a static IP address on a PC
a. Set the PC to a static IP address of 192.168.100.99.
b. Connect the video doorbell directly to the PC using an Ethernet cable
(if connecting through a switch, disconnect any other devices)
c. Using a web browser navigate to 192.168.100.100
d. Navigate to the System tab and click restore defaults to reset to DHCP
or navigate to the Network tab and select the dropdown for DHCP
g. Ethernet Wiring
261-50110xr_clearlake_Surface_Mount_asm_OptionalSurfaceMountBox_withCamera_01.ai
261-50110xr_clearlake_Product_FrontCover_Page11.ai
Connect the pigtail connector to the network, power, relay, door sensor, or door
chime as necesary, described in section b.
Route the end of the pigtail connector through the large hole in the surface
mount box from the rear.
Attach the adhesive gasket from the Video Doorbell kit to the rear of the surface
mount box and attach the surface mount box to the wall.
Connect the pigtail terminal to the video doorbell.
The surface mount box does not accommodate the pigtail connector which
should be placed in the wall behind the doorbell using a 1.5” opening in the wall.
If a 1.5” inch opening behind the surface mount box cannot be made and is too
small to fit the connectors, the two terminal block connectors can be removed.
If necessary, those connections can be wired directly.
If the opening is still too small to fit the RJ45 connector, that connector can also
be trimmed off and the connections can be wired directly (see Ethernet wiring on
the following page).
Place the video doorbell
on the mounting hooks
and slide the video
doorbell down.
Using the included screw
driver and M2 screw,
attach the video doorbell
to the bottom tab of the
mounting bracket.
261-50110xr_clearlake_Surface_Mount_asm_OptionalSurfaceMountBox ISO.ai
Mounting hooks
M2 Screw
ELAN Video Doorbell Standard (TIA568B)
White + Orange White + Orange
Orange Orange
White + Green White + Green
White + Red Blue
Red White + Blue
Green Green
White + Black White + Brown
Black Brown
 Loading...