2 of 13
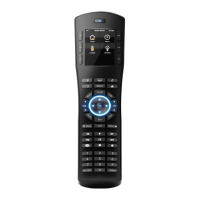
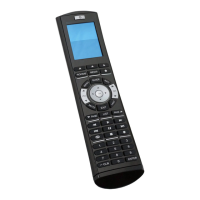
Zone Settings Page: Media zones can be configured to have a zone settings page on the HR2 remote.
The page is customizable in the configurator and is accessed on the HR2 by pressing and holding the
MEDIA hard button.
All Zones Off: An ‘All Media Zones Off’ macro can be executed by pressing and holding the power
button at the top of the HR2.
IR Blaster: The HR2 includes an IR blaster for providing power control of a video display where it is not
possible to run an IR emitter or other control method to the display.
Note: This method will prevent proper control in cases where a macro may be executed from a device
other than the HR2. For example; executing an ‘All Zones Off’ macro from a touchscreen will not turn off
any displays that only use the HR2 IR Blaster for control. See Using the HR2 IR Blaster below for more
information.
T
HE HR2 HANDHELD REMOTE CONTROL DOES NOT SUPPORT THE FOLLOWING FEATURES:
Unsupported Subsystems: The HR2 does not include feedback or control for Video, Messaging,
Irrigation, and Pool/Spa subsystems.
Various custom controls: Not all custom controls are supported on the HR2 interface. Any custom
controls other than those listed above are not supported. The result of this may be limited source control
of various 3
rd
party AV sources.
Custom Homepages: Custom Homepages are not supported on the HR2.
IR Blaster for source control: The HR2 IR blaster is not supported for source control or any use other
than the case explained above. See Using the HR2 IR Blaster below for more information.
Stand-alone remote control: The HR2 is an interface to a g! system controller and is not supported for
stand-alone control. It does not learn or store IR and a compatible g! system controller is required for
operation.
Any feature not specifically noted as “supported” is not supported.
INSTALLATION OVERVIEW
1. Install and test the system controller and all subsystems.
2. Verify the system HC controller is configured with a static IP address. If it is not then stop and
configure the controller with a static IP address and retest the system functionality and remote access
to the system.
3. Fully charge then power up the HR2 remote. Refer to the HR2 Quick Reference guide for details.
4. Verify proper firmware versions as described in the HR2 configuration section below.
5. Use the Configurator to assign the Wi-Fi properties and connect the remote to the wireless network
and the system controller.
6. Use the Configurator to select all pages and options for subsystem control. This includes defining
what zones and subsystems are available for control on the HR2.
7. Configure and test all subsystems for proper operation. In some cases this may include editing or
creating custom UI pages for desired control.
 Loading...