48 ELECRAFT
10. Final Assembly
Remove any masking tape from the top and bottom covers.
Use the technique described on page 23.
Remove and save the hardware supplied with the antenna and
key jacks.
The components on the bottom of the board must have an
overall height of no more than about 0.2” (5 mm) above the PC
board. Fold down or re-solder components if necessary.
Install the bottom cover by sliding it over the rear-panel
controls. Secure it to the rest of the assembly using six 3/16" (4.8
mm) pan-head screws.
Install the hardware supplied with the antenna and key jacks.
Be careful not to strip the plastic threads on the antenna jack.
Figure 10-1
Set the top cover upside-down in front of you, with the back
edge facing away. Place the speaker over its holes, with the lugs to
the left. (Figure 10-1).
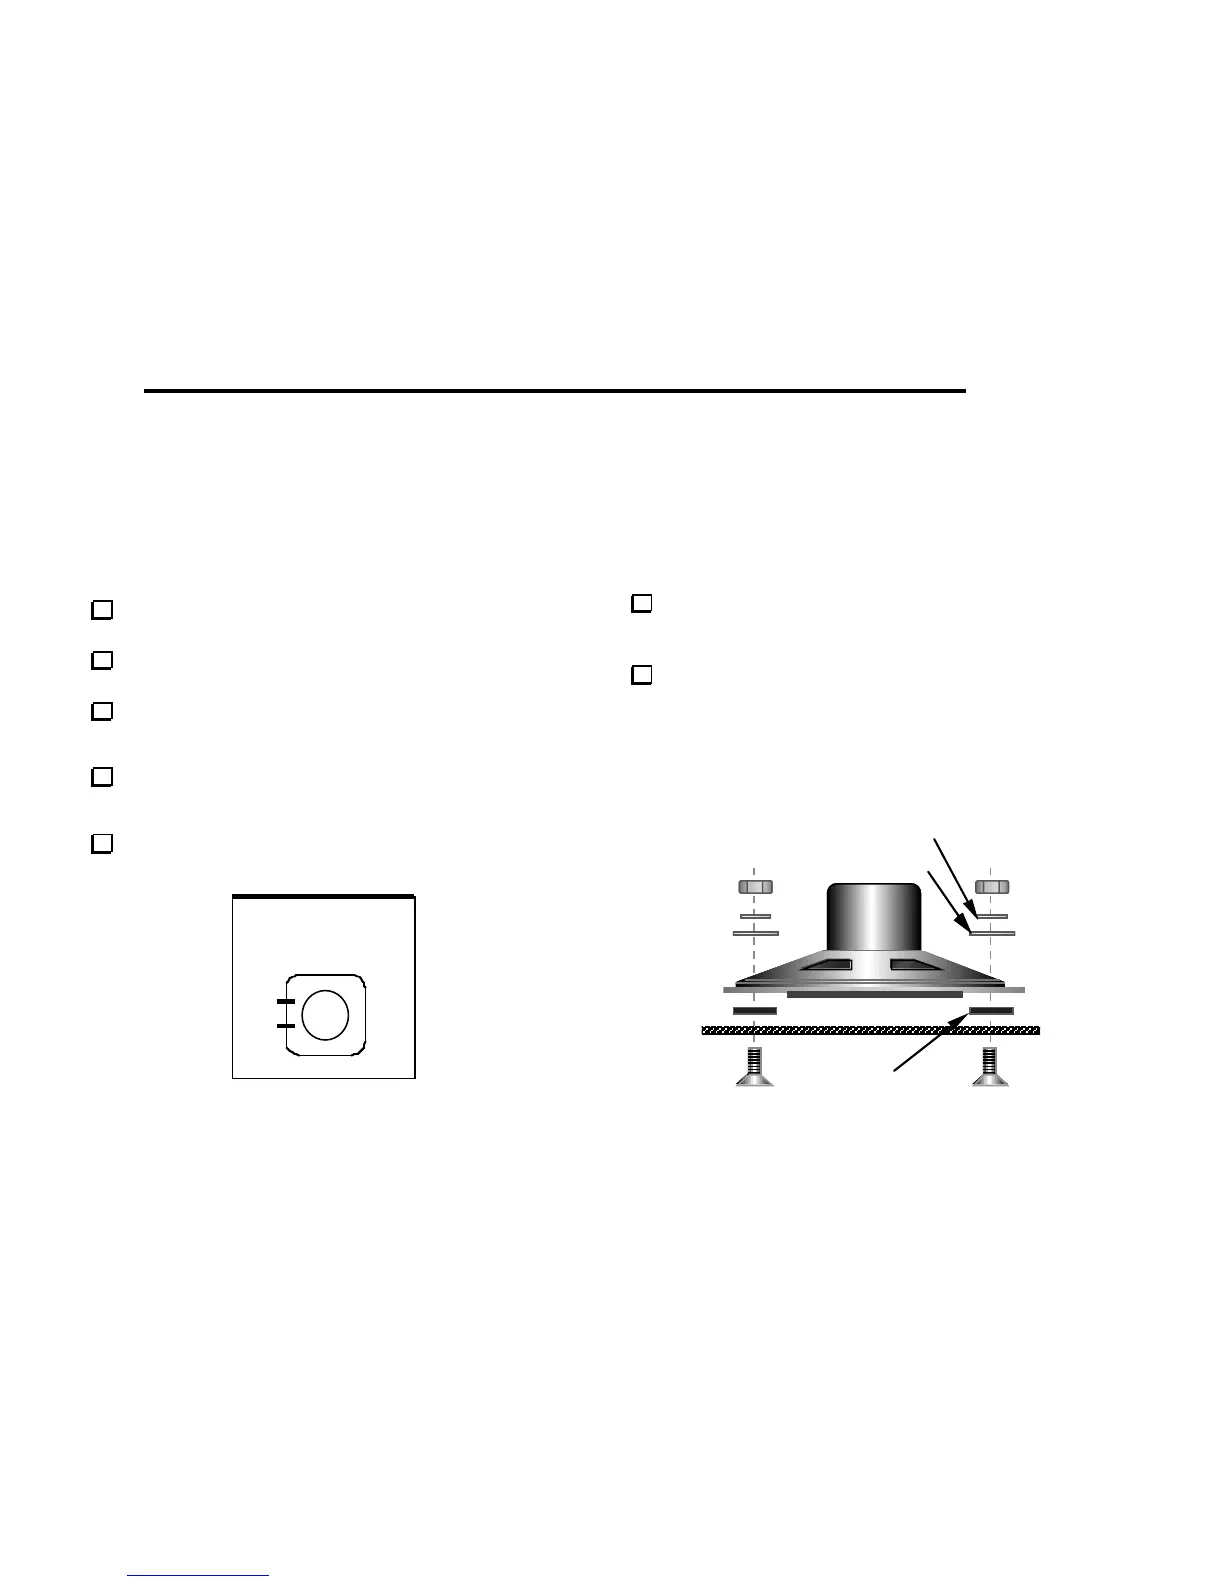
Secure the speaker to the top cover using four 5/16" (8 mm)
flat-head screws, #4 fiber washers (black), #4 metal flat washers, #4
internal-tooth lock washers, and 4-40 nuts (Figure 10-2). The fiber
washers go between the speaker and the top cover. Do not over-
tighten the nuts, as this can flex the speaker frame, causing
damage to the speaker and/or distorted audio.
lockwasher
metal flat washer
fiber washer
Figure 10-2