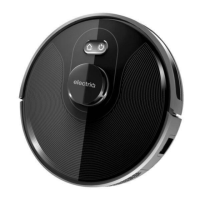
This document is a user manual for the electriQ iQLEAN-LR01 Robot Vacuum Cleaner.
Function Description:
The electriQ iQLEAN-LR01 is a robot vacuum cleaner designed for cleaning homes, small offices, and other small rooms. It provides excellent cleaning for various floor types, including wooden floors, tiled floors, stone floors, and short-pile carpets (less than 1.5cm deep). It features four smart cleaning modes to suit different cleaning needs, controllable via remote control or a dedicated app. The robot is equipped with a charging base that not only recharges its battery but also unloads the robot's dust into its own dust box for easy emptying. It includes a mopping function with a water tank. The unit is designed to be user-friendly, with a control button to start cleaning and voice prompts to guide operation.
Important Technical Specifications:
Host Robot:
- Model Name: iQlean-LR01
- Size: 330 x 96mm
- Battery: Lithium Ion
- Weight: 2.8kg
- Rated Voltage: 14V
- Rated Power: 32W
Charging Station:
- Size: 155 x 150 x 80 mm
- Input: 19V
- Output: 19V 0.6A
- Rated Power: 11.4W
- Rated Frequency: 50/60Hz
Usage Features:
Cleaning Modes:
- Automatic Cleaning: The robot scans the environment, generates a map, partitions it, and cleans systematically (perimeter first, then S-shape patterns). Activated from standby by pressing the start button on the robot, remote, or app.
- Partial Cleaning: Cleans a concentrated 1.5m square area from its starting position. Activated via the app or remote.
- Zoned Cleaning: Cleans specific zones as directed by input on the app.
- Designated Spot: Cleans a target point specified on the map via the app.
- Suction Adjustment: Adjusts suction levels using the remote control or app.
- Manual Control: Allows manual movement control (forwards, backwards, left, right) via the app or remote.
- Virtual Wall: Creates a virtual boundary on the map via the app that the robot must not cross.
- Pause: Pauses operation by pressing the "Start" button on the robot or the pause button on the remote/app.
- Wake Up: Wakes the robot from sleep mode (after three minutes of inactivity) using any button on the robot or app. If inactive for more than 20 minutes, only the Start and Go Home buttons can wake it.
- Shut Down: Turns off the robot using the main power switch after completing its task. It is recommended to return it to the charging station for full recharge after use.
Charging:
- The robot monitors its charge level and returns to the charging station automatically.
- Can be manually put into recharging mode via the remote or app.
- Can be charged directly from the power adapter.
- Indicator light flashes during charging and turns green when complete.
- First use requires a 24-hour charge.
- If not used for a long time, fully charge and remove the battery.
- Do not operate the charging station in areas with strong reflections (e.g., direct sunlight, mirrors); cover reflective surfaces up to 7cm from the bottom if unavoidable.
- Do not charge with the water tank fitted to prevent leaks and for electrical safety.
- Do not press any button other than the charging button during charging.
Mopping Function:
- A water tank can be attached for mopping.
- Water is added by opening a filler cap.
- The mop is attached after filling the water tank.
- Do not use the mopping function on carpets.
- Discard any unused water from the tank after use.
- The saturation level of the mop can be adjusted via the remote or app.
App Control (WeBack App):
- Requires a standard 2.4GHz Wi-Fi connection (dual-band routers should have different SSIDs).
- Place the robot close to the router during setup.
- Turn off mobile data and connect the phone to Wi-Fi before setup.
- Registration/Login: Register with details and verification code or log in if already registered.
- Add Device: Scan the QR code on the robot's underside, reset the device (press and hold power switch for 3-5 seconds until confirmation tone), then connect the phone to the robot's hotspot (ROBOT###) via Wi-Fi settings.
- Device Screen: Main control screen with access to functions and settings.
- Constituency Cleaning: Choose specific rooms to clean.
- Partition Editing: Divide and rename rooms on the map.
- Cleaning Stats: View cleaning area, battery remaining, and cleaning time.
- Cleaning Modes: Select fan mode (three suction speeds) or water tank mode (three water speeds).
- Settings: Adjust volume, set schedules, set up Alexa/Google integration.
- Clear Current Map: Clear the map to start a new room.
- Crossing Obstacles: Enable/disable crossing 1cm doorways/obstacles.
- Breakpoint Cleaning: Allows the robot to recharge and resume cleaning.
- Voice Switch: Adjust robot's voice volume.
- Set Remark: Change robot's name.
- Schedule: Set future cleaning schedules.
- Cleaning Record: View a log of past cleaning jobs.
- Voice Pack: Install different voice prompts.
- Area Unit: Choose between ft² or m².
- Shared Device: Share control with others.
- Check For Update: Update firmware.
- Upload Problem Log: Upload error files for support.
- Third Party Control: Integrate with Google Home and Amazon Echo.
Safety Precautions:
- Indoor use only.
- Connect to a 220-230V earthed outlet.
- Disconnect power before dismantling, assembling, or cleaning.
- Do not spray or immerse in water.
- Do not operate with damaged cord or power supply.
- Ensure power cord is not stretched or exposed to sharp objects.
- Replace damaged power supply with original parts.
- Avoid touching moving parts or inserting objects during operation.
- Not for use by persons with reduced physical, sensory, or mental capabilities, or lack of experience, unless supervised.
- Do not leave children or animals unsupervised.
- Use only original battery and charger.
- Service only by authorized representatives.
- Do not use in high humidity (>80%RH) or if liquids are spilled on the floor.
- Do not use in environments with fire/explosion risk or to clean printer toner.
- Remove fragile objects, sharp metals, needles, glass, or other obstructions from the floor before use.
- Do not place objects on top of the robot or leave fragile items on tables/cabinets where the robot could bump them.
- Ensure no obstructions could trap or jam the robot.
- Charge for 24 hours before first use.
- Do not look directly into the UV lamp or touch its bulb.
Maintenance Features:
Dust Box and Filter Cleaning:
- Remove the dust box by pressing the release button.
- Open the dust box side cover and then the dust box cover to empty contents into a waste bin.
- Open the filter cover to remove the primary filter and HEPA filter.
- The HEPA filter is not recommended for washing; tap gently to remove dust. Maximum service life for HEPA filter is three months. Do not expose HEPA filter to direct sunlight.
- Wash the primary filter every 15-30 days.
- Clean the dust box with a brush or damp cloth; do not wash with running water as it may damage electronics.
- Dry the dust box and filters before reassembling.
Water Tank Maintenance:
- Remove the water tank and pour out any remaining water.
- Clean the inside of the water tank.
- Allow the tank to air dry for 24 hours.
- Remove the mop, wash it with running water, and air dry.
Brush Cleaning:
- Open the roller brush cover assembly.
- Take out the roller brush.
- Use the provided cleaning brush to cut and remove hair tangled on the roller brush.
- Take off the side brush and clean with a soft cloth.
Charge Terminals and Wheels Maintenance:
- Clean the charge terminals on the charging station and the underside of the robot with a dry cloth only (do not use water due to sensitive electronic components).
- Clean the ground sensors.
- Clean the universal wheel.
- Clean the drive wheels.
- Fully charge the product before long periods of inactivity. Recharge every three months to prevent deep discharge. If deep discharge occurs, contact product support.