28
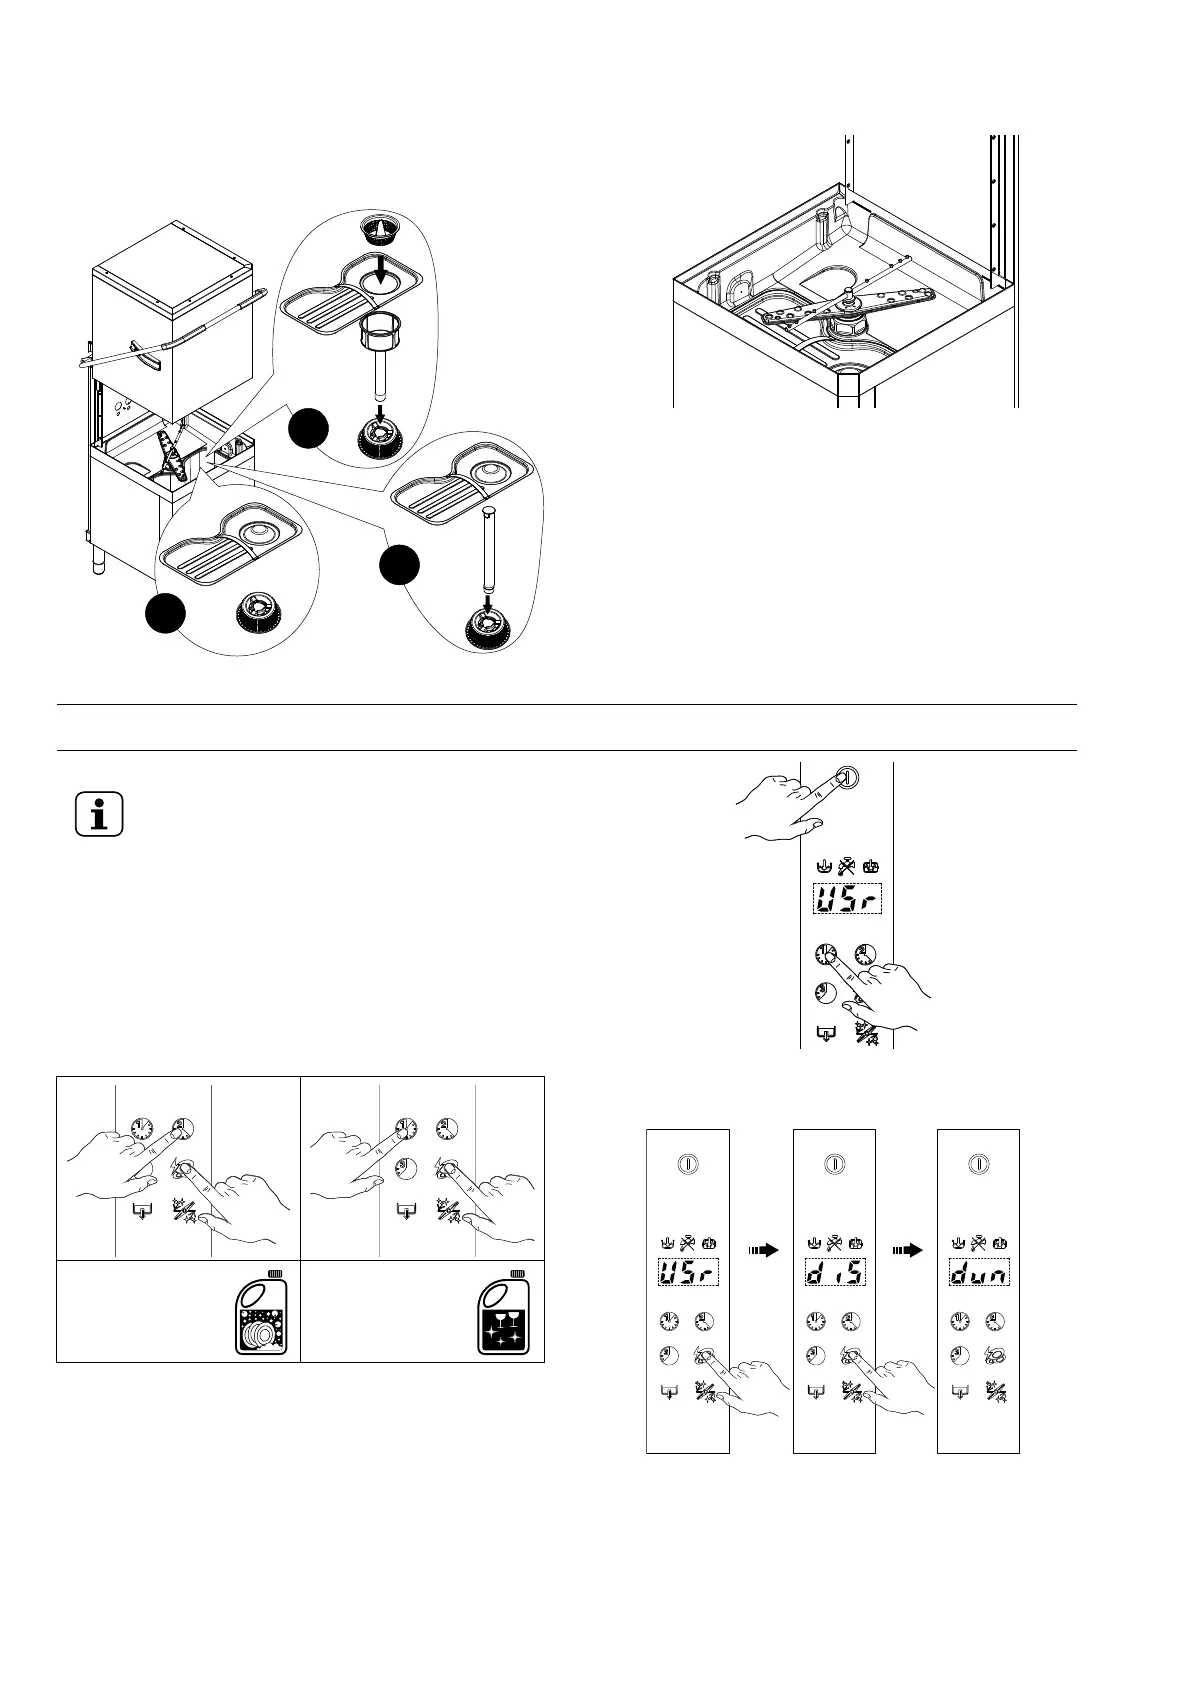
• In versions without supplementary Filtering System (FS)
and without drain pump, make sure the filter “1“, the
overflow “2“ and the flat filter “3“ are correctly fitted (see
detail “B“).
• In versions without supplementary Filtering System (FS)
and with drain pump, make sure the pump suction filter “1“
and the flat filter “3“ are correctly fitted (see detail “C“).
Check the fitting of wash and rinse arms
• Make sure the upper and lower wash and rinse arms are
correctly fitted.
H BASIC MACHINE SETUP
H.1 Manual activation
NOTE!
To obtain excellence washing performance, use
detergent, rinse aid and descaling agent sug-
gested by Electrolux Professional. In the Electrolux
Professional web site, open the “Accessories and
Consumables“ web page and navigate into the
dishwashing equipment tab to order most suitable
detergents and accessories.
Whenever the detergent containers are replaced, it may be
necessary to activate the dispensers manually in order to fill
the hoses and eliminate any air. Simultaneously press the
buttons, as shown in the figures below. If necessary, repeat
this operation several times.
Detergent dispenser Rinse-aid dispenser
H.2 Setting the dispensers
All operations should be carried out with the appliance
switched on, the hood open and no cycle selected.
Press, together, the “On/Off“ and “Wash cycle 1“ buttons for 5
seconds to access the programming mode and the display
shows the parameter USr.
Press the button “L“ (refer to F.1 Control panel description)
twice to access the detergent and rinse aid adjustment
parameters.
The display shows dun which is the first parameter of the
dispenser family:


 To Next Page