Do you have a question about the Electrolux EIFLS60JIW0 and is the answer not in the manual?
How to identify safety alerts and warnings in the manual.
A list of checks to ensure proper installation readiness.
Details tools, materials, and conditions needed before starting installation.
Specifies the necessary electrical connections, circuit, and power supply details.
Outlines the necessary hot/cold water faucet connections and pressure.
Details the required drain pipe size, height, and flow rate.
Specifies minimum space clearances around the washer for proper operation and ventilation.
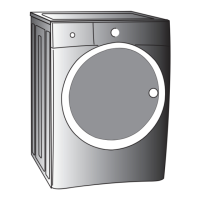
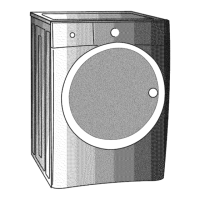
Provides detailed measurements of the washer for planning installation space.
Step-by-step guide to safely remove protective foam and packaging materials.
Instructions for removing internal shipping components like forks, bolts, and clamps.
Guide for inserting protective plugs into the washer's back panel holes.
How to adjust the washer's legs to ensure it is level and stable.
Steps for connecting the hot and cold water supply hoses to the washer.
Instructions for connecting the drain hose and the power cord.
How to run a diagnostic cycle to confirm proper installation and function.
Safety precautions and tool requirements before reversing the door.
Steps to remove the door, trim ring, lock, and hinge from the front panel.
Detailed instructions on removing the hinge assembly and door lock mechanism.
Steps to reinstall the door lock and connect its harness and reattach the hinge.
How to remove and reposition the striker plate, latch indicator, and hole plug.
Steps to reinsert the latch indicator, striker plate, and hole plug into opposite positions.
Steps to reattach the door to the hinge and secure it with screws.
How to reinstall the trim ring and trim plug after reversing the door.
Lists available optional accessories like pedestals, stacking kits, and touch-up paint.
| Style | front load |
|---|---|
| Color | white |
| Washer Capacity | 4.3 cubic feet |
| Control Panel | electronic |
| Delay Start / End | yes |
| Child Lock | yes |
| Cycle Signal | yes |
| Interior Light | yes |
| Steam | yes |
| Annual Energy Consumption | 102 kilowatt hours |
| Voltage | 120 volts |
| Current | 12 amperes |
| Depth | 31.5 inches |
|---|