7.6 Hints and Tips for the
Food Sensor
For functions such as
Assisted Cooking and Sous
Vide, you can use the Food
Sensor on the left side of the
hob only. With the
Thermometer function you
can use the Food Sensor
also on the right side of the
hob.
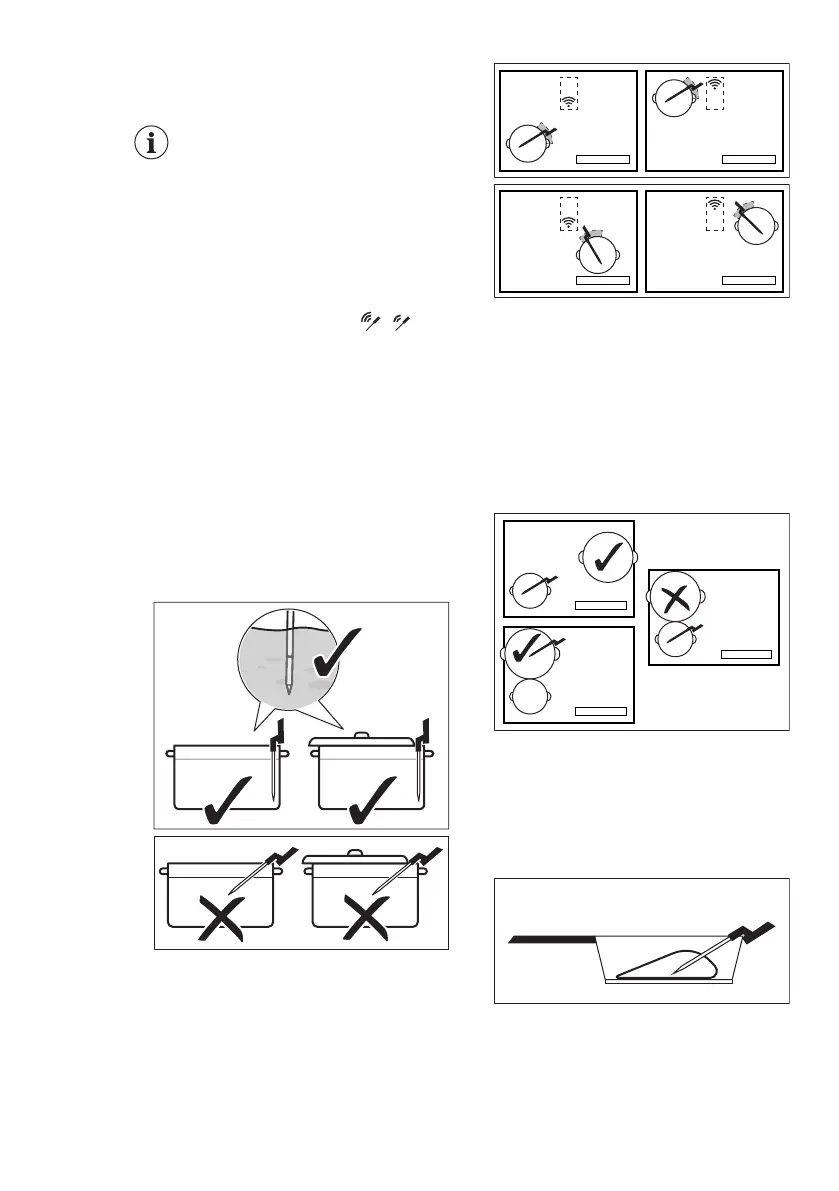
To ensure strong connection ( , )
between the Food Sensor and the hob:
For liquids
• Immerse the Food Sensor in the
liquid, within the recommended
immersion range. The minimum level
mark has to be covered.
• Place the Food Sensor on the rim of
the pot. If possible, keep it in the
vertical position. Make sure its tip
comes into contact with the bottom of
the pot. The handle of the Food
Sensor should always be outside of
the pot or pan.
• If you want to use the Food Sensor on
the left side of the hob, ensure that it
is near the centre of the hob, at 1 - 3
o'clock position. If you want to use it
on the right (with the Thermometer
function), make sure it is placed at 9 -
11 o'clock position. Refer to the
illustrations below.
You can move the Food Sensor along
the rim of the pot if the connection
fails to establish.
• You can partially cover the pot with a
lid.
• If you use the left front cooking zone,
do not place any large pots on the left
rear one. Large pots on the left rear
cooking zone may block the signal.
Move the large pot to the right rear
cooking zone.
For solid foods (core temperature
measurement)
• Insert the Food Sensor across the
thickest part of the food, up to the
minimum level mark. The
measurement point should be in the
central part of the portion.
• Make sure the Food Sensor is firmly
inserted in the food. The metal parts
of the Food Sensor should not touch
the walls of the pot / pan. The hook of
the handle has to point downwards.
ENGLISH 23