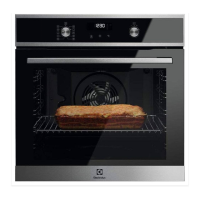
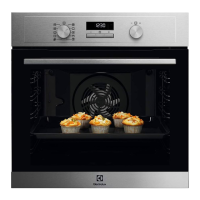
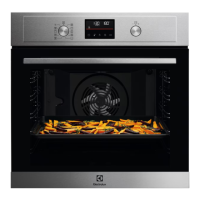
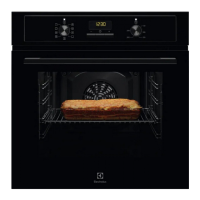
This document is a user manual for an Electrolux oven, model EOF6H46X2, providing comprehensive instructions for its installation, daily use, maintenance, and troubleshooting.
The oven is designed for cooking purposes in single household domestic environments, including offices, hotel guest rooms, bed & breakfast guest rooms, and farm guest houses, provided usage levels do not exceed average domestic levels. It features a control panel with retractable knobs, a display with various indicators for functions like timer, fast heat up, light, lock, assisted cooking, cleaning, settings, minute minder, end time, and uptimer. A progress bar on the display indicates temperature or time, turning fully red when the set temperature is reached.
Function Description:
The oven offers a variety of heating functions to cater to different cooking needs:
- True Fan Cooking: Ideal for baking on up to three shelf positions simultaneously and for drying food. It allows for a temperature setting 20-40°C lower than Conventional Cooking.
- Conventional Cooking: Suitable for baking and roasting food on a single shelf position.
- Frozen Foods: Designed to make convenience foods like french fries, potato wedges, and spring rolls crispy.
- Pizza Function: For baking pizza, achieving intensive browning, and a crispy bottom.
- Bottom Heat: Used for baking cakes with a crispy bottom and for preserving food.
- Defrost: For defrosting food (vegetables and fruit), with defrosting time dependent on the amount and size of the food.
- Moist Fan Baking: An energy-saving function where the temperature in the cavity may differ from the set temperature, utilizing residual heat. The heating power may be reduced. The lamp automatically turns off after 30 seconds when the temperature is set below 80°C.
- Grill: For grilling thin pieces of food and toasting bread.
- Turbo Grilling: For roasting large meat joints or poultry with bones on one shelf position, making gratins, and browning.
- Menu: Provides access to Assisted Cooking, Cleaning, and Settings.
Usage Features:
The oven incorporates several features to enhance usability and safety:
- Retractable Knobs: The control knobs can be pressed in when not in use, providing a sleek appearance and preventing accidental adjustments.
- Assisted Cooking: This submenu offers recommended heating functions and temperatures for various dishes, allowing users to quickly prepare meals with default settings. Time and temperature can be adjusted during cooking.
- Clock Functions: Includes a Minute Minder (a timer that signals when time ends), Cooking Time (stops the heating function when time ends), and Time Delay (postpones the start and/or end of cooking). The Uptimer function tracks the duration of oven operation.
- Fast Heat Up: Available for some oven functions, this feature can be activated by pressing and holding the control knob, allowing for quicker preheating.
- Lock Function: Prevents accidental changes to the appliance function. It can be activated when the appliance is working (continuing the set cooking with a locked control panel) or when it's off (preventing the appliance from being turned on).
- Automatic Switch-off: For safety, the appliance automatically turns off after a certain period if a heating function is active and no settings are changed. The duration depends on the set temperature. This function does not apply to Light or Time Delay.
- Cooling Fan: Automatically turns on during operation to keep surfaces cool and may continue to operate after the appliance is turned off until it cools down.
- Accessories: The oven comes with a wire shelf, a grill-/roasting pan, and a trivet. The wire shelf has a small indentation at the top for safety and anti-tip features. The high rim prevents cookware from slipping. The trivet can be used with the deep pan for roasting larger pieces of meat or poultry (supports pointing up) or for grilling flat dishes and toasting (supports pointing down).
Maintenance Features:
Regular care and cleaning are essential for the appliance's longevity and performance:
- Initial Cleaning: Before first use, the empty oven should be cleaned and the time set. It is also recommended to preheat the empty oven.
- General Cleaning: The appliance should be cleaned regularly with a moist soft cloth and neutral detergents to prevent surface material deterioration. Abrasive products, cleaning pads, solvents, or metal objects should not be used. If using oven spray, follow its safety instructions.
- Accessory Cleaning: All accessories should be cleaned after each use with warm water and a mild detergent. Non-stick accessories should not be cleaned with abrasive cleaners or sharp-edged objects. Accessories should not be cleaned in a dishwasher.
- Shelf Support Removal: Shelf supports can be easily removed for cleaning the oven cavity by pulling the front and then the rear end away from the side walls. They are reinstalled in the opposite sequence.
- Aqua Clean Function: This cleaning procedure uses humidity to loosen remaining fat and food particles. Users pour 300 ml of water into the cavity embossment, select the Aqua Clean function, and let it run for 30 minutes. After the cycle, the cavity is dried with a soft cloth.
- Door Removal and Glass Panel Cleaning: The oven door, which has three glass panels, can be removed for thorough cleaning. The internal glass panels can also be taken out one by one. Instructions are provided for safely removing the door, detaching the door trim, and carefully pulling out the glass panels. The glass panels should be cleaned with water and soap and dried carefully, but not in a dishwasher. It's crucial to reinstall the glass panels in the correct sequence and ensure the door trim clicks into place. The oven should not be used without the glass panels.
- Lamp Replacement: Instructions are provided for safely replacing the internal lamp, emphasizing the need to disconnect the oven from the mains and allow it to cool down to avoid electric shock or burns. A suitable 300°C heat-resistant lamp should be used.