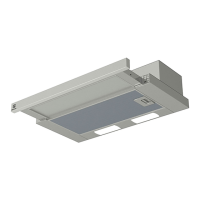
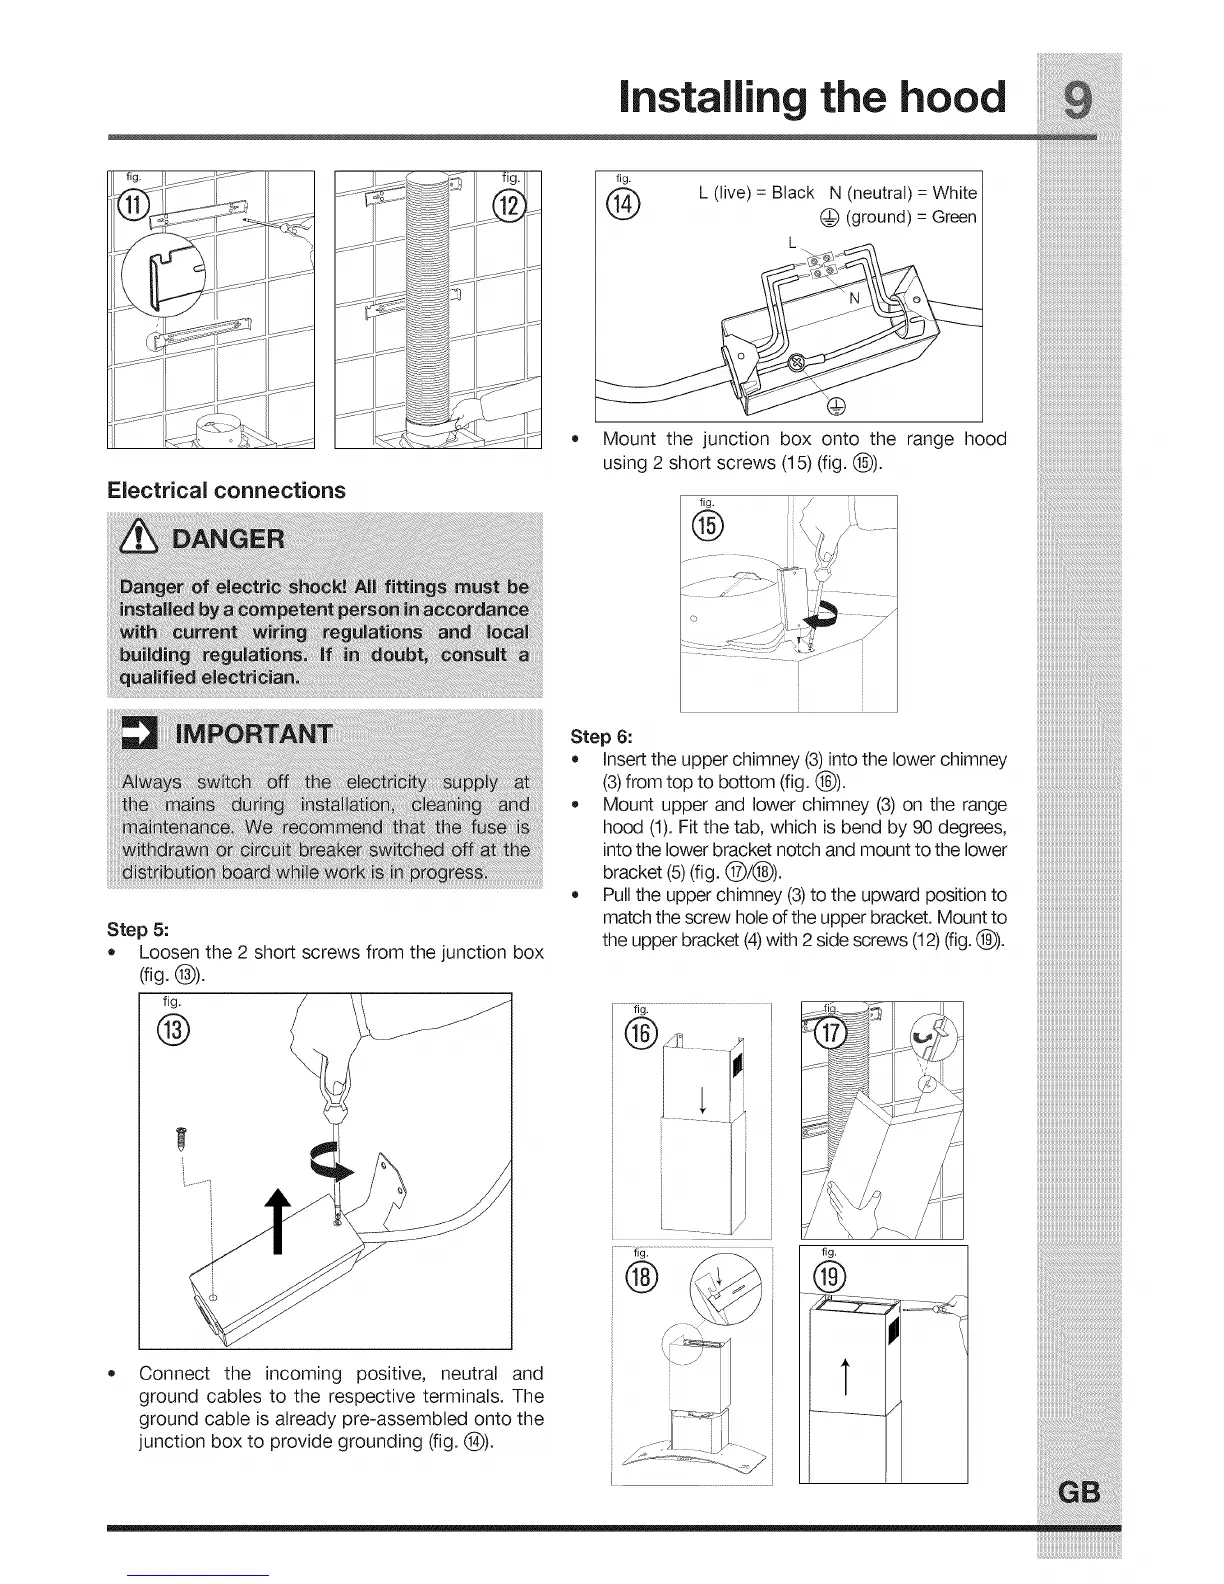
Installing the hood
L (live) = Black_
® tg_o_n_/=G,eenI
I__ ......_1 Mount the junction box onto the range hood
using 2 short screws (15) (fig. (_)).
Electrical connections fig. //
i
Step 5:
Loosen the 2 short screws from the junction box
Connect the incoming positive, neutral and
ground cables to the respective terminals. The
ground cable is already pre-assembled onto the
junction box to provide grounding (fig. (_)).
Step 6:
Insert the upper chimney (3) into the lower chimney
(3)from top to bottom (fig. (_)).
• Mount upper and lower chimney (3) on the range
hood(l). Fitthetab, which isbendby9Odegrees, iiiiiiiiiiiiiiiiiiiiiiiiiiiiiiiiiiiiiiiiiiiiiiiiiiiiiiiiiiiiiii
into the lower bracket notch and mount to the lower
bracket(5)(fig.@/(_)), iiiiiiiiiiiiiiiiiiiiiiiiiiiiiiiiiiiiiiiiiiiiiiiiiiiiiiiiiiiiiii
• Pulltheupperchimney(3) totheupward positionto
match the screw hole of the upper bracket. Mount to iiiiiiiiiiiiiiiiiiiiiiiiiiiiiiiiiiiiiiiiiiiiiiiiiiiiiiiiiiiiii:
theupperbracket(4) with2sidescrews(12)(fig.(_), iiiiiiiiiiiiiiiiiiiiiiiiiiiiiiiiiiiiiiiiiiiiiiiiiiiiiiiiiiiiiil
iiiiiiiiiiiiiiiiiiiiiiiiiiiiiiiiiiiiiiiiiiiiiiiiiiiiiiiiiiiiiil
fig _!::_-_'_* iiiiiiiiiiiiiiiiiiiiiiiiiiiiiiiiiiiiiiiiiiiiiiiiiiiiiiiiiiiiiii
II _ -_ I iiiiiiiiiiiiiiiiiiiiiiiiiiiiiiiiiiiiiiiiiiiiiiiiiiiiiiiiiiiiii,
_ I_ iiiiiiiiiiiiiiiiiiiiiiiiiiiiiiiiiiiiiiiiiiiiiiiiiiiiiiiiiiiiii:,.
iiiiiiiiiiiiiiiiiiiiiiiiiiiiiiiiiiiiiiiiiiiiiiiiiiiiiiiiiiiiiil
fig.
®
fig.