CCoommppoonneenntt TTeeaarrddoowwnn
4-10
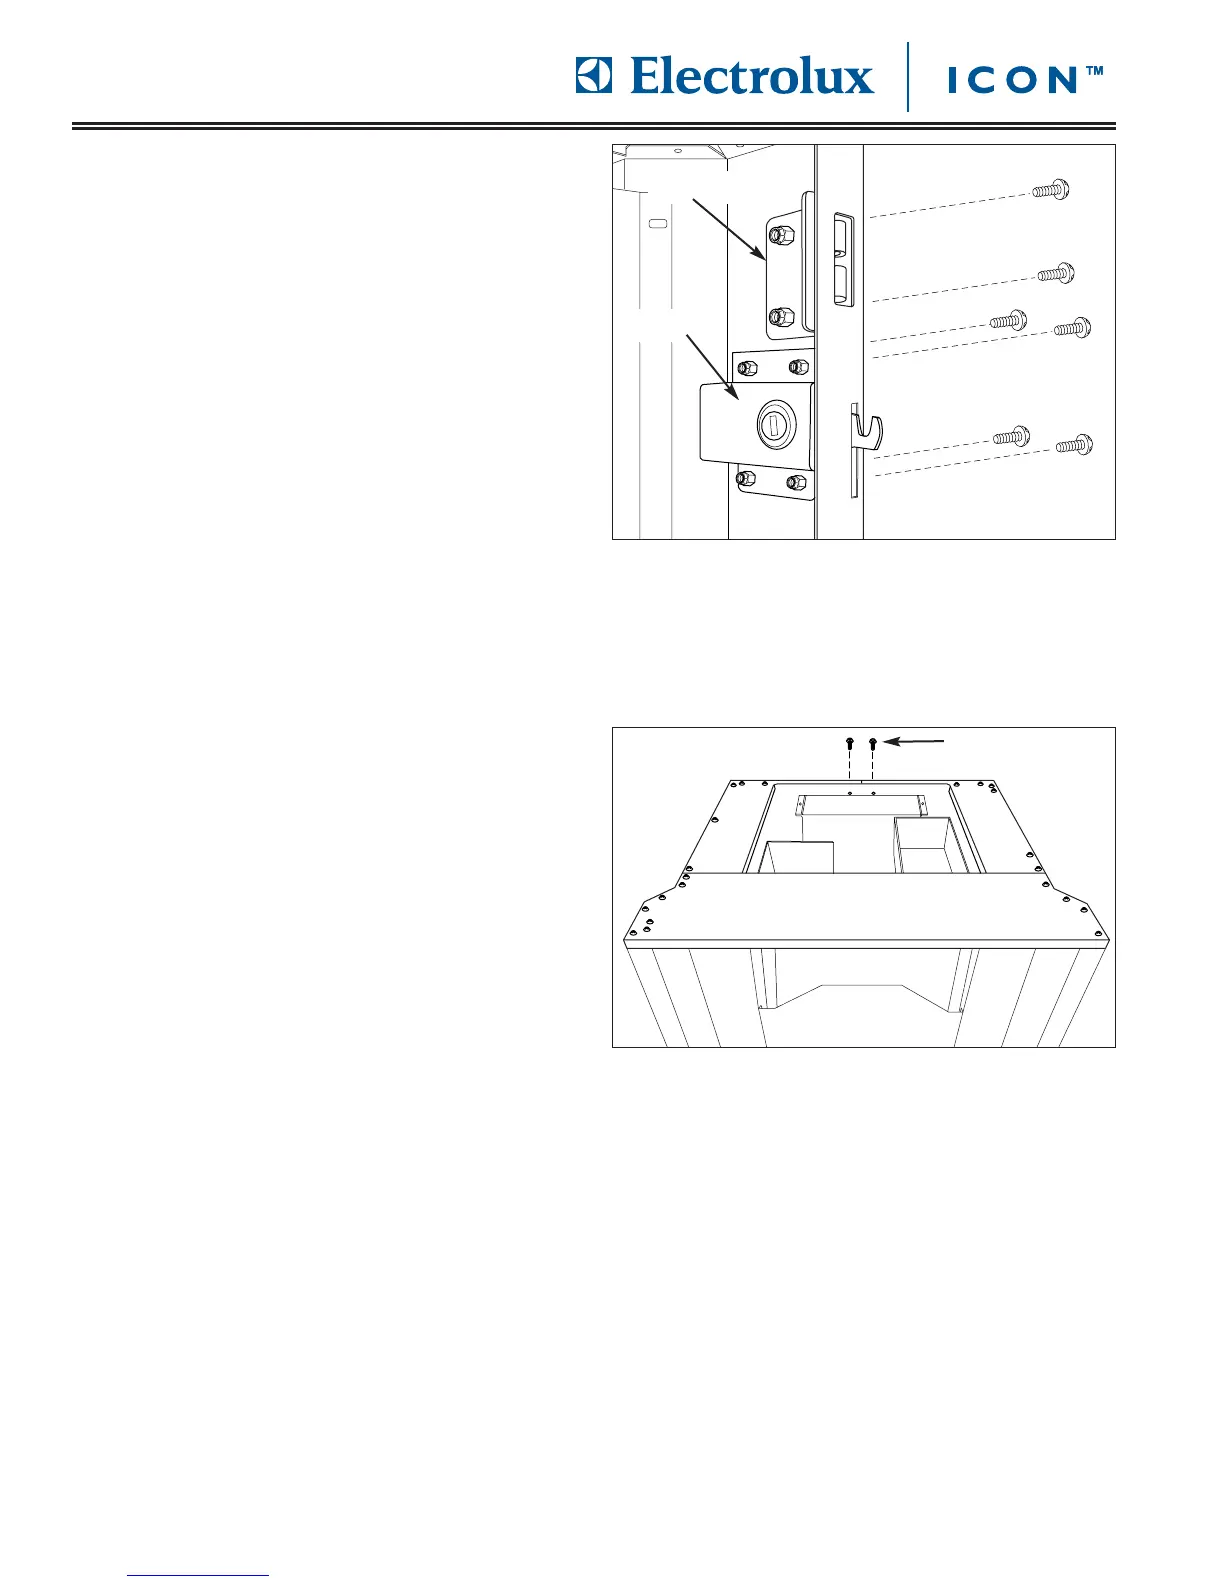
DDoooorr LLoocckk RReemmoovvaall
The door lock is mounted behind the right inner door
panel.
To remove the door lock (See Figure 4-19):
1. Remove drip tray and open door.
2. Remove right side inner door panel.
3. Using a phillips head screwdriver, extract the
screws securing the door lock to unit frame.
DDoooorr PPaawwll RReemmoovvaall
The door pawl is mounted above the door lock behind
the right inner door panel.
To remove the door lock (See Figure 4-19)
1. Remove drip tray and open door.
2. Remove right side inner door panel.
3. Using a phillips head screwdriver, extract screws
securing the door pawl to unit frame.
TToopp SSttaaiinnlleessss SStteeeell CCoovveerr AAsssseemmbbllyy RReemmoovvaall
The top stainless steel cover assembly consists of three
stainless steel panels that are secured with screws to
the unit frame. The three stainless steel panels are
secured together with screws to form an assembly that
is removed as one piece.
To remove the top stainless steel cover assembly (See
Figure 4-20):
1. Pull unit out from installation and remove from the
installation cavity.
2. Remove cover panel.
3. Using a phillips head screwdriver, extract all screws
securing the top stainless steel cover assembly to
the top of unit frame, including screws from the rear
of unit.
4. Lift top stainless steel cover assembly off of unit.
FFiig
guurree 44--1199.. DDoooorr LLoocckk aanndd DDoooorr PPaawwll RReemmoovvaall
FFiigguurree 44--2200.. TToopp SSttaaiinnlleessss SStteeeell CCoovveerr AAsssseemmbbllyy
RReemmoovvaall
Screws
Door Lock
Door Pawl