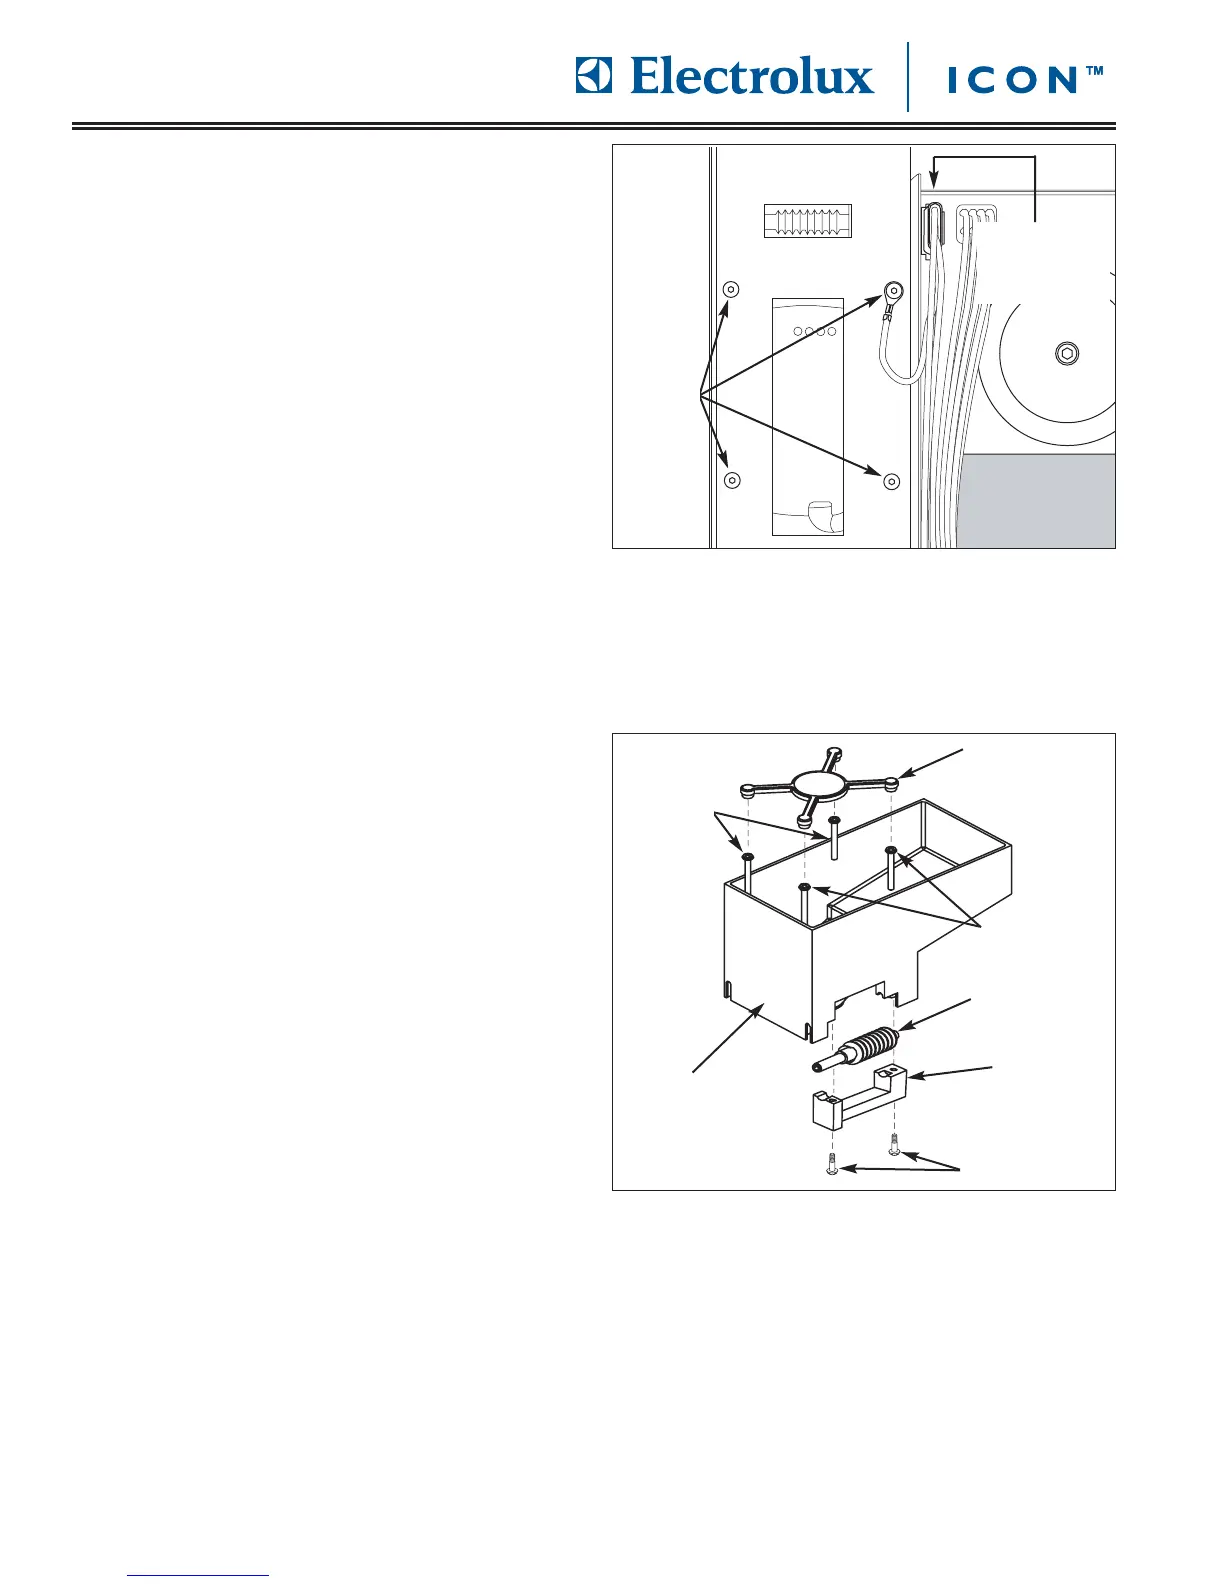
FFiigguurree 44--3355.. GGrriinnddeerr AAddjjuussttmmeenntt SSccrreeww RReemmoovvaall
Internal Screw
Protector
Screws
Adjustment
Screws
Bean
Container
Clamp
Screws
Screws
CCoommppoonneenntt TTeeaarrddoowwnn
4-16
FFiigguurree 44--3344.. GGrriinnddeerr AAsssseemmbbllyy RReemmoovvaall
Disconnect on
Opposite Side
of Frame
Screws
GGrriinnddeerr AAsssseemmbbllyy RReemmoovvaall
The grinder assembly is secured to the inner frame with
screws that pass through the right side frame then
fasten into panel nuts pressed into grinder assembly.
To remove the grinder assembly (See Figure 4-34):
1. Pull unit out from installation and remove from the
installation cavity.
2. Open door and remove drip tray and coffee
grounds drawer from unit.
3. Remove top stainless steel cover assembly and
right side side cover panels.
4. Using a 2.5mm allen wrench, extract screws
securing the grinder assembly to unit frame. The
ground wire will be removed when the upper right
hand screw is removed.
5. Pull grinder assembly away from frame until the
electrical connection is visible. Disconnect electri-
cal connection at quick disconnect by pressing in
on the retaining clips while pulling away from unit
frame.
GGrriinnddeerr AAddjjuussttmmeenntt SSccrreeww RReemmoovvaall
The grinder adjustment screw can be removed without
removing the entire grinder assembly from unit.
However, coffee beans and grounds will need to be
emptied out of the container and the components
cleaned prior to reassembly. Removal of the grinder
assembly from the unit is recommended for that task.
To remove grinder adjustment screw (See Figure 4-35):
1. Pull unit out from installation and remove from the
installation cavity.
2. Open door and remove drip tray and coffee
grounds drawer from unit.
3. Remove top stainless steel cover assembly and
right side side cover panels.
4. Remove grinder assembly.
5. Empty bean container, then pull internal screw pro-
tector from bean container.
6. Using a phillips head screwdriver, extract screws
securing bean container to grinder assembly. Lift
bean container from grinder assembly.
7. From underside of bean container, use a phillips
head screwdriver and extract the screws securing
the grinding screw retainer to bean container. The
adjustment screw can now be removed from bean
container.