E|ectro|ux iNSTRUCTION SHEET
Setting Up The Trim And Grill Assembly
(Single and Dual installations)
,
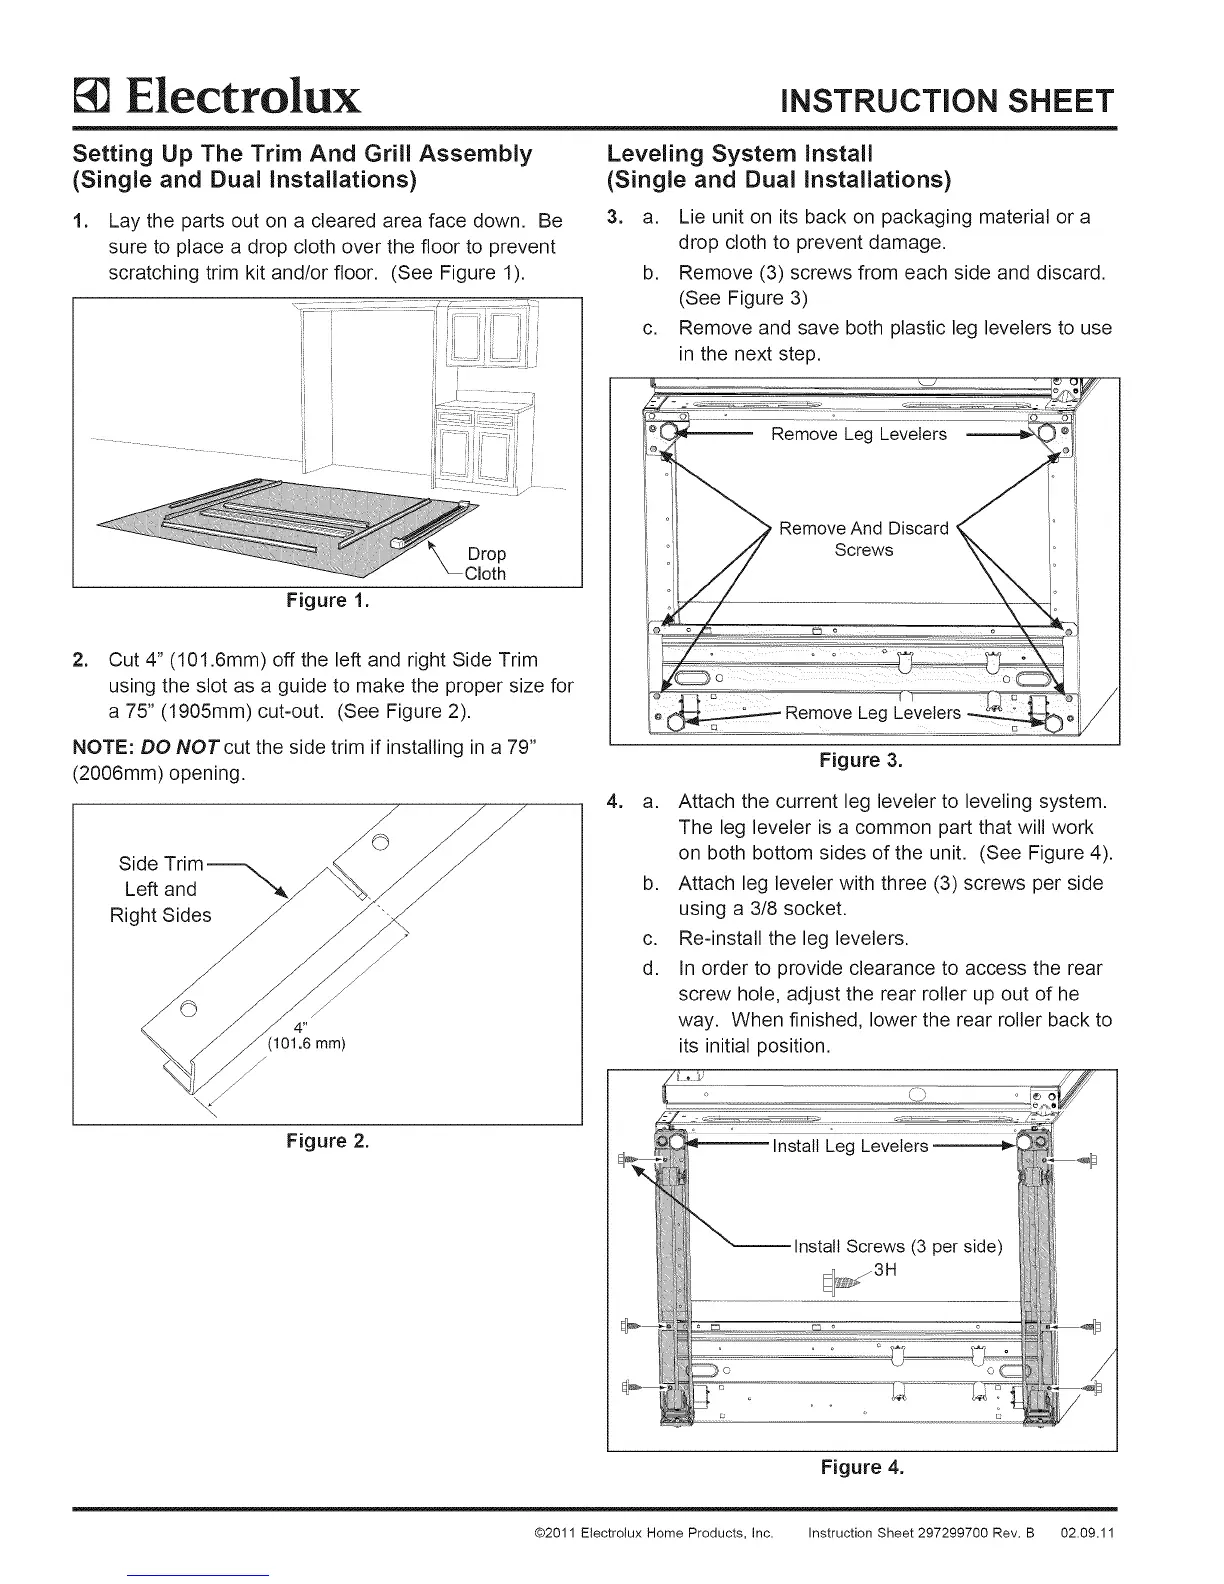
Lay the parts out on a cleared area face down. Be
sure to place a drop cloth over the floor to prevent
scratching trim kit and/or floor. (See Figure 1).
! !_F !
li
!i
::Ji J ! i
' i i
ii
Drop
Cloth
Figure 1.
2. Cut 4" (101.6mm) off the left and right Side Trim
using the slot as a guide to make the proper size for
a 75" (1905mm) cut-out. (See Figure 2).
NOTE: DO NOTcut the side trim if installing in a 79"
(2006mm) opening.
Side
Le_ and
Right Sides
/
Y
4"
(101.6mm)
J
Leveling System Install
(Single and Dual Installations)
3. a. Lie unit on its back on packaging material or a
drop cloth to prevent damage.
b. Remove (3) screws from each side and discard.
(See Figure 3)
c. Remove and save both plastic leg levelers to use
in the next step.
,
Figure 3.
a. Attach the current leg leveler to leveling system.
The leg leveler is a common part that will work
on both bottom sides of the unit. (See Figure 4).
b. Attach leg leveler with three (3) screws per side
using a 3/8 socket.
c. Re=install the leg levelers.
d. In order to provide clearance to access the rear
screw hole, adjust the rear roller up out of he
way. When finished, lower the rear roller back to
its initial position.
Figure 4.
@2011 Etectrolux Home Products, Inc. Instruction Sheet 297299700 Rev. B 02.09.11