6.3
Maintenance
6.1.2 Maintenance of individual
components and systems
Check all accessories independently to verify that they are
functioning as required and replace their components as
necessary. After maintenance restart the compressor
as mentioned in section “Operating instructions”.
6.1.2.1 Pre filter
Pre work
Switch off the compressor and disconnect power supply
to the compressor.
Close the discharge end ball valve.
Release air oil tank pressure and allow the tank to cool
for a few minutes.
Requirements
Compressed air, new pre-filter element (if needed)
Maintenance
Switch off the machine.
Refer to the pre-filter cartridge removal & insert
procedure.
Hold or fix the pre-filter assembly in the cleaning area.
Clean the pre-filter with compressed air at less than 2.5
bar.g (36.3 psi.g) from the reverse or back side of the
pre filter cartridge.
In case of major dust/dirt accumulation in the pre-filter
element, wash with clean water or light detergent.
Do not use any acidic/alkaline chemicals for cleaning.
Repeat this process based on dust
conditions or at regular periodic intervals.
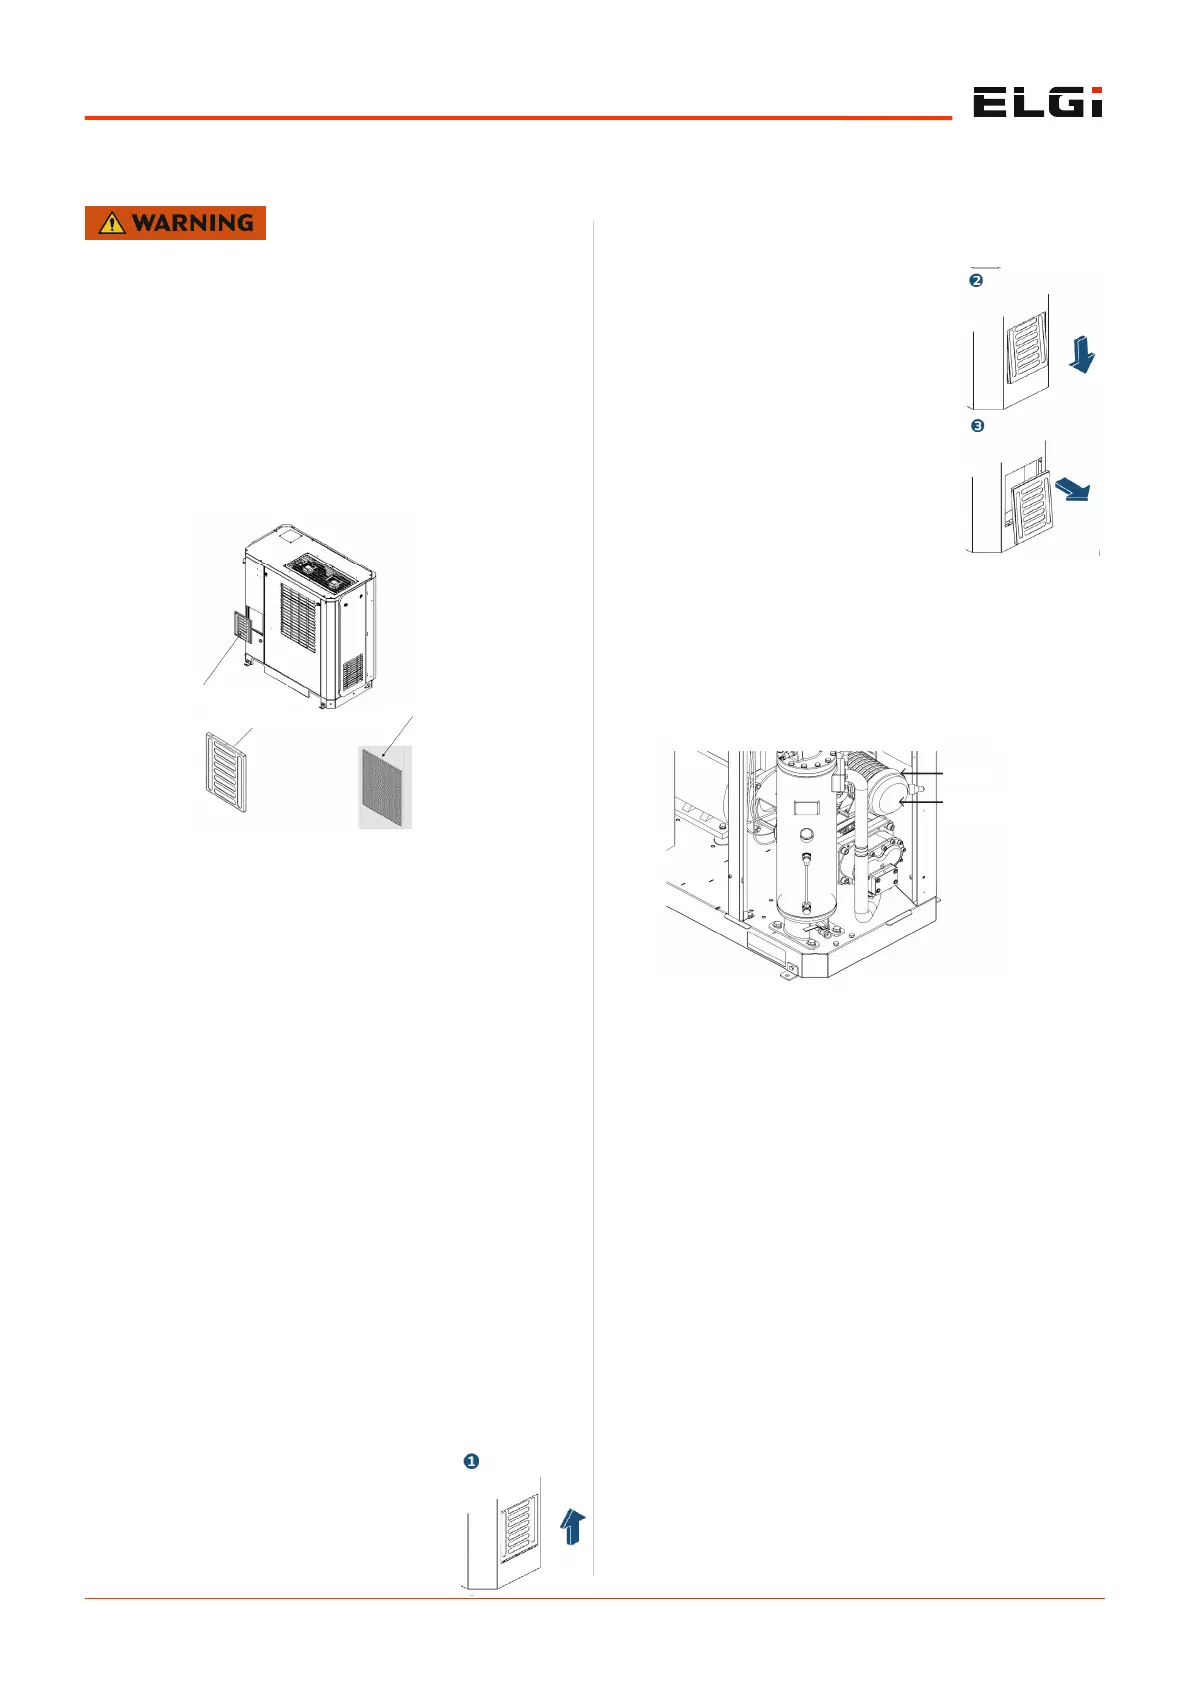
Suction pre-filter cartridge removal
procedure
1. Slide Upward
Hold the pre-filter between the louvers and
slide upwards slightly until the pre-filter bottom edge is
visible
2. Slide Downward
When the pre-filter bottom edge is
visible, slant the pre-filter forward and
slide it downwards away from the
compressor
3. Pull Forward
When the top and bottom edges of the
pre-filter are free from the compressor,
move the pre-filter forward to remove
completely.
Suction pre filter cartridge insert
procedure.
For insert sequence procedure from 3-2-1
6.1.2.2 Air filter
If the air filter clog indicator shows a red colour (meaning
the blocked condition) then the air filter needs to be
cleaned or replaced (if the stipulated life has elapsed).
Pre work
Switch off the compressor and disconnect power supply
to the compressor.
Close the discharge end ball valve.
Release air oil tank pressure and allow the tank to cool
for a few minutes.
Requirements
Compressed air, new filter element (if needed).
Maintenance
Unlock the mounting clips provided on the filter
housing.
Rotate and remove the filter element carefully.
Clean the filter using moisture free compressed air at
less than 2.5 bar.g (36.3 psi.g).
Clean from the inside to outside.
Remove the dust ejector from the filter housing cap and
clean it carefully.
Show bright light from inner side of the filter element to
inspect for damage or holes that result in leaks. Light
Disconnect all the power at the source before attempt to
perform maintenance or make adjustment.
Fig 11. Pre filter
PRE FILTER ELEMENT
PRE FILTER CATRIDGE
PRE FILTER CATRIDGE
Figure 12. Air filter
CLIPS
AIR FILTER END
COVER
 Loading...