EasyManua.ls Logo

Eliminator Lighting ED15 User Manual

Eliminator Lighting ED15
8 pages
To Next Page IconTo Next Page
Page #1 background imageLoading...
Page #1 background image
ED15
USER'S MANUAL
4 Channel Dimmer Pack
RS
ON
10
9876
5
4
3
21
1112
1234
OUTPUT : 5A/CH , TOTAL 15A MAX.
CAUTION!
Warning : This unit must be grounded
N'ouvrez pas..risque de choc electrique
Risk of Electric Shock
DO NOT OPEN
Max
Min
142
3
AUDIO
SENSITIVITY
DMX
Indicator
Power
Indicator
ON
OFF
(1 ) ( 2) ( 3) ( 4) (5 ) ( 6) ( 7) (8 ) ( 9 ) (10)
Dipswitch#
Value
1
8
Program
Single( )
Or
Loop( )
On
Off
2
4
AUDIO MODE
(Dipswitch9=OFF, Dipswitch10=OFF):
AUTO MODE
(Dipswitch9=ON, Dipswitch10=OFF):
Dipswitch#
Value
11
2
4
8
Speed
Program
Single( )
Or
Loop( )
2
4
On
Off
(1) (2) (3) (4) (5) (6) (7) (8) (9) (10)
4 Channel Dimmer Pack
1 : Ground
2 : Data -
3 : Data +
Analog input: DC 0-10V
1. DC +15V 500mA
2. NC
3. Channel 1
4. Channel 2
5. Ground
6. Channel 3
7. Channel 4
8. NC
5
46
37
2
8
1
DMX Address Setting
111234 56 78 9
1
2
4
8
16
32
64
128
256
10 12
D/S
SLAVE MODE
(Dipswitch10=ON):
Dipswitch11:
Channel1- 2 ON(Dimmer) / OFF(Switch)
Dipswitch12:
Channel3- 4 ON(Dimmer) / OFF(Switch)
Question and Answer IconNeed help?

Do you have a question about the Eliminator Lighting ED15 and is the answer not in the manual?

Eliminator Lighting ED15 Specifications

General IconGeneral
BrandEliminator Lighting
ModelED15
CategoryDimmer
LanguageEnglish

Summary

Features

General Instructions

Warnings

Safety precautions for operating the dimmer pack, including grounding and handling.

Cautions

Handling advice for unpacking and potential issues, plus copyright notice.

Control and Functions

1. Front View

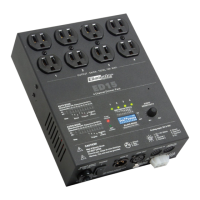
Details the components and indicators on the front panel of the ED15 dimmer pack.

2. Side View

Explains the connectors and power input/output ports on the side of the unit.

Operation Guide

1. Dimmer/Switch Mode

Configures channels for dimmer or switch functionality using dip-switches 11 and 12.

2. Slave Mode

Sets the unit to slave mode for synchronized operation with other units via dip-switches.

3. Auto Mode

Enables automatic built-in programs and effects using dip-switches 9 and 10.

4. Audio Mode

Activates audio-reactive mode, controlling effects based on music beat via dip-switches.

5. Notice Information

Provides important operational notes, safety recommendations, and linking guidelines.

Technical Specifications