- 5 -
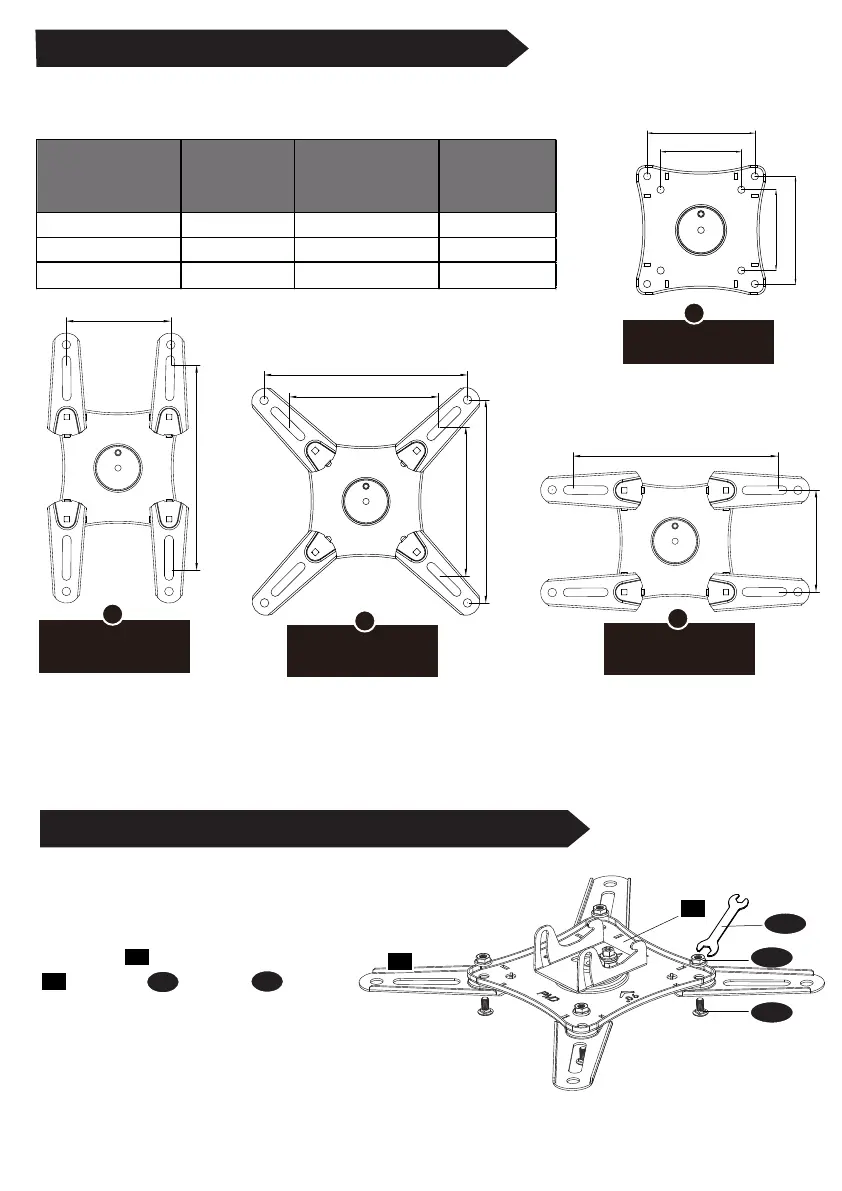
STEP 3-1 Select Monitor Plate Configuration
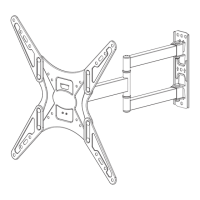
STEP 3-2 Assemble Monitor Plate and Extenders
Select the configuration A , B , C, or D to use based on the measurement from STEP 2.
If your TV hole pattern is greater
than 100x100mm, attach
extenders [03] to monitor plate
[02]using Nut [C] and Bolt [D] .
for VESA hole pattern:
150x150mm, 200x200mm
for VESA hole pattern:
100x200mm
for VESA hole pattern:
200x100mm
B
D
C
for VESA hole pattern:
75x75mm, 100x100mm.
A
VESA Patter
(WxH)
Configuration
VESA Pattern
(WxH)
Configuration
75mm x 75mm A C
100mm x 100mm A D
B C
100mm x 200mm
150mm x 150mm
200mm x 100mm
200mm x 200mm
02
B
D
C
C
D
75mm
100mm
75mm
100mm
200mm
200mm
150mm
150mm
200mm
100mm
200mm
100mm
03
03
02