80
q
w
t
y
t
e
r
w
e
q
u
Replacing the Light Bulb
WARNING:
Turn the power off before replacing the light bulb.
The bulb could be HOT, wait until it has cooled down
before touching it.
To remove:
Remove the cap q and setscrew w.
Unhook the hook r from the rear cover e and
remove the face plate t.
Pull out the light bulb y from the lamp socket u.
To replace:
Insert the light bulb y into the lamp socket u.
Attach the face plate t inserting the ribs and hook r
into the rear cover e. Secure the face plate t with
the setscrew w, and attach the cap q.
NOTE:
Replace the bulb with the same type rated 12V, 5W
(part number 000026002).
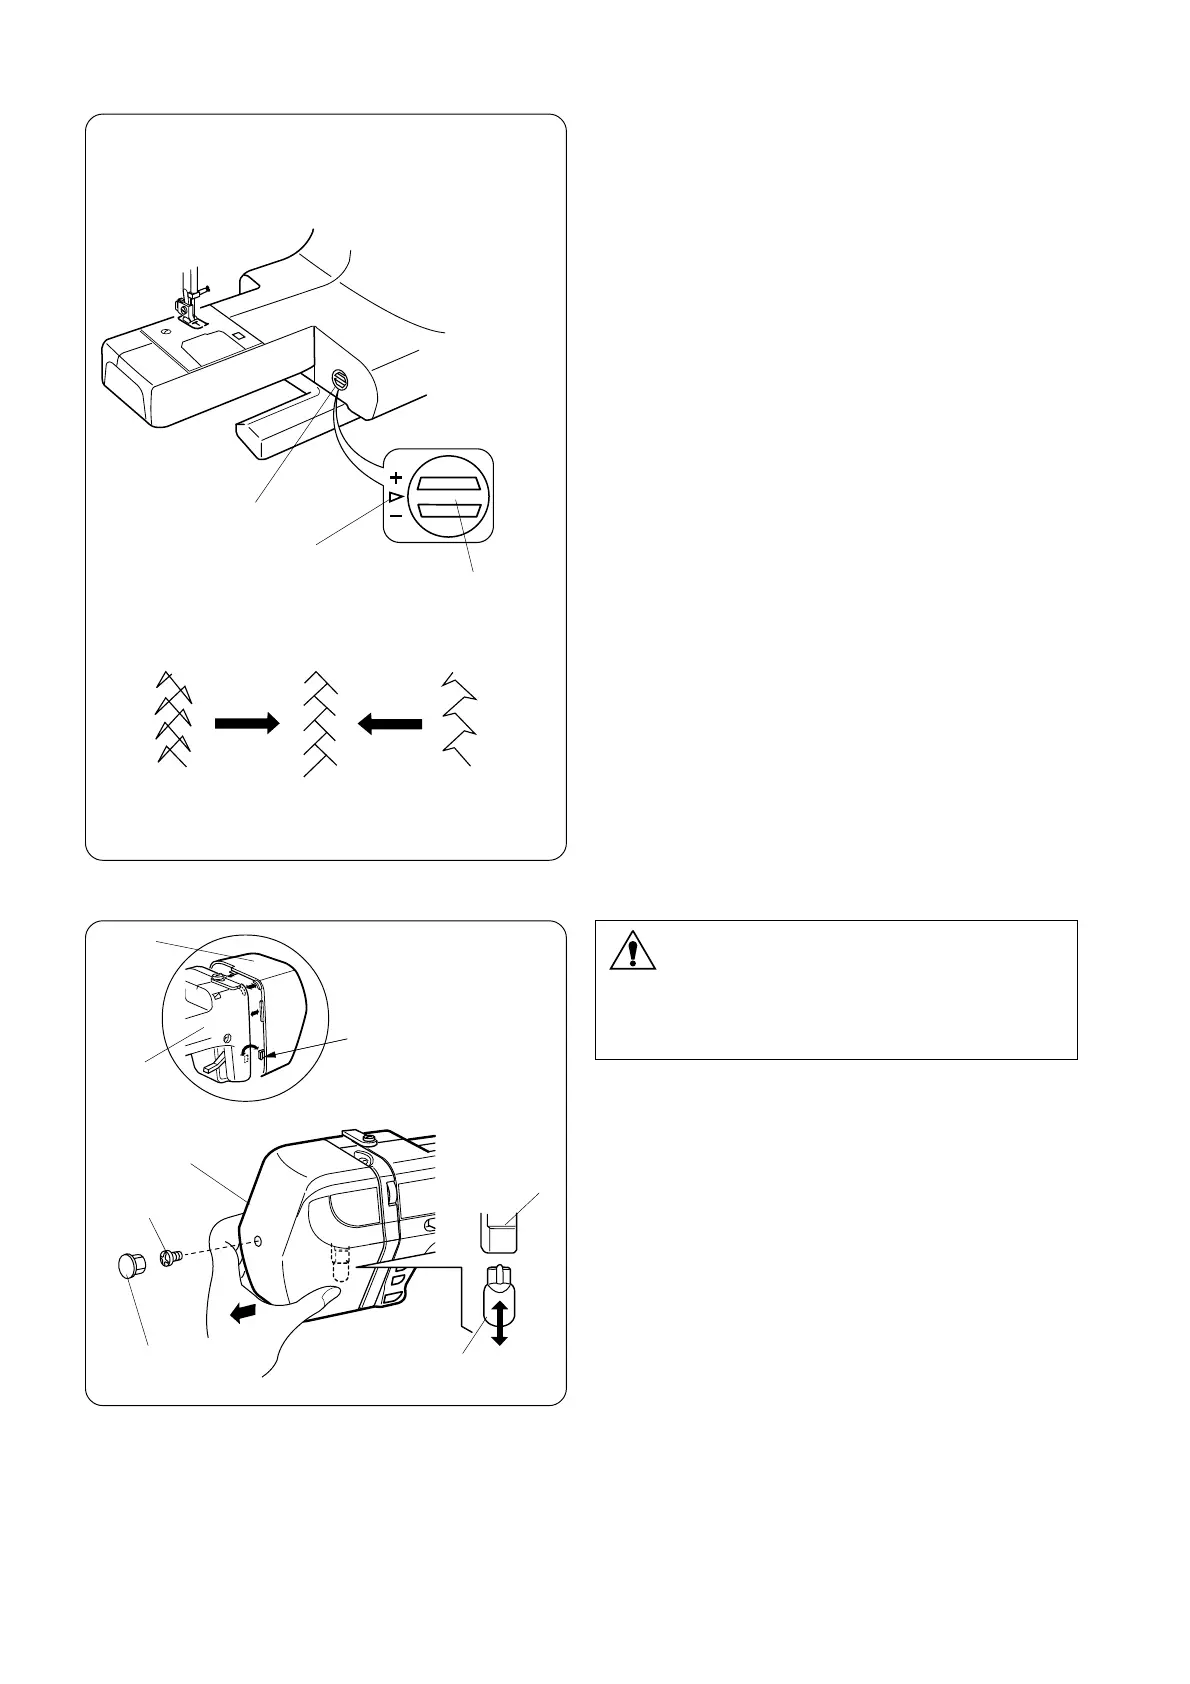
Using the Fine Adjustment Dial
The sewing results of the stretch patterns may vary
depending upon the sewing conditions, such as
sewing speed, type of the fabric, number of layers
etc.
Always test sew on a scrap piece of the fabric that
you wish to use.
If stretch stitch patterns are distorted, correct it with
the fine adjustment dial q.
q Fine adjustment dial
w Standard position
e Setting mark
SECTION V. CARE AND MAINTENANCE
(A) (B)
Example: Pattern #29
(A): If the pattern is compressed, turn the fine
adjustment dial in the direction of “+”.
(B): If the pattern is drawn out, turn the fine
adjustment dial in the direction of “–”.

 Loading...