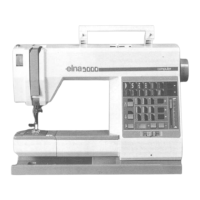
This document is a service manual for the Elna 505 sewing machine, providing detailed instructions for service access and mechanical adjustments. It is designed for technicians or experienced users to perform maintenance and repairs, rather than for general operation.
Function Description:
The Elna 505 is a sewing machine, and this manual specifically covers its service and maintenance aspects. It outlines procedures for accessing internal components and performing precise mechanical adjustments to ensure the machine operates correctly. The manual focuses on the physical structure and mechanical settings of the machine, rather than its sewing capabilities or user-facing features. It details how to dismantle and reassemble various covers, adjust key mechanical parts like the presser bar and needle bar, and set the motor belt tension.
Important Technical Specifications (as inferred from the manual):
- Presser Bar Height: The distance between the bottom of the presser foot and the top of the needle plate should be 4.0 mm (0.16") when the presser foot is in the standard position. This is a critical setting for proper fabric feeding and stitch formation. The manual illustrates a measurement scale on the presser foot with lines at 2 mm, 6 mm, and 10 mm, and indicates that the second line from the top aligns with the bottom of the presser bar.
- Needle Bar Height: When the needle bar is at its lowest position, the distance between the tip of the needle unit and the top of the needle plate should be in the range of 15.7-16.3 mm. The adjustment procedure specifies setting this distance to 16 mm. This precise measurement is crucial for correct needle timing and preventing needle breakage or interference with the needle plate.
- Motor Belt Tension: The belt deflection should be 7 mm - 9 mm when pressing the middle of the motor belt with approximately 300 grams of pressure. This ensures optimal power transmission from the motor to the machine's mechanisms, preventing noise, motor overload, or belt slippage.
- Component Fasteners: Various setscrews are used throughout the machine for securing covers and adjusting mechanical parts. Examples include setscrews for the face cover (B), belt cover (C), base plate (A), front cover (A, B, C, D, E, F, G, H), rear cover (A, B, C, D, E, F, G, H, J, K, L), and adjustment screws for the presser bar (A, thumb screw) and needle bar (A, B).
- Modular Access: The machine's design allows for modular access to internal components. Covers such as the face cover, belt cover, base plate, front cover, and rear cover can be removed independently or in a specific sequence to expose different parts of the mechanism.
- Clear Disassembly/Reassembly Instructions: Each section provides step-by-step instructions for both removing and attaching components, often including notes on specific fasteners or alignment points. For example, the face cover requires removing a cap and setscrew, then unhooking ribs from the rear cover. The front cover removal involves loosening multiple setscrews and unhooking a tab.
- Visual Aids: The manual includes detailed diagrams for each service procedure, illustrating the location of screws, covers, and adjustment points. These diagrams are essential for identifying the correct parts and understanding the spatial relationships of components during service.
- Specific Adjustment Points: The manual clearly identifies the screws and mechanisms used for making adjustments. For instance, the presser bar height is adjusted by loosening a thumb screw and a setscrew (A), while the needle bar height is adjusted by loosening setscrews (A) and (B). Motor belt tension is adjusted by loosening setscrews (A) and (B) on the motor mount.
Maintenance Features (related to service):
- Routine Component Removal: The manual facilitates routine maintenance by detailing how to remove covers for cleaning, lubrication, or inspection of internal parts. For example, removing the belt cover allows access to the motor belt for tension checks and adjustments.
- Precision Adjustments: The instructions emphasize precision in mechanical adjustments, providing specific measurements (e.g., 4.0 mm for presser bar height, 15.7-16.3 mm for needle bar height, 7-9 mm deflection for motor belt). This ensures that the machine operates within factory specifications after service.
- Alignment Procedures: The manual includes procedures for aligning components, such as ensuring the presser foot is parallel to the needle plate and that the needle unit does not interfere with the needle plate. Proper alignment is crucial for smooth operation and preventing damage.
- Troubleshooting Support (implied): While not a troubleshooting guide, the adjustment sections address common issues that can arise from incorrect settings, such as "improper belt tension may cause noise, overload of motor, slow running or motor belt jumping." By providing adjustment procedures, the manual helps resolve these issues.
- Wiring Diagram: A basic wiring diagram for the machine socket unit, including connections for the lamp and motor, is provided. This is essential for electrical troubleshooting and repair.
- Safety Considerations (implied): Although not explicitly stated as safety warnings, the detailed instructions for disassembly and reassembly, along with the emphasis on correct adjustments, implicitly guide the technician to perform service safely and correctly, preventing damage to the machine or injury to the technician. For example, the note to "Be sure the needle unit does not interfear with the needle plate" during needle bar height adjustment prevents potential damage.