QUICK START GUIDE
Download your OMGUARD APP
GB
DE
PL
NL
FR
ES
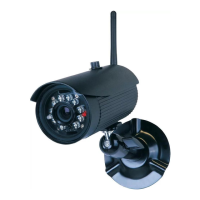
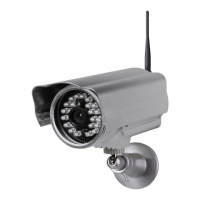
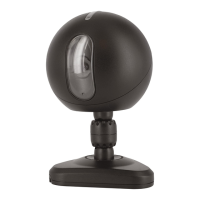
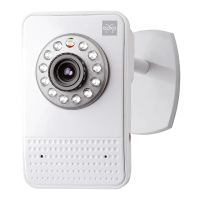
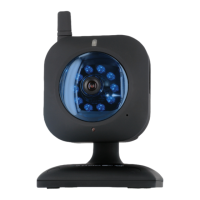
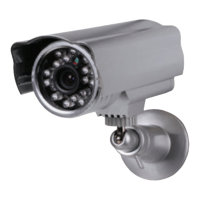
1- Camera x 1, stand x 1, antenna x 1, power adapter x 1, screw pack x 1, manual CD x 1, Quick Start Guide x 1.
2- Power up the camera and receiver. Connect the camera to Wi-Fi router
3- Download the OMGUARD APP from the APP Store or Google Play
4- From the APP, tap Add Camera and search to select the camera connecting to the router
5- Setup WiFi network. Tap Camera Setting , select System Information, enter Advanced (default 123456). Go to WiFi to select the router and
enter router password.
6- (1) Secure camera stand on the stable surface. (2) Loosen up the Thumb screw. (3) Adjust proper view angle then secure the
joint with T-bolt.
1- Kamera x 1, Ständer x 1, Antenne x 1, Netzteil x 1, Schraubensatz x 1, Handbuch-CD x 1, KURZANLEITUNG x 1.
2- Versorgen Sie die Kamera und den Empfänger mit Strom. Verbinden Sie die Kamera mit dem WiFi-Router
3- Laden Sie die App “OMGuard” aus dem APP Store oder von Google Play herunter
4- In der APP, drücken Sie auf Kamera Hinzufügen und Suchen, um die Kamera auszuwählen, die mit dem Router verbunden werden soll
5- Das WiFi-Netzwerk einstellen. Drücken Sie auf Kameraeinstellung, wählen Sie Systeminformationen, öffnen Sie Erweitert (Standard 123456).
Gehen Sie zu WiFi, um den Router auszuwählen und geben Sie das Router-Passwort ein
6- (1) Stellen Sie den Kameraständer auf eine stabile Oberfläche (2) Lösen Sie die Flügelschraube (3) Stellen Sie den richtigen Blickwinkel ein
und sichern Sie dann das Gelenk mit einem T-Bolzen
1- 1 kamera, 1 stojak, 1 antena, 1 zasilacz, 1 zestaw wkrętów, 1 płyta CD z instrukcją obsługi, 1 skrócona instrukcja użytkownika.
2- Zasilanie kamery i odbiornika.Podłącz kamerę do routera WiFi
3- Pobierz aplikację „OMGuard” z APP Store lub Google Play
4- W aplikacji stuknij „dodaj kamerę oraz wyszukaj“, aby podłączyć kamerę do routera,
5- Konfiguracja sieci WiFi. Stuknij „ustawienia kamery“, wybierz „informacje o systemie“, wejdź w „ustawienia zaawansowane“ (domyślne:
123456).Przejdź do WiFi i wybierz router, a następnie wprowadź hasło routera.
6- (1) Zamocuj kamerę na stabilnej powierzchni. (2) Poluzuj śrubkę. (3) Dopasuj właściwy kąt widzenia, a następnie zabezpiecz śrubą stopową
1- Camera x 1, Camera Stand x 1,Camera Antenna x 1, Power Adapter x 1, Screw Pack x 1, Manual CD x 1, Snelstartgids x 1.
2- Zet de camera en ontvanger aan. Sluit de camera aan op de Wi-Fi router
3- Download de “OMGuard” APP uit de APP Store of via Google Play
4- In de APP, tikt u op camera toevoegen en zoek naar de camera die verbonden moet worden met de router.,
5- Instellen WiFi netwerk. Tik op camera instellingen, selecteer systeeminformatie, voer in Gevorderd (fabrieksinstellingen123456). Ga naar WiFi
om de router te selecteren en het wachtwoord van de router in te voeren.
6- (1) Bevestig de camera standaard op een stabiele ondergrond. (2) Draai de vleugelmoer los. (3) Stel de juiste kijkhoek in en vergrendel deze
dan met de vleugelmoert.
1- Caméra x 1, support x 1, antenne x 1, adaptateur d'alimentation x 1, jeu de vis x 1, manuel sur CD x 1, guide de démarrage rapide x 1.
2- Mettez en marche la caméra et le récepteur. Connectez la caméra au routeur WiFi
3- Téléchargez l'application « OMGuard » depuis les boutiques d'applications APP Store ou Google Play
4- Depuis l'application, appuyez sur « Add camera » et « Search » pour sélectionner la caméra à connecter au routeur,
5- Configuration du réseau WiFi. Touchez « Réglage de la caméra », sélectionnez « Information du système », accédez à « Avancé » (par défaut
123456).Accédez à WiFi pour sélectionner le routeur et saisissez le mot de passe du routeur.
6- (1) Fixez le support de caméra sur une surface solide. (2) Desserrez la vis moletée. (3) Réglez correctement l'angle de vision puis fixez le joint
avec le boulon en T.
1- Cámara x 1, Soporte x 1, Antena x 1, Adaptador x 1, Paq. tornillos x 1, Manual de CD x 1, Guía rápida x 1.
2- Conecte la cámara y el receptor. Conecte la cámara al router wifi
3- Descargue la aplicación “OMGuard” de APP Store o Google Play
4- Desde la APP, pulse Añadir cámara y Buscar para seleccionar la cámara que se conecte al router.
5- Prepare la red de wifi. Pulse Configuración de la cámara, seleccione Información del sistema y entre en Avanzado (pred. 123456). Vaya a
WiFi, seleccione el router e introduzca la contraseña del router.
6- (1) Asegure el soporte en superficie estable (2) Afloje el tornillo de muletilla (3) Ajuste un ángulo apropiado y asegure la junta con un tornillo
1
2
3
4
5
6
C905IP