5
5
2.1 The EBW25 must be vertically wall mounted using the bracket supplied.
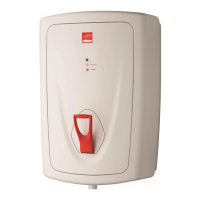
2.2 Figure.1 (p.6) details the outside dimensions of the EBW25 unit. It is
recommended that the unit is positioned above the draining board. If this is not
possible consideration should be given to any spillages that may occur under the
appliance. The heater should be positioned at a height to suit the items being
fi lled (fl asks, pans, cups etc.). This is likely to position the base of the unit
250mm above the work surface.
2.3 Suffi cient room should be left around the heater for access for maintenance
and servicing. The top should not be covered as this will reduce the effi ciency
of the EBW25.
2.4 Ensure that the wall can support the full weight of the unit (see TECHNICAL
SPECIFICATIONS, p.3) and that there are no hidden services (electricity, gas
or water) below the surface of the wall.
2.5 Using the backplate mark the fi xing positions and water and vent entry points.
Drill and plug the fi xing positions. Fix the mounting bracket to the wall using
the two No. 12x2” screws provided (confi rm suitability of all screws and plugs
for use with the wall, if unsuitable due to wall type provide alternative fi xings)
2.6 If rear entry services are to be used the necessary holes for these should be
prepared prior to hanging the unit onto its bracket.
2.7 Remove the front cover by unscrewing the top and bottom cover fi xing screws
bottom and top. Hang the EBW25 onto the wall mounting bracket. Secure
anchor point to the wall with the No.8 x 1” screw (provided).
2.0 INSTALLATION - MOUNTING