RL. 00 4/2011Cod. S6I.560.A00
ART. 560A
ISTRUZIONI PER IL COLLEGAMENTO DELLA TELECAMERA CCD CON POSTO
ESTERNO PER VIDEOCITOFONO CON O SENZA CAVO COASSIALE
WIRING INSTRUCTIONS OF CCD CAMERA WITH SPEECH UNIT FOR VIDEO-ENTRY
SYSTEM WITH OR WITHOUT COAXIAL CABLE
INSTRUCTIONS POUR LE RACCORDEMENT DE LA CAMÉRA AVEC POSTE EXTENE
POUR PORTIER VIDÉO AVEC OU SANS CABLE COAXIAL
ANLEITUNG FÜR DEN ANSCHLUSS DER CCD-KAMERA MIT SPRECHSTELLE FÜR
VIDEOTÜRSPRECHANLAGEN MIT ODER OHNE KOAXKABEL
INSTRUCCIONES PARA EL CONEXIONADO DE LA CÁMARA CCD CON APARATO
EXTERNO PARA VÍDEO-PORTERO CON O SIN CABLE COAXIAL
INSTRUÇÕES PARA A LIGAÇÃO DA TELECÂMARA CCD COM POSTO EXTERNO
PARA VIDEO-PORTEIRO COM O SEM CABO COAXIAL
Il prodotto è conforme alla direttiva europea 2004/108/CE e successive.
Product is according to EC Directive 2004/108/CE and following norms.
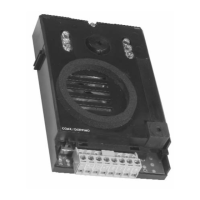
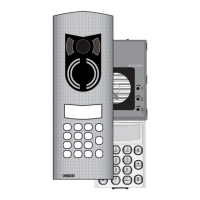
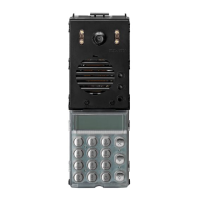
Questo tipo di unità di ripresa CCD è munito anche di un posto ester-
no audio. Può essere montata solo su targhe serie GALILEO e 8100.
CARATTERISTICHE
- Sensore CCD 1/4"
- Obiettivo autoiride 3,7 mm F4,5 fuoco fisso
- Controllo automatico della luminosità
- Uscita video standard CCIR 625 linee 50 quadri
- Tensione di uscita video 1 Vpp su carico di 75 Ohm
- Temperatura di funzionamento -5° +50° C
- Alimentazione 12 Vcc 2VA
- Livello di illuminazione al soggetto minimo 0,5 lux
-
Microfono separabile per eliminare l’effetto LARSEN
- Illuminatore al l’in fra ros so
- Morsettiera estraibile
- Regolazione volume interno
- Switch di commutazione, coassiale (coax), senza coassiale
(doppino)
I
This CCD camera is supplied complete with speech unit. Camera to
be mounted on entrance panels series GALILEO and 8100.
CHARACTERISTICS:
- CCD 1/4" sensor
- 3.7mm F4,5 auto-iris lens with non-adjustable focus
- Automatic brighteness control
-Vi deo signal output standard CCIR, 625 lines, 50 images
- Video output voltage 1Vpp on 75Ohms
- Operating temperature -5° +50°C
- 12V D.C. 2VA supply
- Minimum lighting level 0,5 lux
- Splittable microphone to eliminate the LARSEN effect
- Infrared lighting
- Removable terminal block
- Internal volume setting
- Switcher, coaxial (coax), without coaxial (telephone cable)
GB
Posizionare lo switch nella posizione coax per il funzionamento in
impianti con cavo coassiale (leva a sinistra); nella posizione “DOPP”
per il funzionamento in impianti con doppino twistato (senza cavo
coassiale, leva a destra).
Funzionamento in doppino (leva switch a destra)
coax doppino
Eseguire i collegamenti.
Alla te le ca me ra:
- Morsetto - (negativo alimentazione)
- Morsetto M/V1, V/V2 (segnale video)
- Morsetti +T (alimentazione 12 Vcc)
Al posto esterno:
- Morsetti 5 - 8 (al to par lan te)
- Morsetti 6 - 7 (microfono am pli fi ca to)
N.B. Nel collegamento della telecamera 560A con l’alimentatore
Art. 6680 eseguire il ponte tra i morsetti 5 e 6. Nel collega-
mento con l’alimentatore Art. 6568 eseguire il ponte tra i
morsetti - e 7.
Il volume del microfono della telecamera 560A è tarato in fab-
brica per l'alimentatore Art. 6680. Per il funzionamento con l'Art.
6568 potrebbe essere necessario tarare il microfono agendo sul
potenziometro VI (retro della telecamera 560A).
Funzionamento in coassiale (leva switch a sinistra)
coax doppino
Eseguire i collegamenti. Alla te le ca me ra:
- Morsetto - (negativo alimentazione)
- Morsetto V/V2 (segnale video)
- Morsetto M/V1 (massa video)
- Morsetti +T (alimentazione 12 Vcc)
Al posto esterno:
- Morsetti 5 - 8 (al to par lan te)
- Morsetti 6 - 7 (microfono am pli fi ca to)
Ai pulsanti di chiamata.
N.B. Nel collegamento della telecamera 560A con l’alimentatore
Art. 6680-6580-6581 eseguire il ponte tra i morsetti 5 e 6.
Set the switch in “coax” position on installations with coaxial cable
(lever-swiitch on the left hand side); in “DOPP” position on installa-
tions with twisted telephone cable (i.e. without coaxial cable, lever-
switch at the right hand side).
Operation with telephone cable (lever-switch on the right hand side).
coax telephone cable
Carry out wirings.
To camera:
- Terminal - (supply negative line)
- Terminal M/V1, V/V2 (video signal)
- Terminal +T (12V D.C. supply)
To outdoor unit:
- terminals 5 - 8 for loudspeaker
- terminals 6 - 7 for amplified microphone
N.B.
In camera type 560A connection with power supply type 6680-
carry out the jumper between terminals 5 and 6. On connec-
tion with power supply type 6568-carry out the jumper
between terminals - and 7.
The microphone volume of camera type 560A is adjusted in the fac-
tory for power supply Art. 6680. For the operation with type 6568 it
could be necessary to adjust the microphone by using the potentio-
meter VI (on the back of camera 560A).
Operation with coax cable (lever-switch at the left hand side).
coax telephone cable
Carry out wirings. To camera:
- Terminal - (supply negative line)
- Terminal V/V2 (video signal)
- Terminal M/V1 (video ground)
- Terminal +T (12V D.C. supply)
To outdoor unit:
- terminals 5 - 8 for loudspeaker
- terminals 6 - 7 for amplified microphone
- to call push-buttons
N.B. In camera type 560A connection with power supply type
6680-6580-6581 carry out the jumper between terminals 5
and 6.