20
EMS Series User Manual
www.emacoustics.co.uk
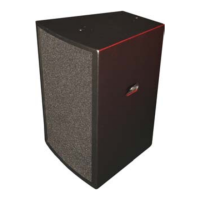
EMS-215: Low Frequency Drive Units
NOTE: ONLY ATTEMPT TO REMOVE DRIVE UNITS WITH THE EMS-215 IN AN UPRIGHT POSITION!
1. Carefully lift the foam along the long edges of the grille to expose the three locating screws on each side.
Using a No.2 Pozidrive screwdriver, undo these screws and keep them to one side.
2. Insert a flat bladed screwdriver between the enclosure and the long edge of the grille, and gently lever the
grille upwards. This will ease it out of its locating slots down the shorter sides.
3. Using a 10mm spanner or socket driver, undo the six M6 hex head bolts holding the lower drive unit in place.
Remove these bolts and ensure that you have both shake-proof and flat washers.
4. Lift the drive unit out of the mounting hole, ensuring that you do not hit the drive unit above when removing
it. Take care as the drive units are very heavy. Disconnect the cables before lifting the drive unit clear.
5. To remove the other drive unit, turn the enclosure the other way up and repeat the procedure.
6. To reinstate the drive unit, simply reverse the procedure above, ensuring that you have the correct polarity on
the drive unit cables (red cable to positive terminal, black cable to negative).
7. Reinstate the grille by easing into one side slot, then gently applying a curve to the grille to ease it into the
other side.
8. Reinstate the six Pozidrive screws to secure the grille in place.

 Loading...