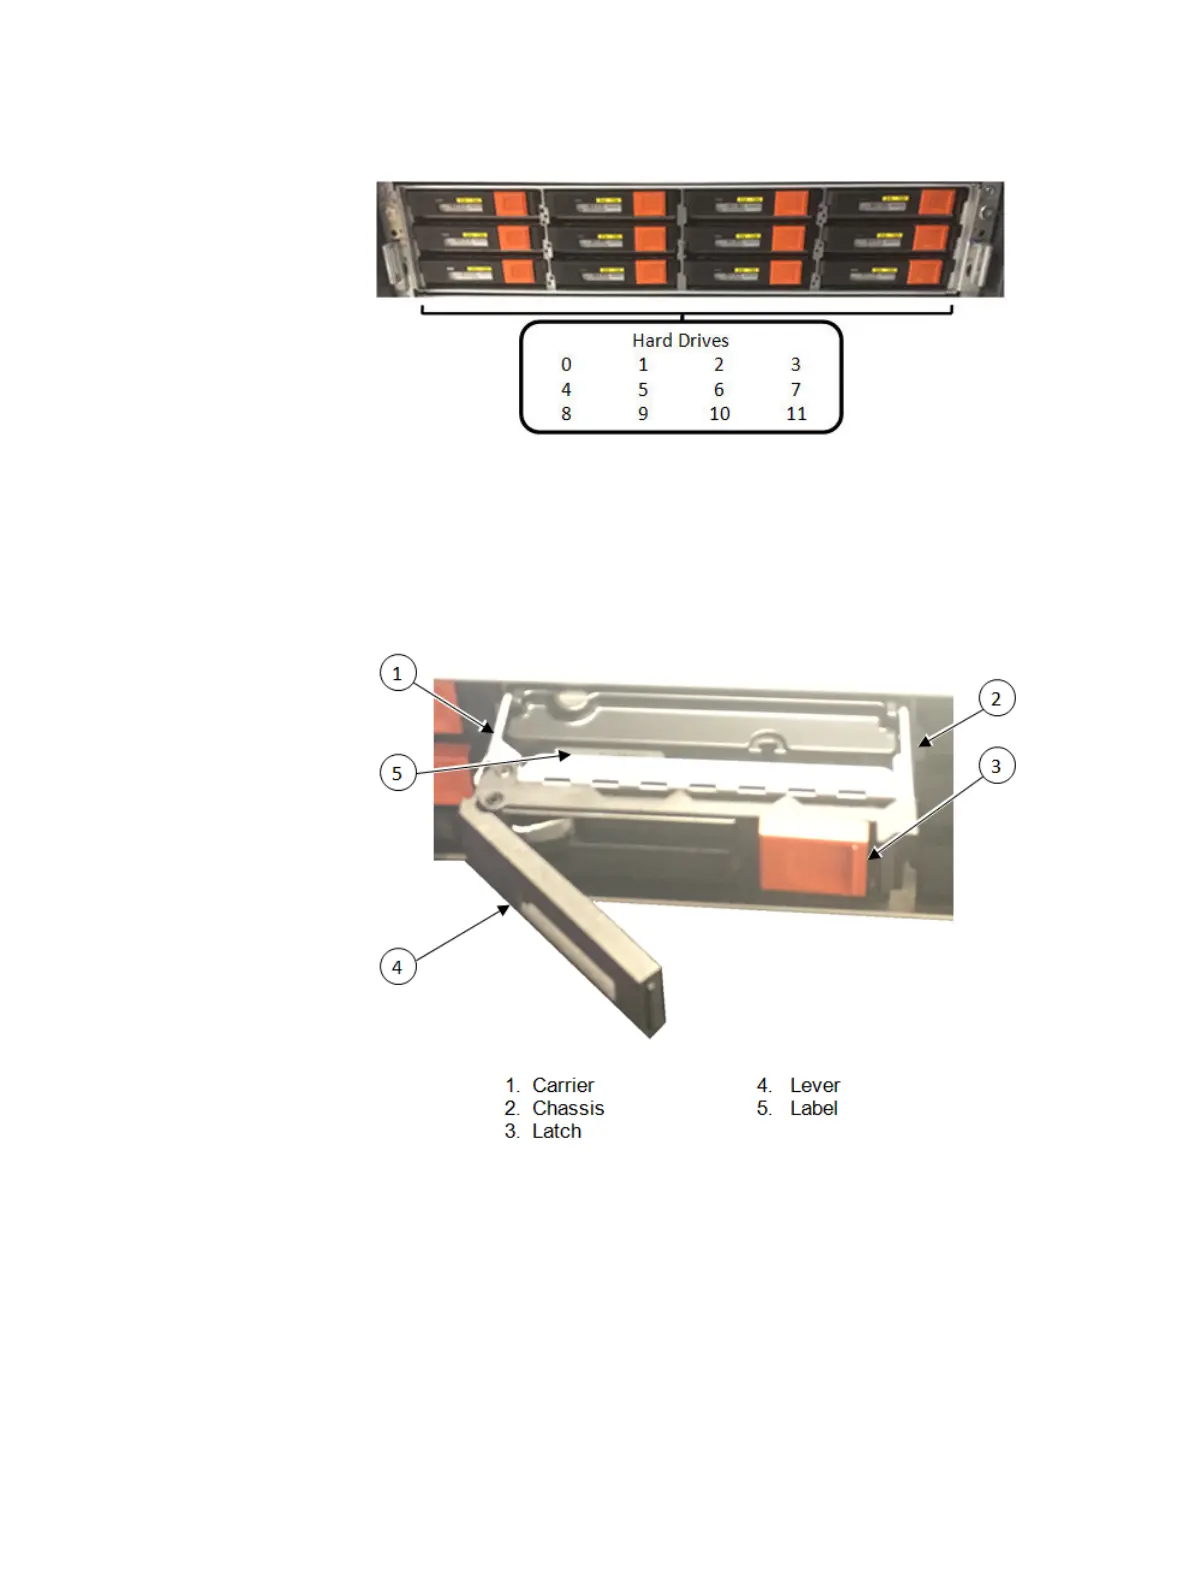
Figure 8 Front View
Use this physical location numbering sequence to identify the defective hard drive for
all node types. Typically, the hard drive LED turns solid amber when the hard drive has
failed.
4. Compare the label on the front of the defective and replacement hard drives to ensure
that you are replacing the defective hard drive with the same equipment.
Figure 9 Hard Drive Removal
5. On the carrier containing the defective hard drive, slide the orange latch to the right to
unlock the lever. Pull the lever open.
6. Pull the carrier forward and remove the carrier from the chassis.
Replacing a Hard Drive
20 EMC Avamar Data Store Gen4T Customer Service Guide