EasyManua.ls Logo

Emerson Copeland XCM25D - User Manual

Emerson Copeland XCM25D
3 pages
To Next Page IconTo Next Page
Loading...
RGL-Unit-LOCU-XCM25D/EGF/Rev00 1/3
Date of last update: Mar-20
Ref: RGL-Unit-LOCU-XCM25D/EGF/Rev00
Application Engineering Europe
XCM25D REPLACEMENT GUIDELINES
XCM25D REGLERAUSTAUSCH KURZANLEITUNG
XCM25D GUIDE DE REMPLACEMENT
1 Controller replacement
1 Regleraustausch
1 Remplacement du régulateur
This manual describes the working
steps required to replace the XCM25D
controller on an OMTE/CFMTE or
OLTE/CFLTE unit in case of damage.
Diese Kurzanleitung beschreibt die
Arbeitsschritte zum Austausch eines
XCM25D bei Regler-Ausfall an einem
OMTE/CFMTE- oder OLTE/CFLTE-
Verflüssigungssatz.
Ce guide décrit les étapes nécessaires
pour effectuer le remplacement du
régulateur XCM25D sur un groupe
OMTE/CFMTE ou OLTE/CFLTE en cas
de panne.
The spare parts kit contains 3 "Hot
Keys", one for each unit family
(OMTE/CFMTE & OLTE/CFLTE).
Dem Ersatzteilkit liegen 3 “Hot Keys” bei,
einer für jede Familie (OMTE/CFMTE &
OLTE/CFLTE).
Le kit de remplacement inclut 3 « Hot
Keys », une pour chaque famille de
groupes de condensation
(OMTE/CFMTE & OLTE/CFLTE).
Interrupt the power supply of the unit.
Disconnect the protection connectors.
Disconnect all the wires from the upper
and lower parts of the controller and
connect them to the new controller at
the same terminals as before.
Unterbrechen Sie die Spannungs-
versorgung.
Entfernen Sie die Schutzstecker.
Entfernen Sie alle Anschlussdrähte vom
alten Regler. Bringen Sie die
Flachsteckhülsen an gleicher Stelle am
neuen Regler an.
Couper l’alimentation du groupe.
Débrancher les connecteurs de
protection.
Débrancher les câbles et les rebrancher
sur le nouveau régulateur aux mêmes
bornes que précédemment.
Unlock the 4 locks on the controller.
Remove the defective controller and
mount the new controller in its place.
Entsichern der Regler-Halterungen.
Entfernen des defekten Reglers.
Einbau und Fixierung des neuen Reglers.
Dévisser les 4 cales.
Ôter le régulateur défectueux.
Monter le nouveau régulateur à la place
de l’ancien.
Question and Answer IconNeed help?

Do you have a question about the Emerson Copeland XCM25D and is the answer not in the manual?

Emerson Copeland XCM25D Specifications

General IconGeneral
BrandEmerson
ModelCopeland XCM25D
CategoryController
LanguageEnglish

Summary

Controller Replacement

Spare Parts Kit Contents

The spare parts kit contains three 'Hot Keys', one for each unit family (OMTE/CFMTE & OLTE/CFLTE).

Controller Replacement Procedure

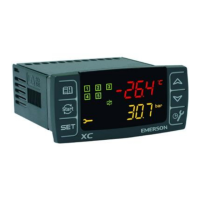
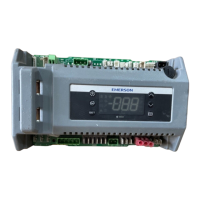
Steps to replace the XCM25D controller, including power interruption, wire disconnection, and mounting the new unit.

Parameter Uploading

Upload Process Overview

Steps to upload parameters from a 'Hot Key' to the controller, including inserting the key and controller restart.

Error Handling During Upload

Procedure for handling 'Err' message during programming, suggesting restart or aborting the operation.

Programming Parameters

Accessing Pre-Program Level

Press SET+ together for 3 seconds to access the pre-programming level, indicated by 'rtC'.

Accessing Program Level

Press Up or Down key until 'PAR' appears to access the main program level.

Accessing Pr1 and Pr2

Steps to access Pr1 by pressing SET, and Pr2 by navigating to T18 and confirming with SET.

Password Entry for Parameters

Input password [321] using arrow keys and confirm each digit with SET to access parameter settings.

Parameter Navigation and Modification

Selecting Parameters and Submenus

Use arrow keys to select parameters or submenus for modification.

Displaying and Modifying Values

Press SET to show value, then use arrows to modify it.

Confirming and Storing Changes

Press SET to confirm value; it blinks for 3 seconds before showing the next parameter.

Exiting Programming Mode

Press SET+ simultaneously or wait 30 seconds (MTO) to exit the programming mode.

Related product manuals