1592002211 XT110-111C-D GB R.1.0 04.05.11 XT110C – XT111C - XT110D – XT111D 1/4
XT110C - XT111C - XT110D - XT111D
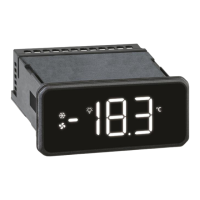
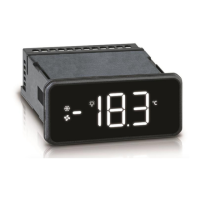
Single Stage Digital Controller
with Multi Probe Input
1. GENERAL WARNING
1.1 PLEASE READ BEFORE USING THIS MANUAL
This manual is part of the product and should be kept near the instrument for easy and quick reference.
The instrument shall not be used for purposes different from those described hereunder. It cannot be used as
a safety device.
Check the application limits before proceeding.
1.2
SAFETY PRECAUTIONS
Check the supply voltage is correct before connecting the instrument.
Do not expose to water or moisture: use the controller only within the operating limits avoiding sudden
temperature changes with high atmospheric humidity to prevent formation of condensation
Warning: disconnect all electrical connections before any kind of maintenance.
The instrument must not be opened.
In case of failure or faulty operation send the instrument back to the distributor or to “DIXELL S.r.l.” (see
address) with a detailed description of the fault.
Consider the maximum current which can be applied to each relay (see Technical Data).
Ensure that the wires for probes, loads and the power supply are separated and far enough from each other,
without crossing or intertwining.
In case of applications in industrial environments, the use of mains filters (our mod. FT1) in parallel with
inductive loads could be useful.
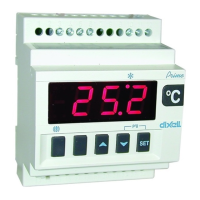
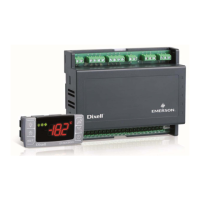
2. GENERAL DESCRIPTION
The XT110C, XT111C and XT110D, XT111D (DIN RAIL format) are single-stage ON/OFF controllers for
temperature, humidity and pressure applications with direct or inverse action, user-selectable. The
analogue input type can be set by parameter between the following, according to the model:
- PTC, NTC;
- PTC, NTC, Pt100, Thermocouple J, K, S;
- 4÷20mA, 0÷1V, 0÷10V.
3. FIRST INSTALLATION
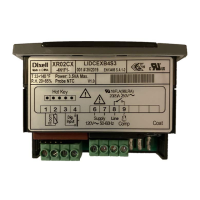
3.1 PROBE SETTING
The pre-set probe type is written on the label of the instrument,
see picture. If it is different from the probe that has be used, set
the probe following procedure below
3.1.1 How to set the probe.
1. Enter the programming menu by pressing the SET+ n for 3s.
2. Select the Pbc (Probe configuration) parameter and push the SET key.
3. Set the kind of probe:
a. Controller for temperature: Pt= Pt100, J = J thermocouple, c = K thermocouple, S = S
thermocouple; Ptc = PTC; ntc = ntc.
b. Controller with current or voltage inputs: cur=4÷20mA, 0-1= 0÷1V, 10= 0÷10V
4. Push the SET key to confirm it.
5. Switch the controller off and on again.
NOTE: Before proceeding check and, if necessary; set with appropriate values the Minimum Set Points
(LS1 e LS2) and Maximum Set Points (US1 e US2). See also the paragraphs concerning the
programming.
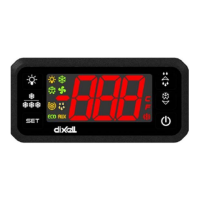
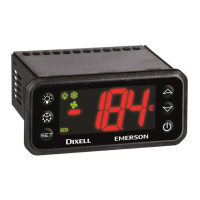
4. FRONT PANEL COMMANDS
SET: To display and modify target set point;
in programming mode it selects a
parameter or confirm an operation.
TO SWITCH THE INSTRUMENT
ON/OFF: If the function is enabled (par.
onF=yES), by pressing the SET key for
more than 4s the controller is switched
OFF. To switch the instrument on again
press the SET key.
o
UP: in programming mode it browses the
parameter codes or increases the
displayed value. Hold it pressed for a
faster change
n DOWN: in programming mode it browses
the parameter codes or decreases the
displayed value. Hold it pressed for a
faster change
KEY COMBINATIONS:
o + n
To lock & unlock the keyboard.
SET + n To enter in programming mode.
SET + o To return to the room temperature display.
4.1 USE OF LEDS
A series of light points on the front panels is used to monitor the loads controlled by the instrument. Each
LED function is described in the following table.
LED MODE FUNCTION
ON Output relay enabled
LED1 Flashing - Programming Phase (flashing with LED2)
LED2 Flashing - Programming Phase (flashing with LED1)
E.S. ON Energy saving activated by digital input
ON - ALARM signal
- In “Pr2” indicates the parameter is also present in “Pr1”
4.2 TO SEE THE SETPOINT
1. Push and release the SET key to see the Set point value;
2. To come back to the normal display push again the SET key or wait 10s.
4.3 TO CHANGE THE SETPOINT
1. Hold pushed the SET key for 3s to change the Set point value;
2. The value of the set point will be displayed and the LED1 & 2 start blinking;
3. To change the Set value push the o or n arrows within 10s.
4. To memorise the new set point value push the SET key again or wait 10s.
4.4 TO ENTER THE PARAMETERS LIST “PR1
To enter the parameter list “Pr1” (user accessible parameters) operate as follows:
1. Push for 3s the SET + n keys (LED1 & 2 start blinking).
2. The controller will display the first parameter present in the Pr1 menu..
4.5 TO ENTER THE PARAMETERS LIST “PR2”
The “Pr2” parameter list contains the configuration parameters. A security code is required to enter it.
1. Enter the “Pr1” level, see above paragraph.
2. Select “Pr2” parameter and press the “SET” key.
3. The “PAS” flashing message is displayed, shortly followed by “0 - -” with a flashing zero.
4. Use o or n to input the security code in the flashing digit; confirm the figure by pressing “SET”.
The security code is “321”.
5. If the security code is correct the access to “Pr2” is enabled by pressing “SET” on the last digit.
Another possibility is the following:
After switching ON the instrument, within 30 seconds, push SET + n keys together for 3s: the Pr2 menu
will be entered.
4.6 HOW TO MOVE A PARAMETER FROM THE “PR2” MENU TO “PR1” AND
VICEVERSA.
Each parameter present in “Pr2” MENU can be removed or put into “Pr1”, user level, by pressing “SET +
n”. In “Pr2” when a parameter is present in “Pr1” the LED
is on.
4.7 HOW TO CHANGE A PARAMETER
To change a parameter value operates as follows:
1. Enter the Programming mode
2. Select the required parameter.
3. Press the “SET” key to display its value.
4. Use “UP” or “DOWN” to change its value.
5. Press “SET” to store the new value and move to the following parameter.
TO EXIT: Press SET + UP or wait 15s without pressing a key.
NOTE: the set value is stored even when the procedure is exited by waiting the time-out to expire.
4.8 HOW TO LOCK THE KEYBOARD
1. Keep pressed for more than 3 s the the o and n keys.
2. The “POF” message will be displayed and the keyboard will be locked. At this point it will be possible
only to see the set point or the MAX o Min temperature stored
3. If a key is pressed more than 3s the “POF” message will be displayed.
4.9 TO UNLOCK THE KEYBOARD
Keep pressed together for more than 3s the the o and n keys, till the “Pon” message will be
displayed.
4.10 ON/OFF FUNCTION
TO SWITCH THE INSTRUMENT ON/OFF: If the function is enabled (par. onF=yES), by pressing the
SET key for more than 4s the controller is switched OFF. To switch the instrument on again press the
SET key.
5. PROBES AND MEASURING RANGE
Probe Down Scale Full Scale
NTC -40°C/-40°F 110°C / 230 °F