Instruction Manual
D100423X012
V500 Valve
July 2017
14
Assembly of Retainer, Seat Ring, and Face Seals
WARNING
Seat ring installation requires that the valve plug (key 2) remain in the open position.
To avoid personal injury or damage to tools, valve parts, or other items resulting from plug closing, prevent plug travel by
using travel stops, manual actuators, constant supply pressure to a pneumatic actuator, or other steps as appropriate.
When installing the seat ring, keep hands, tools, and other objects out of the valve.
1. Apply enough supply pressure to the actuator to open the valve plug, or take other steps to hold the valve plug
open.
2. Clean the valve body, the retainer threads, the retainer gasket surface, and the seat ring sealing surface.
3. Using either face seals (key 8) in good condition or new face seals, place one seal in the seat ring cavity.
Table 8. Assembly Clearance
VALVE SIZE
SEAT RING AND RETAINER CLEARANCE
mm Inches
NPS Min Max Min Max
2 0.05 0.17 0.002 0.007
3, 4, 6, and 8 0.08 0.30 0.003 0.012
Note
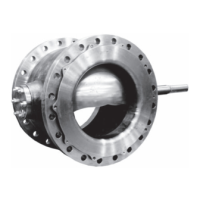
The seat ring (key 4) may have one or two shutoff surfaces. The shutoff surfaces are the narrow, rounded edges of the seat ring
bore. Inspect the seat ring and locate the shutoff surfaces before proceeding.
4. Insert the seat ring into the seat ring cavity with the correct shutoff surface facing the valve plug and shaft. The seat
ring will cover the face seal installed in step 3.
5. Place the second face seal on the seat ring.
6. Apply anti‐seize lubricant to the gasket surface in the valve body. Install the gasket (key 11), while making certain
that for NPS 2 through 8 sizes the concave surface of the gasket is up (hump surface of gasket down).
7. Apply anti‐seize lubricant to the threads and bottom of the retainer (key 5). Thread the retainer into the valve body.
8. Refer to figure 7. With the appropriate torque indicating tool, tighten the retainer to the torque listed in table 7.
9. A gap between the seat ring (key 4) and retainer (key 5) allows the seat ring to self‐center. Applying the proper
amount of torque during installation should position the retainer and seat ring properly. However, for NPS 2
through 8 valves, use a feeler gauge to measure between the parts as shown in figure 13, making certain the
necessary clearance exists. Compare the measured gap to the clearance in table 8 and proceed as follows:
D If the measured clearance is within table values, proceed to the next step.
D If the measured gap is larger than the maximum, tighten the retainer—apply more torque than that listed in table 7,
if necessary—until the clearance is within maximum and minimum values.
D If the measured clearance is smaller than the minimum, remove the retainer, seat ring, and face seals, clean the
parts, and reassemble so as to obtain the necessary clearance.
10. Perform the Adjusting Actuator Travel procedure and then install the control valve in the pipeline.

 Loading...