Instruction Manual
D100423X012
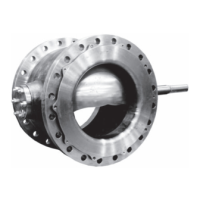
V500 Valve
July 2017
21
D Clean the valve shaft splines and actuator lever splines to be sure the actuator lever will slide on easily.
D Pull the valve shaft (key 3), by hand, toward the packing (key 13). Or,
D If the lever does not slide easily on the valve shaft, carefully wedge the valve plug solidly against the actuator‐side
thrust washer using a screwdriver or similar tool in the same direction as the pry bar shown in figure 6.
3. Clamp the lever to the valve shaft.
CAUTION
Do not apply full actuator signal (pressure or power) to the actuator in the next step. Full signal may wedge the valve plug
into the seat ring. Use a regulated signal source and gradually increase the signal to slowly stroke the actuator.
4. Adjust actuator travel and stroke the actuator so that the plug is close to but not contacting the seat ring at full
actuator travel. If available on electric actuators, use a manual handwheel to position the plug.
5. Adjust travel, using full actuator signal, until the valve plug contacts the seat ring around its full circumference. This
contact self‐centers the seat ring on the valve plug.
6. Continue to adjust travel until a gap of 0.001 inch exists between the seat ring and retainer, as shown in figure 13,
at full actuator travel.
7. Refer to the actuator instruction manual to lock the actuator travel adjustment.
Changing Valve Flow Direction
The V500 valve may be installed in either forward or reverse flow service. Forward flow enters the seat ring first, then
flows past the valve plug. If changing flow direction is necessary, release all pressure from the valve and actuator.
Remove the control valve assembly from the pipeline and rotate the assembly about the valve shaft to put the retainer
end of the valve where the other end was. Refer to the procedure for Changing Actuator Mounting Style if the actuator
must be repositioned, and refer to the Installation section to install the control valve assembly. Be sure to reposition
the flow direction arrow on the valve body.
Changing Actuator Mounting Style
Refer to figure 3 of this manual and the actuator instruction manual when changing mounting styles or positions.
Right‐hand mounting places the actuator on the right side of the valve as viewed from the upstream side of the valve;
left‐hand mounting places the actuator on the left side of the valve. Remember that the upstream side of the valve
inlet is the retainer end of the valve body for forward flow and the other end of the valve body is the upstream side for
reverse flow.
Complete the Adjusting Actuator Travel procedure whenever the actuator is removed.
Parts Ordering
A serial number is assigned to each valve and stamped on the nameplate. Always refer to the valve serial number when
corresponding with your Emerson sales office
or Local Business Partner. When ordering replacement parts, also specify
the part name and desired material.
WARNING
Use only genuine Fisher replacement parts. Components that are not supplied by Emerson Automation Solutions should
not, under any circumstances, be used in any Fisher valve, because they may void your warranty, might adversely affect the
performance of the valve, and could cause personal injury and property damage.

 Loading...