Instruction Manual
D100423X012
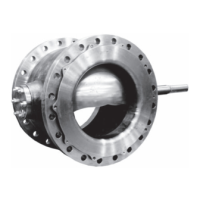
V500 Valve
July 2017
3
materials with process media rests solely with the purchaser and end‐user. Since some valve body/trim material
combinations are limited in their pressure drop and temperature ranges, do not apply any other conditions to the valve
without first contacting your Emerson sales office
or Local Business Partner.
Table 2. Shaft Diameter and Approximate Weights
VALVE SIZE,
NPS
SHAFT DIAMETER
APPROXIMATE WEIGHT
Flanged Flangeless
Through
Valve
At Spline End CL150 CL300 CL600 CL150 CL300 CL600
mm kg kg
1 12.7 12.7 5.4 5.9 5.9 3.6 3.6 3.6
1-1/2 15.9 15.9 8.6 9.5 10 5.4 5.4 5.4
2 15.9 15.9 9.5 11 13 8.2 8.2 8.2
3
25.4 25.4
19 24 26 16 16 16
25.4 19.1
4 31.8 31.8 36 42 50 34 34 34
6
38.1 38.1
54 69 93 50 50 - - -
38.1 31.8
8 38.1 38.1 79 98 135 57 68 - - -
Inches lbs lbs
1 1/2 1/2 12 13 13 8 8 8
1-1/2 5/8 5/8 19 21 23 12 12 12
2 5/8 5/8 21 25 28 18 18 18
3
1 1
42 52 57 35 35 35
1 3/4
4 1‐1/4 1‐1/4 79 93 111 75 75 75
6
1‐1/2 1‐1/2
120 152 204 110 110 - - -
1‐1/2 1‐1/4
8 1‐1/2 1‐1/2 75 217 298 125 150 - - -
Key numbers in this procedure are shown in figure 11 (NPS 1 and 1-1/2 valves) or figure 13 (NPS 2 through 8 valves)
unless otherwise indicated.
CAUTION
To prevent product damage during storage, keep the valve body cavity dry and clear of foreign material.
1. If the valve is to be stored before installation, protect the flange mating surfaces and keep the valve body cavity dry
and clear of foreign material.
2. Install a three‐valve bypass around the control valve assembly if continuous operation will be necessary during
inspection and maintenance of the valve.
3. A V500 valve is normally shipped as part of a control valve assembly, with a power or manual actuator mounted on
the valve. If the valve and actuator have been purchased separately or if the actuator has been removed from the
valve, mount the actuator according to the Actuator Mounting procedure. Also, adjust the actuator travel using the
Adjusting Actuator Travel procedure before installing the valve. The necessary measurements cannot be made with
the valve installed.
4. Before starting the actual installation of the valve, determine the proper installation orientation of the valve plug
(key 2) and actuator. Determine the flow direction of the process fluid through the valve. See figure 2.

 Loading...