Instruction Manual
D100423X012
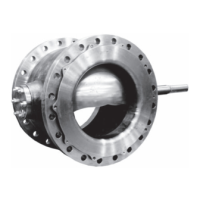
V500 Valve
July 2017
9
Removing the Packing
1. Isolate the control valve from the line pressure, release pressure from both sides of the valve, and drain the process
media from both sides of the valve. If using a power actuator, also shut off all pressure lines to the power actuator,
release all pressure from the actuator. Use lock‐out procedures to be sure that the above measures stay in effect
while you work on the equipment.
CAUTION
When the actuator is removed from the valve, do not use a hammer or similar tool to drive the lever or actuator off the
valve shaft. Driving the lever or actuator off the valve shaft could damage the valve plug, seal, and valve.
If necessary, use a wheel puller to remove the lever or actuator from the valve shaft. It is okay to tap the wheel puller screw
lightly to loosen the lever or actuator, but hitting the screw with excessive force could damage the valve plug, seal, and
valve.
2. If necessary, remove the cap screws (key 25) and hex nuts (key 26). Then remove the actuator while referring to the
actuator manual for assistance.
3. Remove the packing nuts (key 16) and packing follower (key 14).
4. Remove the old packing rings (key 13), packing box ring (key 17), and, if used, the lantern ring (key 18).
CAUTION
Do not scratch the valve shaft or packing box wall. Scratching these surfaces could cause leakage.
5. Clean all accessible metal parts and surfaces to remove particles that would prevent the packing from sealing.
6. If necessary, complete the steps in the Replacing the Valve Plug, Shaft, and Bearings section, and return to the
Installing Packing steps below.
Installing Packing
1. Install the new packing rings and packing box ring by stacking the parts as shown in figure 5. Make sure split rings
are arranged so that the splits do not line up to form a leak path. Then slide the stack into the packing box as far as
will go while being careful to avoid trapping air among the rings.
2. Install the studs, packing follower, and nuts.
CAUTION
To prevent possible product damage or leakage, make sure the valve plug remains in the closed position when installing
new packing parts.
3. Make sure the valve plug is in the closed position when installing new packing parts.
4. Insert a screw driver, pry bar, or similar tool between the lower ear of the plug and the valve body (see figure 6). Use
the pry to move the plug tightly against the thrust washer and bearing on the actuator side of the valve. Keep the
valve plug in that position until you have completed the packing installation.
5. Tighten packing flange nuts enough to stop leakage under normal conditions.
6. Mount the actuator while referring to the actuator mounting procedures of the actuator instruction manual. You
must complete the Adjusting Actuator Travel procedure in this manual before installing the valve in the pipeline,
due to the measurements that must be made during the actuator adjustment process.

 Loading...