5
PREPARATION
INSTALLATION PROCESS STARTS HERE
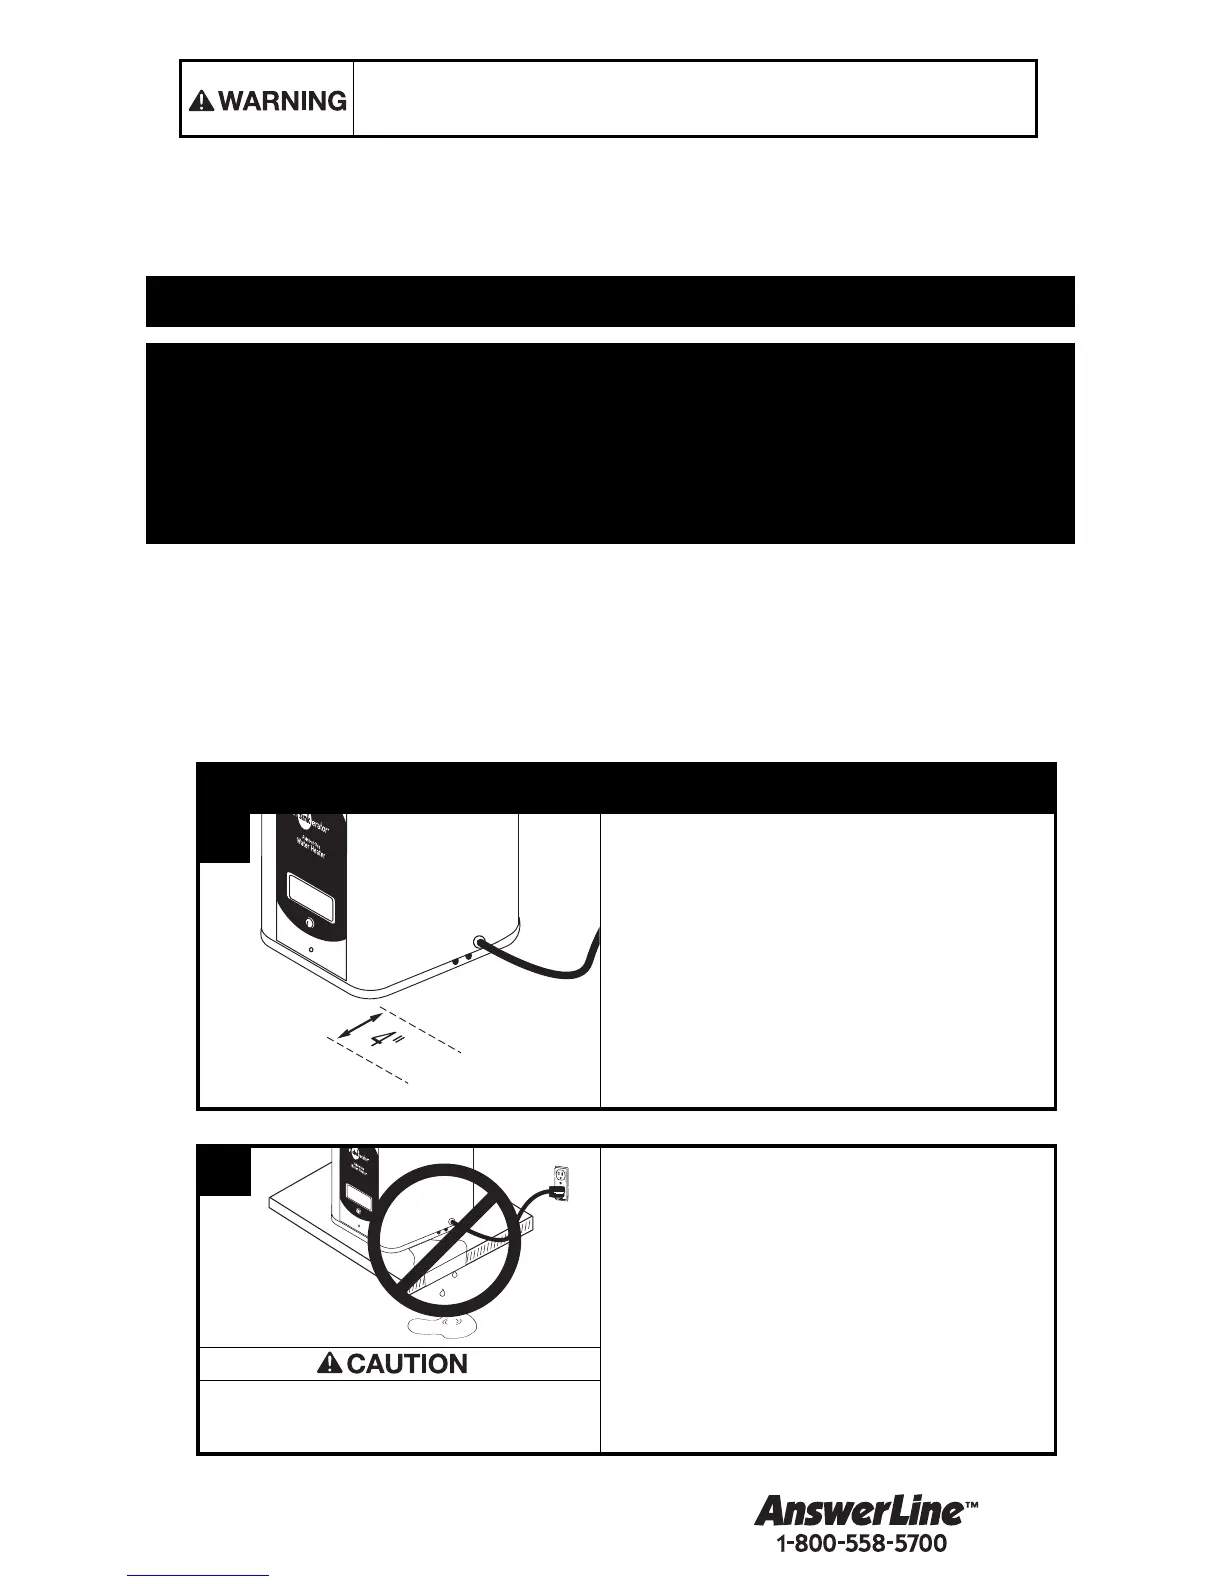
■■ Ensure power switch located at the
front-top of tank is in off position.
■■ Identify location for water heater tank.
■■ Check to make sure there is proper
clearance in front of heater to allow
for draining the tank and for access
to replaceable parts such as the
thermostat, heater and relief valve.
■■ Locate heater in an area where
leakage of the tank or connections
will not result in damage to the
area adjacent or to lower floors of
the structure.
■■ When such locations cannot be
avoided, a suitable drain pan piped
to an adequate drain should be
installed under the heater (available
from your distributor).
1
A
B
Property Damage: If the heater becomes immersed in
water, the heater should be examined by a competent
service person before it is placed back in operation.
Equipment You May Need:
Equipment Required:
■ Adjustable wrench
■ Level
■ Pencil
■ Tape Measure
■ Phillips and flat blade screwdrivers
■ T & P valve
(Pre-installed on some models)
■■ Support blocks
■■ Drain pan
■■ Teflon tape
WHAT YOU NEED TO GET STARTED
Personal Injury: Failure to follow these instructions can result in serious
personal injury or death.
The installation must conform to these instructions, the local code authority having jurisdiction
and the requirements of power company. In the absence of code requirements follow NFPA-70,
The National Electrical Code, which may be ordered from: American Standards Institute, 1430
Broadway, New York, NY 10018.
Minimum
Clearance
4"
 Loading...