This document is a comprehensive manual for TESCOM pressure regulators and valves, covering safety, installation, operation, and service procedures. It emphasizes the importance of understanding the product thoroughly before selection, installation, use, or maintenance to ensure a safe and successful operating environment.
Function Description
TESCOM products covered in this manual include diaphragm-sensed and piston-sensed pressure reducing regulators, back pressure regulators, and TESCOM 30 Series, VA, VG, and VT Series valves.
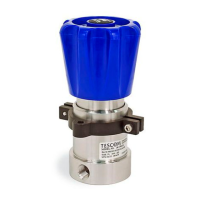
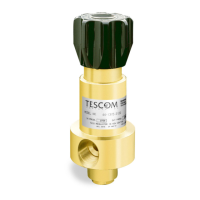
Pressure Reducing Regulators (Diaphragm-Sensed and Piston-Sensed): These regulators are engineered for applications requiring dependable pressure regulation. They are particularly suitable for installations where high system pressures (up to 6000 psi for diaphragm-sensed, up to 20,000 psi for piston-sensed) need to be reduced to levels appropriate for actuating low-pressure instruments and related equipment.
Back Pressure Regulators (Diaphragm-Sensed and Piston-Sensed): These regulators are designed for applications where the system or process requires the pressure to be limited to a maximum pressure (up to 500 psig for diaphragm-sensed, up to 20,000 psi for piston-sensed).
TESCOM 30 Series Valves: These are shut-off manual control valves specifically engineered for applications requiring dependable controls, especially where high system pressures (up to 10,000 psi) are used.
TESCOM VA, VG, and VT Series Valves: These valves are designed for applications requiring dependable controls, particularly in installations with high system pressures (up to 10,000 psig).
Usage Features
General Operation:
TESCOM regulators and valves are designed to operate with any liquid or gaseous media compatible with their wetted materials. For optimal performance and to prevent contamination or icing, an auxiliary upstream filter is recommended for all but the cleanest media, and gaseous media should be free of excessive moisture.
Pressure Activation Methods (Regulators):
- Control Knob: Delivery or back pressure is increased by turning the control knob clockwise. The knob applies a load through a spring to the diaphragm or piston.
- Dome Load: Delivery or back pressure is increased by applying pressurized gas or liquid to the dome of the regulator at a pressure equal to the desired outlet or back pressure. This dome pressure is typically supplied by a pilot regulator.
- Combination Spring and Dome: Delivery or back pressure is increased by applying both a spring force and pressurized gas or liquid.
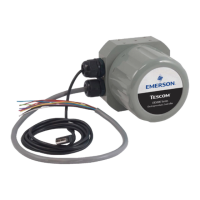
- Air Actuated (Multiplier) (Piston-Sensed Regulators): Delivery pressure is controlled by applying 0-100 psig pilot pressure to an air actuator, enabling full outlet pressure range control.
Control Knob Adjustment (Regulators):
- Pressure Reducing Regulators: Controlled outlet pressure settings are achieved by adjusting the control knob. Rotating the knob clockwise raises the outlet pressure. Counterclockwise rotation, coupled with venting the downstream side, lowers the outlet pressure. Final adjustments should always be made in the direction of increasing pressure for the most accurate set point.
- Back Pressure Regulators: Controlled back pressure settings are obtained by adjusting the control knob. Rotating the knob clockwise raises the back pressure, while counterclockwise rotation lowers it. Final adjustments should be made in the direction of increasing pressure to achieve the most accurate back pressure set pressure.
Valve Actuation (TESCOM 30 Series):
- These are hand knob, manual control valves. The valve is closed by turning the hand knob clockwise and opened by turning it counterclockwise, which changes the position of the valve stem relative to the seat.
Valve Actuation (TESCOM VA, VG, and VT Series):
- These valves are opened or closed by applying low air pressure to the actuation port.
- Normally closed (spring closed) VA and VG valves require a minimum of 60 psi applied to the actuation port to open.
- Normally open (spring open) VA and VG valves require a minimum of 60 psi applied to the actuation port to close.
- VT valves require a minimum of 80 psi for actuation pressure.
Safety Precautions:
- Always read and fully understand the manual before selecting, installing, using, or maintaining the product.
- Ensure all operators are trained.
- Never connect products to a supply source exceeding their maximum rated pressure.
- Verify the designed pressure rating of all system equipment.
- Clearly establish fluid flow direction before installation.
- Remove pressure from the system before tightening fittings or components.
- Do not modify equipment or add unapproved attachments.
- Apply pressure gradually to avoid sudden surges or pressure shock.
- Regulators are not shut-off devices; install a pressure relief device downstream.
- Shut off supply pressure when the regulator is not in use.
- For positive seal/tied diaphragm regulators, vent downstream pressure before reducing outlet pressure to prevent damage.
- Never use incompatible materials with the fluids.
- Vent fluids to a safe, well-ventilated area, following all local and federal requirements.
- Avoid locating equipment controlling flammable fluids near ignition sources.
- Ensure adequate ventilation to prevent suffocation from gases.
- Never use oil or grease on regulators/valves unless specifically recommended for oxygen service.
- Use upstream filters with all fluids.
- Prevent icing by removing excess moisture from gas.
- Use proper thread lubricants and sealants on tapered pipe threads.
- Do not open packaging until ready for installation in a clean environment.
- Ensure components and materials are compatible with the fluid and have the proper pressure rating.
- Inspect for physical damage or contamination before connection.
Maintenance Features
General Maintenance:
- Periodic inspection and scheduled maintenance are required for continued safe operation, with frequency determined by the user based on the application.
- If a regulator or valve leaks or malfunctions, take it out of service immediately.
- Do not attempt repairs without instructions or if you do not understand them. Qualified personnel should perform repairs.
- Equipment needing service should be returned to the supplier for evaluation and prompt service. Factory repairs restore products to original performance specifications.
Disassembly Procedures (Regulators and Valves):
- Maintenance operations are easier with the product removed from the line, but can be performed in-line if the supply is shut off and pressures vented.
- Assembly Drawings and Bills of Material are essential for maintenance and repair and can be obtained from TESCOM.
- Common Steps:
- Clamp the body in a vise.
- Turn the control knob (or spring adjustment mechanism) counterclockwise to remove all spring force.
- For dome-loaded regulators, vent all pressurized gas or liquid from the dome before disassembly.
- Remove the upper portion (bonnet and/or dome), and any associated parts like spring buttons, load spring back-up plates, diaphragms, or piston sensors.
- For two-stage regulators (e.g., TESCOM Model Series 44-3400, 64-3400, PS3400, BB-5), it is recommended to return them to the factory for repair.
- Remove valve parts by turning the seat retainer and/or back cap counterclockwise.
- For main valve assembly disassembly, clamp the valve in a smoothed jaw vise or hold with pliers on the flats.
- For TESCOM 30 Series valves, remove the hand knob to expose the flats on the stem retainer. The 30-1100 series seat is accessed from the bottom.
- For VA, VG, and VT series valves, remove the upper bonnet (actuation side) and, for VT valves, the lower bonnet. Special repair tools are available for valve modules.
Reassembly Procedures (Regulators and Valves):
- Reassembly is performed in the reverse order of disassembly, following specific precautions and referring to the Bill of Material and Assembly Drawing for correct replacement parts and torque specifications.
- Common Steps:
- Inspect all parts and replace worn or damaged components with TESCOM replacement parts.
- Clean all parts in the flow stream to the required cleanliness level to ensure freedom from particles that could prevent proper seating of the main valve.
- Apply a thin, uniform coating of fluorocarbon grease to specific threaded parts, O-rings, and spring button indentations. Crucially, do NOT apply grease to threaded internal parts of regulators with metal-to-metal diaphragm seals (specific series listed) or to inlet/outlet connections.
- Install valve seats with the chamfered side towards the main valve or valve stem.
- Standard Regulators with Control Knob: Join the body and bonnet by holding the bonnet assembly open end up, dropping required items (including the diaphragm or piston sensor) into place, centering the diaphragm/piston, inverting the body assembly, and screwing it into the bonnet hand-tight. Then, place in a vise and re-torque to specifications.
- Dome/Combination Spring and Dome Loaded Regulators: Reassemble by holding the regulator firmly in a vise and reinstalling the dome.
- Self-Venting Regulators: If adjustment is needed after installation:
- Remove the hole plug in the control knob.
- Apply 10-15 psi (for diaphragm-sensed) or 100-150 psi (for piston-sensed) on the downstream side using the control knob.
- Turn the CW vent adjusting screw (under the hole plug) until media escapes.
- Turn the screw counter-clockwise until media flow stops, plus 1/2 turn.
- Replace the hole plug.
- Wire Mesh Inlet Filter: Reinstall by inserting it into the primary inlet port and expanding it to fit correctly, using a metal tool and light tapping.
- Post-Reassembly Testing: After reassembly, the product MUST be connected to a pressure source with compatible media and pressurized to check for internal and external leakage and operating characteristics.
Proper Component Selection:
- Consider the total system design when selecting components.
- The user is responsible for ensuring all safety and warning requirements of the application are met through their own analysis and testing.
- TESCOM may suggest materials for specific media upon request.