12
TESCOM™ Safety, Installation, Operations & Service Manual
Content
December 2020
Installation Manual
TR000238ENUS-01_12-20
Operation (Control Knob Adjustment)
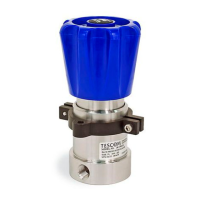
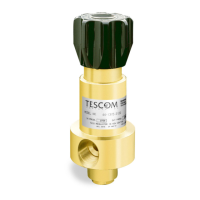
Controlled outlet pressure settings are obtained using TESCOM pressure reducing
regulators by adjusting the control knob. Rotating the knob clockwise raises the outlet
pressure while a counterclockwise rotation, coupled with venting of the downstream side
of the regulator plumbing, lowers the outlet pressure. Final adjustments should be made
in the direction of increasing pressure to obtain the most accurate set point.
TESCOM regulators will operate with any liquid or gaseous media compatible with the
wettedmaterials.Someseries/modicationscomewithaninternallterthatonlyare
designed to stop random contamination resulting from the installation of the regulator.
Anauxiliaryupstreamlterisrecommendedforuseinallbutthecleanestmedia.Gaseous
mediashouldbefreeofexcessivemoisturetopreventicingoftheregulatorathighow
rates.
WARNING
A regulator is not intended to be used as a shutoff device. When the regulator is not in use,
the inlet supply should be turned off. As a safety precaution, a pressure relief device should
be installed downstream of the regulator.
Maintenance
The following procedures are provided to enable the customer to perform all normal
maintenance and repair operations. These operations are more easily performed with the
regulator removed from the line. However, in some cases repair may be accomplished
without removal of the regulator body as long as the supply has been shut off and the
inlet and outlet pressures have been vented.
An Assembly Drawing and Bill of Material for the regulator will be needed to complete
maintenance procedures. The Assembly Drawing and Bill of Material are separate from
this manual and available by contacting TESCOM (see last page for TESCOM contact
information).
The following steps outline the disassembly of pressure reducing regulators for
maintenance and repair:
1. Clamptheregulatorinavisebytheatsonthebottomand/orsideoftheregulator
body.
2. Turn control knob and/or spring adjustment mechanism counterclockwise to insure
removal of all spring force on the piston.
NOTE: (Dome loaded regulators): All pressurized gas or liquid must be vented from
dome before disassembly.
3. Remove upper portion of regulator (bonnet and/or dome). Some models require the
handknoband/ormountingbrackettoberemovedrst.
NOTE: Upper portion of regulator may also include spring button, load spring back-up
plate, and piston sensor, etc. Review correct drawing to ensure that all parts have been
disassembled.
NOTE: Two-stage regulators have portions on both ends of the regulator body that
must be removed. It is TESCOM’s recommendation that two-stage regulators be
returned to the factory for repair.
3.2.3
3.2.4