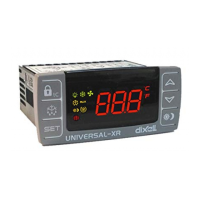
1592023140 XM678D GB r2.8 01.09.2017.docx XM678D 5/15
Use
or
arrows to
select an
entry,
then
press
to see the
value or
to go on
with other
value.
HM Access to clock menu or reset of the RTC alarm;
An Value of analog output;
SH Value of superheat. nA = not Available;
oPP Percentage of valve opening.
dP1 (Pb1) Value read by probe 1.
dP2 (Pb2) Value read by probe 2.
dP3 (Pb3) Value read by probe 3.
dp4 (Pb4) Value read by probe 4.
dP5 (Pb5) Temperature read by probe 5 or value obtained from
pressure transducer.
dP6 (Pb6) Value read by probe 6.
dPP Pressure value read by (Pb5) transducer.
rPP Virtual pressure probe, only on slave.
L°t Minimum room temperature;
H°t Maximum room temperature;
dPr Virtual probe for room temperature regulation [rPA and rPb];
dPd Virtual probe for defrost management [dPA];
dPF Virtual probe for fan management [FPA];
rSE Real thermoregulation set point: the value includes the sum of
SET, HES and/or the dynamic set point if the functions are
enabled.
Exit
Pressed together or wait the timeout of about 60 sec
11. MENU FOR MULTIMASTER FUNCTION: SEC
The function “section” SEC is enabled when icon is lit. It allows entering in the
remote programming mode, from a keyboard not physically connected to the board,
through the LAN functionality.
Action
Button or
display
Notes
Enter menu
Press UP arrow for about 3 sec, the icon
will be ON.
Waiting for
action
SEC
The menu to change the section will be
entered. SEC label will be displayed.
Enter section
list
to confirm. The following list will
be available to select the proper network
function.
Select proper
function
Or
LOC
ALL
SE1
SEn
SE8
To gain access only to the local device.
To gain access to all the devices connected
to the LAN.
To gain access to the device with 1st Adr (*)
…
To gain access to the device with 8th Adr (*)
Confirm
Select and confirm an entry by pressing
seconds.
(*) The devices on the LAN are indexed by using the Adr parameter (in ascending
order).
EXAMPLES:
1. To modify the same parameter values in all the devices connected to the LAN:
enter multimaster menu. Select and confirm ALL. Exit from multimaster menu.
Enter the programming menu and change the required parameter values.
The new values will be changed on all devices connected to the LAN.
2. To modify a parameter value in the device with [Adr = 35]: find the relevant
indexed section (the one linked to [Adr = 35]). Enter multimaster menu. Select
and confirm this section from the multimaster menu. Exit from multimaster menu.
Enter the programming menu and change the required parameter value.
3. If the alarm nod is present: enter the multimaster menu. Select and confirm the
LOC section. Exit from multimaster menu.
AT THE END OF THE PROGRAMMING PROCEDURE, SELECT THE
SECTION “LOC”. IN THIS WAY THE ICON WILL BE SWITCHED OFF!!
11.1 SYNCHRONIZED DEFROST
The synchronized defrost allow to manage multiple defrost from different boards
connected through the LAN connection. In this way, the boards can perform
simultaneous defrosts with the possibility to end them in a synchronized way.
The Adr parameter cannot be duplicated because in this case the defrost cannot
be correctly managed.
BEGIN
Press for 3 seconds, the rtC or other will be
showed. The measurement unit blinks.
Find Adr
Press more than once the DOWN arrow to find the
Adr parameter, the press SET.
Modify
Adr
or
Set the value of Adr parameter, then press SET to
confirm the parameter.
EXIT
Press the two keys together to exit from menu or
wait for about 10 seconds.
The LSn and LAn parameter are only to show the actual settings (read only). Se the
following example of configuration:
DAILY DEFROST FROM RTC: [EdF = rtC]
IdF Parameter: for safety reason force the value of Idf at +1 respect to the interval
between two Ld parameters. The IdF timer is reinitialized after defrost and at every
power-on.
DEFROST START: at the time selected by the parameters Ld1 to Ld6 or Sd1 to Sd6.
DEFROST END: if the probes reach the dtE temperature or for maximum MdF time.
SAFETY and RtC or RtF ALARM: with clock alarm the device will use the parameter
IdF, dtE and MdF.
WARNING: don’t set [EdF = rtC] and [CPb = n].
MULTIMASTER DEFROST: all the probes with clock
Table for example
rtC (clock) rtC (clock) rtC (clock)
9 hours safety 9 hours safety 9 hours safety
45 min safety 45 min safety 45 min safety
12°C safety 12°C safety 12°C safety
06:00 1° 06:00 1° 06:00 1°
14:00 2° 14:00 2° 14:00 2°
22:00 3° 22:00 3° 22:00 3°
12. COMMISSIONING
12.1 CLOCK SETTING AND RTC ALARM RESET
If the clock is present: [EdF = rtC] enable the defrost from rtc [Ld1 to Ld6].
BEGIN
UP arrow (press once) to access the fast access
menu
Display
HM identify the clock RTC submenu; press
Display
HUr = hour press to confirm/modify
Min = minutes press to confirm/modify
…… don’t use others parameters if present.
EXIT
Press for about 10 sec. The operation resets the RTC
alarm.
Note: the rtC clock menu is present also on the second level of parameters.
Warning: if the board shows the rtF alarm, the device has to be changed.
12.2 ELECTRONIC VALVE SETTINGS
Some parameters have to be checked:
[1] Superheat temperature probe: Ntc, Ptc, Pt1000 with parameter P6C. The sensor
has to be fixed at the end of the evaporator.
[2] Pressure transducer: [4 to 20mA] or ratiometric P5C = 420 or 5Vr with parameter
P5C.
[3] Range of measurement: check the parameter of conversion PA4 and P20 that are
related to the transducer.
TRANSDUCER: [-0.5/7Bar] or [0.5/8Bar abs] the correct setup is relative pressure with
PA4 = -0.5 and P20 = 7.0. The [0.5/12Bar abs] the correct setup is relative pressure
with PA4 = -0.5 and P20 = 11.00.
Example of virtual pressure with unique [4 to 20mA] or [0 to 5V] transducer:
Param.
without transducer
Adr
n n + 1 n + 2
LPP
LPP = n LPP = Y LPP = n
P5C
LAN or not connect
the probe
P5C= 420 or 0-5V
LAN or not connect
the probe
PA4
Not used -0.5 bar Not used
P20
Not used 7.0 bar Not used
[4] From EEV submenu: select the correct kind of gas with FTY parameter.
[5] Use the following parameters to setup the right valve driving, according to the valve
datasheet from the manufacturer.

 Loading...

