6
• atmospheric disturbances, thunderstorms, electrical appliances with no interference elimination,
television sets and computers located near the DCF receiver.
If the weather station cannot detect the DCF signal, time and date must be set manually.
Note: If the weather station detects DCF signal but the current time on the display is incorrect (e.g.
shifted ±1 hour), you must always set the correct time zone for the country where you are using the station,
see Manual Setting of Time and Date. The current time will be shown with the appropriate time zone dierence.
Note: It may take up to 30 minutes since the insertion of batteries into the units before the station begins
showing all the correct measured data and loads DCF signal.
Manual Setting of Time and Date
1. While in time display mode, press the "MODE" button for 3 seconds.
2. Use the " " or "" buttons to set the following parameters and conrm with "MODE" in the fo-
llowing order: year – month – day – time zone (-12 to +12) – time format 12/24 h – calendar language
(EN – English, GE – German, SP – Spanish, IT – Italian, FR – French, DU – Dutch, DA – Danish) – unit
of pressure (inhg or hpa) – hour – minute.
Alarm Settings
The weather station allows you to set 2 separate alarm times.
Repeatedly press the MODE button and select alarm time no. 1 (A1) or alarm time no. 2 (A2).
To activate the alarm, press "" or "". The icon will appear (active). Another press of the "" or ""
button deactivates the alarm; the icon will disappear (inactive).
Then, long-press the MODE button to set your alarm of choice; the time setting will start ashing.
Set the alarm time using the "" or "" buttons; to switch selection, press the MODE button again.
Based on the settings, the display will show an icon of the corresponding alarm.
The alarm will then activate at the set time. The alarm rings for 2 minutes unless a button is pressed.
If you wish to deactivate the alarm, repeatedly press the MODE button to select the alarm of choice and
press "" or ""to deactivate it. The alarm icon will disappear from the screen.
Snooze Function
Alarm ringing can be postponed by 5 minutes by pressing the SNOOZE/LIGHT button located on the
top of the weather station.
Press the button when the alarm starts ringing. The alarm icon will be ashing.
To cancel SNOOZE mode, press any other button – the icon will stop ashing and will remain on the screen.
The alarm will be re-activated the next day.
If you do not press any button while the alarm is ringing, the ringing will stop automatically after
2 minutes.
Indoor and Outdoor Temperature, °C/°F Temperature Unit Setting
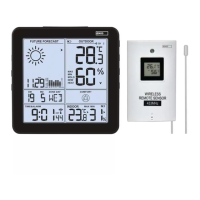
Indoor temperature is displayed in eld 22.
Outdoor temperature is displayed in eld 15.
Repeatedly press the "" button to switch between °C/°F units.
Displaying Maximum and Minimum Temperature/Humidity Readings
Repeatedly pressing the "" button will gradually display the maximum (MAX icon) and minimum (MIN
icon) temperature/humidity readings.
If you hold the "" button for more than 3 seconds, the memory of MAX/MIN readings will be erased.
Setting Outdoor Temperature Alert
• Long-press the "" button until ON/OFF in eld no. 15 begins ashing; then, use the "" and "”
buttons to select ON or OFF
• Press the "MODE" button and then use the "" and "” buttons to set the desired temperature for
the upper temperature limit ( icon)