7
• Press the "MODE" button and then use the "" and "” buttons to set the desired temperature for
the lower temperature limit (
icon)
• If the temperature limit is exceeded, an alarm will sound (beeping) and the temperature value
will begin ashing
• Press any button to silence the beeping
• The lower temperature limit must be at least 1 °C lower than the upper temperature limit
Weather Forecast
The station forecasts weather on the basis of changes in atmospheric pressure for the next 12–24 hours
for an area within the range of 15–20 km.
The accuracy of weather forecast is approximately 70 %. As the weather forecast may not be 100 %
accurate, neither the manufacturer nor the seller can be held responsible for any loss caused by an
incorrect forecast. When you rst set or reset the weather station, it takes approximately 12 hours before
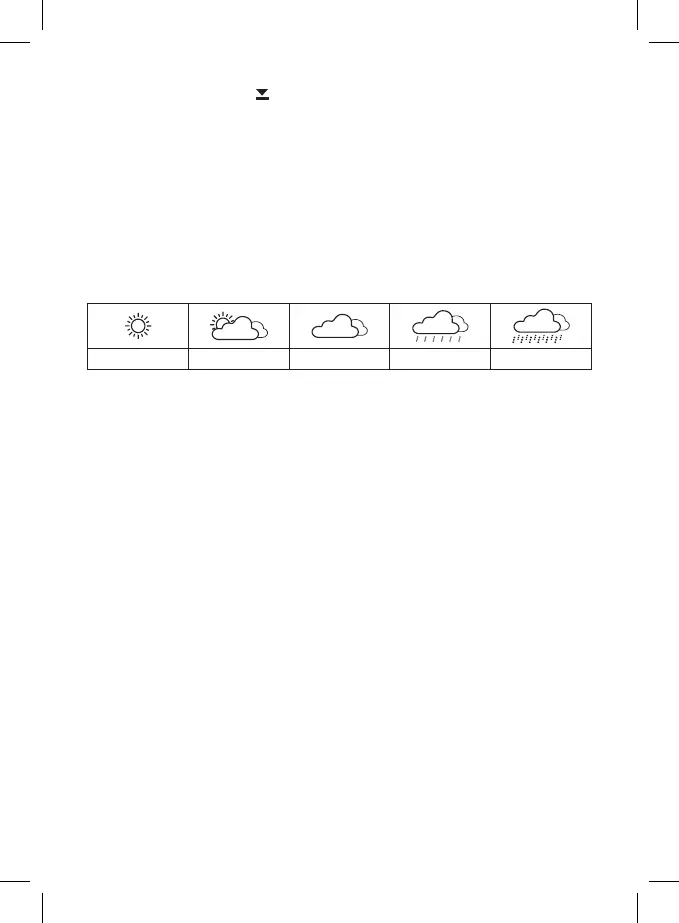
the weather station begins forecasting correctly. The weather station shows 5 weather forecast icons.
Note: Currently displayed icon means a forecast for the next 12 – 24 hours. It may not reect the current
state of the weather.
Sunny Cloudy Overcast Rain Heavy rain
Atmospheric Pressure/History
The station shows the current atmospheric pressure value in hPa/inHg and keeps a history of pressure
readings for the last 12 hours in eld no. 21 (repeated pressing of the HISTORY button). The chart of
pressure history is animated. Moving the weather station to another place will aect the measured values.
Measurement will stabilise within 12 hours of battery insertion or station relocation.
• To set the altitude, hold the "HISTORY" button for 3 seconds. The altitude value on the screen will
start ashing
• Use the "", " " (C and D) buttons to input the altitude of your location and conrm by pressing
the History (E) button.
• The weather forecast icon will start ashing; use the "", "" (C and D) buttons to select the
current weather.
Screen Illumination
Press the SNOOZE/LIGHT push-button to activate screen illumination. When the station is only running
on batteries, the screen will illuminate for 10 seconds.
When powered via the adapter:
The screen will be illuminated permanently.
Press SNOOZE/LIGHT again to activate/deactivate screen illumination.
Setting Screen Illumination Mode
• Hold the "SNOOZE/LIGHT” button for 2 seconds to select the illumination mode (a/b/c icon in
eld no. 1 ashes)
• Press the "" button repeatedly to select illumination mode a/b/c.
Mode A
• you can manually choose the colour of screen illumination. Repeatedly pressing the "SNOOZE/LIGHT”
button switches between individual colours: red – green – blue – yellow – purple – light blue – white.
• Press "MODE" to conrm your selection.
Mode B
• shows colour based on the Weather Forecast function: yellow (sunny)- red (cloudy) – green (over-
cast)– blue (rain) – purple (heavy rain). Press "MODE" to conrm your selection.