5
4. Depending on the conditions, in reinforced concrete structures (cellars, high-rise buildings etc.) the DCF signal reception
is weaker. In extreme cases, place the weather station close to a window toward the transmitter.
The reception of the DCF77 radio signal is aected by the following factors:
• thick walls and insulation, basements and cellars
• inadequate local geographical conditions (these are dicult to assess in advance)
• atmospheric disturbances, thunderstorms, electrical appliances with no interference elimination, television sets and
computers located near the DCF receiver.
Permanent Activation/Deactivation of DCF Signal Reception
Long press the RCC button for ca 8 seconds.
ON will ash on the screen – DCF signal reception is permanently active and will be updated daily.
If you wish to deactivate DCF signal reception, again long press the RCC button for ca 8 seconds; OFF will ash on the
screen – DCF signal reception is permanently deactivated.
Do not forget to manually set time data in this mode.
Setting time manually, time format
1. Press and hold the TIME button.
2. Use the UP/DOWN buttons to set the following parameters: 12/24 time format – hour – minutes – seconds – time
shift – DST DST (AUTO – on, OFF – o).
Press TIME to move between the items.
Holding the UP/DOWN buttons adjusts values faster.
If no button is pressed within 1 minute, the unit will revert to the basic display.
If the weather station displays incorrect data or does not respond to button pressing, use a thin tool (e.g. a pencil) to press
the RESET button at the back of the weather station. This will erase all data; you will need to readjust the weather station.
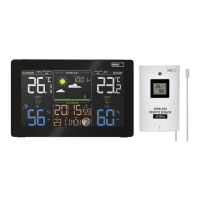
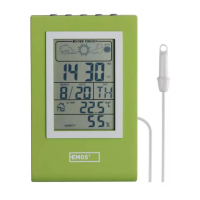
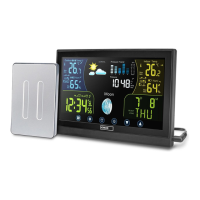
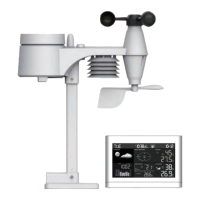
Indoor and outdoor temperature/humidity, °C/°F temperature unit
Indoor temperature/humidity is displayed at the IN icon.
Outdoor temperature/humidity is displayed at the OUT icon.
Use the C/°F button to select the unit of temperature.
Display of the maximum and minimum temperature/humidity reading
Press repeatedly MAX/MIN to display the readings measured.
To clear the memory, press and hold MAX/MIN.
History of temperature and humidity readings
Weather station allows you to view the history of temperature and humidity measurements up to 72 hours ago.
Press the HISTORY button repeatedly to display past readings of temperature and humidity.
Each time you press HISTORY, you will be moved back by one hour.
Sequential display of the connected sensor readings
If you have connected several sensors, press and hold the CHANNEL button.
Weather station will sequentially display (interval of 4 seconds) the readings from all connected sensors.
Press CHANNEL to cancel the sequential display mode.
Press CHANNEL button shortly and repeatedly to display sequentially data from all connected sensors.
Setting an alarm
In the clock mode press and hold the ALARM button.
Use the UP/DOWN buttons to set the required time of alarm.
Move between values using the alarm button.
Activate/deactivate an alarm by repeated brief pressing of the ALARM button.
The alarm icon will be displayed.