4
3. Place the two units next to each other. The weather station detects the remote sensor signal within 3 minutes, the
icon is ashing. If the sensor signal is not detected, or if the outdoor temperature reading on the weather station
display vanishes, press the SENSOR button to repeat the search.
4. We recommend placing the sensor on the north side of the house. The range of the sensor may decrease substantially
inareas with large number of obstacles.
5. The sensor is resistant to dripping water, however, it should not be exposed to rain permanently.
6. Do not place the sensor on metal objects; doing so will reduce the transmission range.
7. If the sensor battery low icon is displayed on the weather station , replace batteries in the sensor.
Replacing sensor batteries
Remove the low batteries and insert new batteries.
Before inserting new batteries, change the sensor number, if necessary, by the slide switch 1/2/3.
If you have already inserted the new batteries, press the RESET with a suitable tool, e.g. a pencil tip.
Switching Over to Another Channel and Connecting Additional Sensors
1. Repeatedly press the CHANNEL button at the back of the weather station to choose required channel of the sensor – 1,
2, or 3. Then press the SENSOR button, the
icon will start ashing.
2. Remove the cover from the battery compartment and insert batteries (2× 1.5 V AA).
3. Use the channel switch to set the required channel number – 1, 2, 3 and then insert batteries in the sensor. Replace
the battery cover. Data from the sensor will be loaded within 3 minutes.
4. If the sensor signal is not detected, remove the batteries and reinsert them.
Note: if you want to connect more sensors, a dierent number for communication with the weather station must be set on each
sensor.
Radio controlled clock (DCF77)
After registering with the wireless sensor, the weather station will automatically start searching for the DCF77 signal for
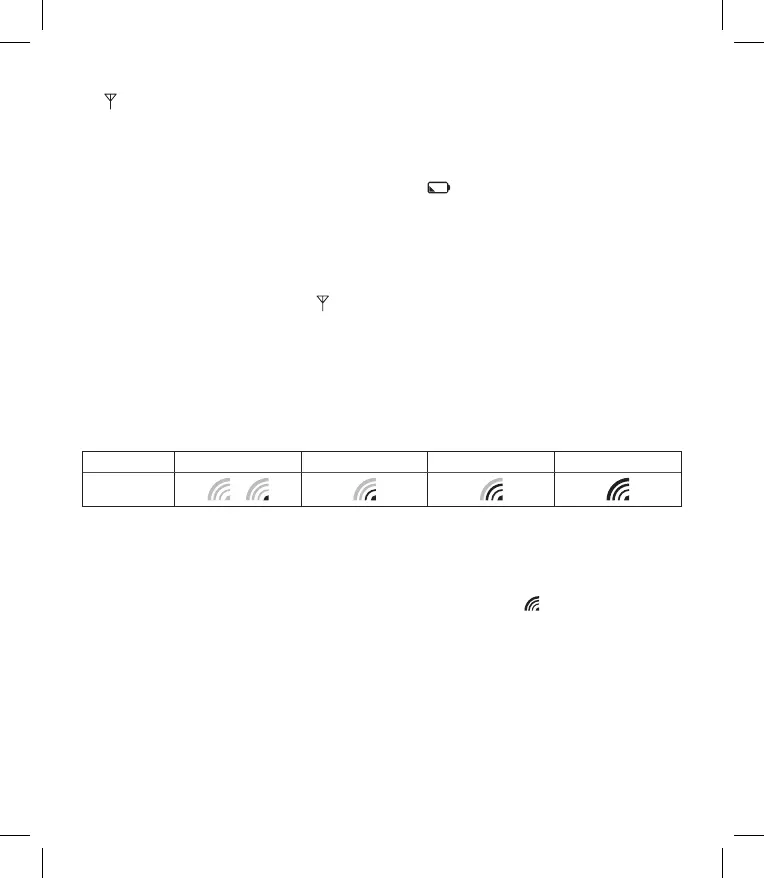
5minutes; the following icon will ash depending on the DCF signal intensity.
no signal weak signal medium signal good signal
DCF signal
reception icon
/
Note:
When searching for DCF signal, the colour of the screen will always temporarily change to green regardless of the colour you
have currently set.
After the DCF search is complete, the colour of the screen will once again change to your set colour.
During the search, no other data on the display will be updated and the buttons will be disabled.
Signal detected – the icon stops ashing and displays the current time with the DCF icon
.
Signal not detected – DCF icon is not displayed.
Press the RCC button shortly to repeat search for the DCF77 signal for 9 minutes, press again the RCC button to stop
search for the DCF77 signal. The DCF77 signal will be synchronised daily at the following times: 2:00, 8:00, 14:00, 20:00. In
standard conditions (at safe distance from sources of interference, such as TV sets, computer monitors), the reception of
time signal takes several minutes.
If the weather station does not detect the signal, follow these steps:
1. Move the weather station to another location and try to detect the DCF signal again.
2. Check the distance of the clock from the sources of interference (computer monitors or television sets). It should be
at least 1.5 to 2 m during the reception of the signal.
3. When receiving DCF signal, do not put the weather station in the proximity of metal doors, window frames and other
metal structures or objects (washing machines, dryers, refrigerators etc.).